Page 4 of 5
Re: Assembling the raiding force
Posted: Sun Jun 23, 2013 6:29 pm
by Heartsbane
Thank you!
Oh, and Rowena, I hope you don't mind if I steal your idea of using mandrakes as wood elves? They look great, though mine are going to be way watchers...
Re: Assembling the raiding force
Posted: Sun Jun 23, 2013 7:43 pm
by Rowena
Heartsbane wrote:Thank you!
Oh, and Rowena, I hope you don't mind if I steal your idea of using mandrakes as wood elves? They look great, though mine are going to be way watchers...
Of course, they say inspiration is the greatest compliment.

I look forward to seeing your version, will you post them here?
Re: Assembling the raiding force
Posted: Sun Jun 23, 2013 11:04 pm
by Heartsbane
Sure, why not?

Re: Assembling the raiding force
Posted: Mon Jun 24, 2013 6:35 am
by Jvh792
SEA DRAGON SOOOO COOOOOL
Re: Assembling the raiding force
Posted: Thu Jul 04, 2013 11:44 am
by Setomidor
Lovely, lovely army, well done! Really like the Shade unit, that's simply excellent. Might consider stealing that idea
Where are the pennants on the Knights from?
Re: Assembling the raiding force
Posted: Thu Jul 11, 2013 2:21 pm
by Heartsbane
Thankyou Jvh792 and Setomidor for your kind words. Others admiring my painting is a wonderful spur to paint more!
The penants on the knights are from the wood elf glade rider sprue. I had plenty spare after making all those dark riders!
Re: Assembling the raiding force
Posted: Thu Jul 11, 2013 2:29 pm
by cultofkhaine
Can't believe I have not seen this thread yet! Amazing.
I love the harpies - I wish I had done mine like that now - great colour scheme and conversion.
And the shades diorama is wicked!!!!
How about an army wide shot for us to look at them all together.
Re: Assembling the raiding force
Posted: Thu Jul 11, 2013 7:48 pm
by Manit0u
Such awesome work brings tears to my eyes. I have so far to go still...
Re: Assembling the raiding force
Posted: Thu Oct 17, 2013 11:10 am
by stuaker
Love the harpies. I was planning on converting some of my own eventually. Seeing yours has made me really want to up my game! I'd like to do something as dynamic and creepy in the way it combines several natural creatures like yours. The monkey feet are especially great. I'll have to spend a lot of time thinking of how I could represent them
Re: Assembling the raiding force
Posted: Fri Oct 18, 2013 7:05 am
by Jvh792
Use that underwater one as a Kharibdyss!!!!!
Re: Assembling the raiding force
Posted: Fri Oct 18, 2013 9:14 am
by treeapple
This is a really awesome army. Well done! Great conversions and I especially like your bases!
Re: Assembling the raiding force
Posted: Sun Nov 17, 2013 11:16 pm
by Karond
Superb work, are you contemplating any of the new models? Would love to see your conversions of those.. I
Re: Assembling the raiding force
Posted: Mon Nov 18, 2013 10:54 am
by Heartsbane

Such kind words, my humble thanks.
@ Manit0u: keep pushing yourself. I've been painting for about 20 years now, which helps, but much of that time was spent without really stretching my painting skills; it's only when I've had periods where I've tried to do new things that I've got better, and those new things rarely work first time.
@ Cult of Khaine: glad you like it! buying a garden of Morr just for the gateway for the shades was a bit of an induldence, (and my most expensive movement tray ever by a long margin) but I'm really happy with how it turned out
@jvh792: she was originally meant to be used as a hydra, but yes, the K-beast is a better fit for the model (handy as I want to try it out whereas the new hydra doesn't make me want to put it in my list).
@ stuaker: go for it, and I'd be interested in seeing pics when they're done!
@Karond: I'm thinking of getting my hands on some warlocks (if you look closely there are a couple of nods towards Slaneesh, most obviously the BSB's standard top, so they fit thematically), and I fancy painting up a scourgerunner too, so maybe they'll be some of the new kits eventually...
Re: Assembling the raiding force
Posted: Mon Nov 18, 2013 12:49 pm
by Artfactial
I am loving this. The unit filler is incredibly dynamic and your beasts are nicely magically scary.
I am especially intrigued by your way of painting the Harpy/Dragon wings. First of the blue/black/tan scheme is wonderful. but what I have always learned is to do the leathery fold-lines on wings horizontally from the 'fingers', why do the vertical lines work so well on these models? I'd love to recreate it for my Manticore.(and later on my future dragons and pegassi*dreams*)
Re: Assembling the raiding force
Posted: Mon Nov 18, 2013 1:39 pm
by Heartsbane
If memory serves, the highlighting on the dragon was largely done with stormvermin fur and skavenblight dinge. As to why I did it that way, it was partly personal preference and partly time.
Doing straight lines with the fingers to guide is simply faster for me than sequential arches spanning from one finger to the next. For highlighting, just do a lighter colour for the ones towards the centre of each membrane on the top and the ones nearer the fingers on the bottom.
Secondly, the normal way of doing it might be most accurate (as a quick google image serch for "bat wings" confirms), but to my mind it always makes the wings look a bit saggy. Whilst that's fine for a terrorgheist, I wanted my dragon's wings to look like they were pumping mightily and holding up most of the beast's weight. After I'd used it on the dragon and liked how it turned out, I copied it across to the harpies.
Re: Assembling the raiding force
Posted: Mon Nov 18, 2013 3:32 pm
by Artfactial
Thanks a bunch!:)
I've got stormvermin fur mixed in allot of my De scheme, so that'll work nicely.
It indeed seems like a faster way. if it turns out to be looking better, its all the more preferable.
I'll give it a shot and try to layer in some veins.
Thanks again!
Re: Assembling the raiding force
Posted: Tue Dec 17, 2013 8:00 pm
by Datalink7
I love this Army, particularly the Sea Dragon. I might steal that deep water idea for my Kraken when I put it together. How did you do the water effect? I know there are a bunch of different kinds of Water Effects to buy, but I'm not sure what the differences are. Also, how did you get it so deep? I've seen tutorials for really shallow (just put some tape around the edge of the base and fill it up), but for something that deep I'm not sure. Did you cut out a cereal box and make a box around the base or something?
Anyway, looks amazing
Re: Assembling the raiding force
Posted: Wed Dec 18, 2013 10:19 am
by Heartsbane
Hey Datalink7, glad you like it
And give the water a try for your kraken, it's fun to try things that are a bit different.
In terms of applying the water, here are a few tips:
* Get two part resin based water effects, which may also be marketed as clear casting resin (As an example,
http://www.ebay.co.uk/itm/CASTING-RESIN-KIT-1KG-WATER-CLEAR-IDEAL-FOR-MODEL-MAKING-SCENERY-CRAFTS-/151018298646?pt=UK_Antiques_Woodenware_RL&hash=item2329645d16#ht_2961wt_758, though I've never bought from that supplier so am not specifically recomending them). Acrylic stuff is easy to spot as it only comes in one pot rather than two, and is only good for small puddles. This is because acrylics require air to dry so aren't suitable for casting large volumes from, and also because as acrylic cures it looses water, leading to it shrinking.
* Make a box, as you surmised, but I used plasticard held together with a hot glue gun, as you've about 800g of resin to hold in place so you want it to be secure! Test it with water before you apply the resin, to be sure it doesn't leak, then let it dry thoroughly before adding resin.
* Make the bottom of the box in such a way that the model stands flat. Otherwise you'll end up with sloped water.
* Add mould release of some sort to the inside of the box! I can't stress this enough, the resin will bond quite firmly to the box without it. I didn't do this, and had to take a hammer and chisel to liberate my sea dragon from the casting box, risking destroying everything!
Re: Assembling the raiding force
Posted: Wed Dec 18, 2013 3:20 pm
by Datalink7
Heartsbane wrote:Hey Datalink7, glad you like it
And give the water a try for your kraken, it's fun to try things that are a bit different.
In terms of applying the water, here are a few tips:
* Get two part resin based water effects, which may also be marketed as clear casting resin (As an example,
http://www.ebay.co.uk/itm/CASTING-RESIN-KIT-1KG-WATER-CLEAR-IDEAL-FOR-MODEL-MAKING-SCENERY-CRAFTS-/151018298646?pt=UK_Antiques_Woodenware_RL&hash=item2329645d16#ht_2961wt_758, though I've never bought from that supplier so am not specifically recomending them). Acrylic stuff is easy to spot as it only comes in one pot rather than two, and is only good for small puddles. This is because acrylics require air to dry so aren't suitable for casting large volumes from, and also because as acrylic cures it looses water, leading to it shrinking.
* Make a box, as you surmised, but I used plasticard held together with a hot glue gun, as you've about 800g of resin to hold in place so you want it to be secure! Test it with water before you apply the resin, to be sure it doesn't leak, then let it dry thoroughly before adding resin.
* Make the bottom of the box in such a way that the model stands flat. Otherwise you'll end up with sloped water.
* Add mould release of some sort to the inside of the box! I can't stress this enough, the resin will bond quite firmly to the box without it. I didn't do this, and had to take a hammer and chisel to liberate my sea dragon from the casting box, risking destroying everything!
Really appreciate the tutorial. I have two of these:
http://armorcast.com/store/popup_image.php?pID=664Inbound right now to use as my Kharibdyss/Kraken, and I want to try at least one with the deep water effect that you've done. Obviously going to look different than yours with the different model but I think it will still look cool.
Re: Assembling the raiding force
Posted: Thu Dec 19, 2013 9:27 am
by Heartsbane
Hope it helps, and if you've any other questions about how to do it feel free to ask, either in this thread or by pm.
Those kraken look great, pics when you're done please! Only thought looking at them is that I don't think it'd be possible to have part of the model poking out of the side of the water (which would look really odd anyway), so to fit those tentacles in I'd be minded to angle it backwards, so the tentacles are rising up out of the water. Mmmm, tentacles.
Re: Assembling the raiding force
Posted: Thu Dec 19, 2013 9:40 am
by Datalink7
Heartsbane wrote:Hope it helps, and if you've any other questions about how to do it feel free to ask, either in this thread or by pm.
Those kraken look great, pics when you're done please! Only thought looking at them is that I don't think it'd be possible to have part of the model poking out of the side of the water (which would look really odd anyway), so to fit those tentacles in I'd be minded to angle it backwards, so the tentacles are rising up out of the water. Mmmm, tentacles.
Ok sounds good.
I am a bit worried about the tentacles. Here is one that someone painted:
http://www.cultofkhaine.com/2013/01/release-kraken.htmlThey do spread out a bit to the side. I'm going to have to see if I can bend them in. Otherwise I'm going to have to have it mostly out of the water. If that's the case, I'm going to have to mold a bunch of waves off the side of it to simulate it "bursting" forth. Any idea how to do those?
Re: Assembling the raiding force
Posted: Sun Mar 16, 2014 12:41 am
by kunimitsu
Hey, loving the sea dragon. What parts are used in it? I am guessing the trygon tail and back with greenstuffed over the nid vents? Black dragon head, no idea where the arms are from. Looks really good, I'm having trouble building my k beast and this might help for me to finish it off. Either that or I give up on him and just don't field them lol.
Re: Assembling the raiding force
Posted: Mon Mar 17, 2014 1:48 pm
by Heartsbane
Hey Kunimitsu, glad you like her!
Spot on with the tyranid beastie for the body and tail, and yes, the vents were trimmed off and greenstuffed over to hide the scar. Also a bit of greenstuff was needed to replace a section of tail as I needed to curve it round more sharply in order to prevent it overhanging the edge of a chariot base (and that *really* wouldn't have worked with the water...)
Other parts were the black dragon head, and the tip of the tail is also from the black dragon kit. The legs are from the same tyranid kit, though the feet are created from greenstuff with small claws from the kit added to make, erm, claws. Sculpting these was really easy, it was pretty much just rolling out 4 saussages of greenstuff, blend them together a little near the ankle, and make a ridge to represent knuckles. Once cured, trim to length and glue on the claws and the job was a good 'un.
The riders have saddles from cold one knights (left over after making chariots), and otherwise are mostly from the dark eldar wyches sprue made by using two raised legs (greenstuffed crotch to make them fit). The trident came from the wood elf glade riders with the spear tip replaced with spiked from the old dark elf spearmen kit.
Good luck with your k-beast, I hope this helps and please do post picks once you've got him finished.
Re: Assembling the raiding force
Posted: Mon Mar 31, 2014 12:37 pm
by Heartsbane
Re: Assembling the raiding force
Posted: Mon Mar 31, 2014 12:48 pm
by Heartsbane
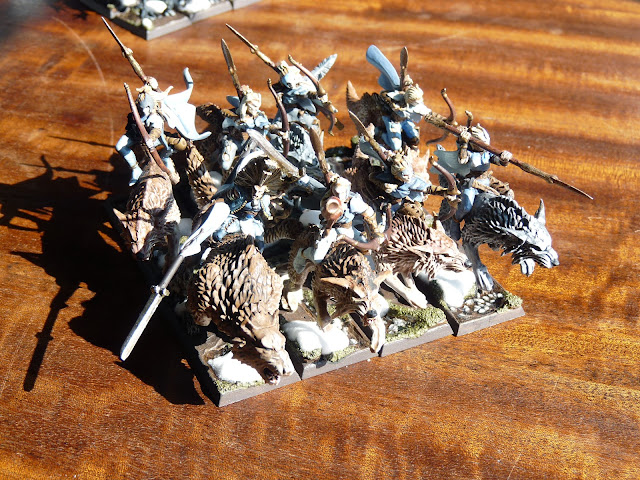
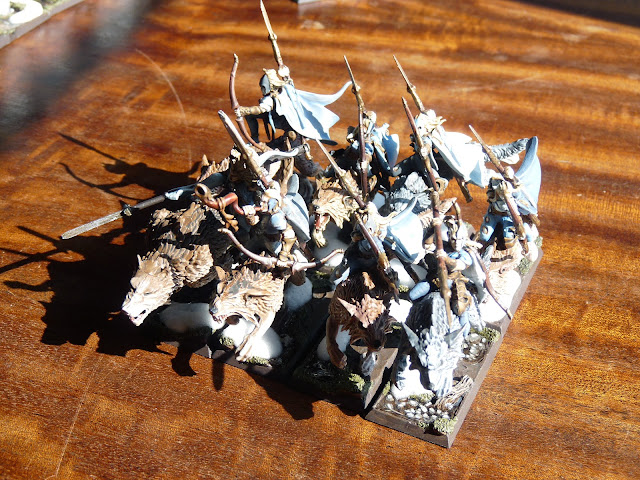
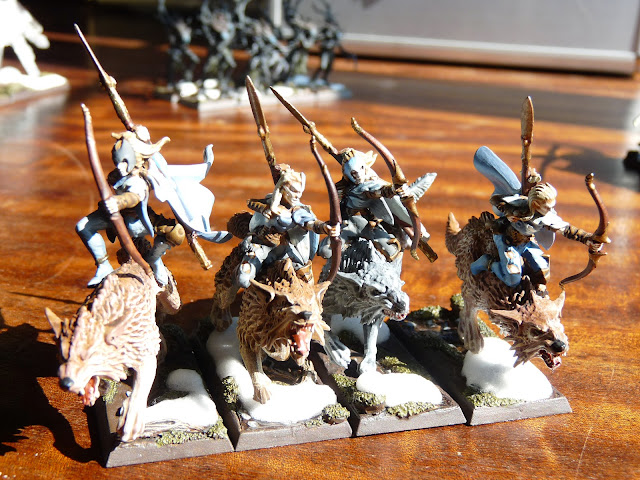
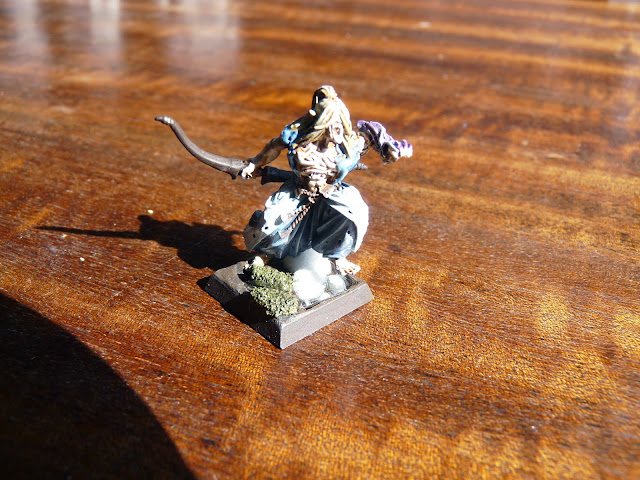
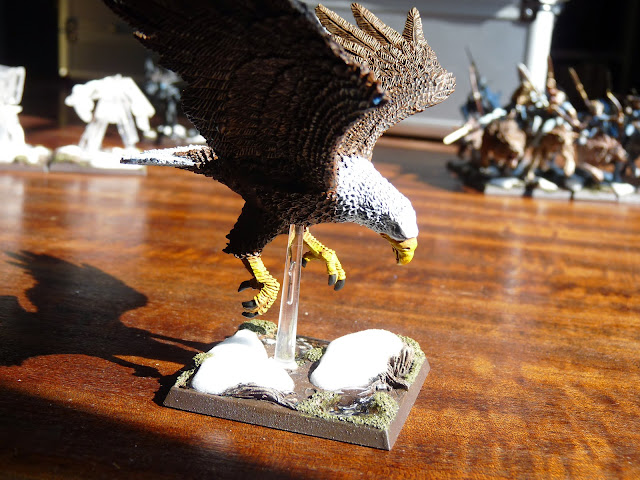
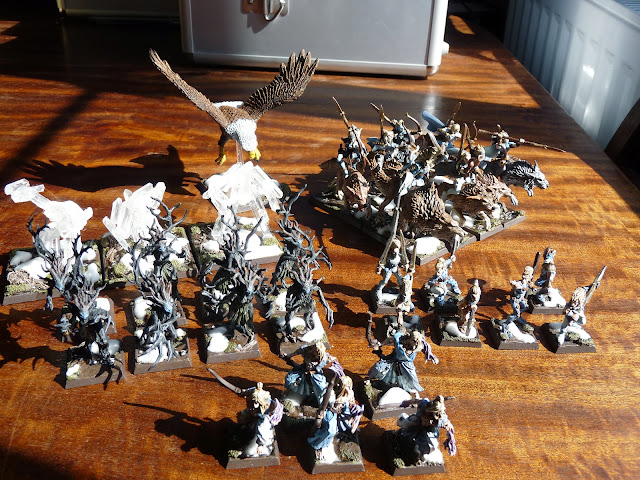
Not painted to the same standard as my druchii, but I did most of the waywatchers and wardancers, and the eagle, noble, drayads and elementals in a single day. It was a long day, with more sugar and caffeine than was healthy, but they don't look too bad considering...
Nice bases (from base x of war) and starting from a brown spray with a black ink wash certainly helped with painting that quickly!