How To Paint A Hydra Dreadboi Style!

Discover the age-old techniques of painting...

Moderators: Layne, xFallenx, cultofkhaine

Forum rules
Remember that picture file size should be no larger than 256KB.
For the full Painting and Modelling rules, visit [url]http://www.druchii.net/phpBB3/viewtopic.php?f=9&t=27440[/url]
Post Reply
dreadboi
Slave (off the Altar)
Posts: 16
Joined: Thu Oct 03, 2013 7:03 pm

How To Paint A Hydra Dreadboi Style!

Post by dreadboi »

How To Paint A Hydra Dreadboi Style!

Welcome to my first Dark Elf tutorial. This model was painted about 70% with my airbrush. Apologies for those who haven’t got an airbrush, but to me, this model deserves it!

PRIMING

Firstly, as with every miniature I do, I primed it black, and used Grey Airbrush Primer (Vallejo) shooting it at a 45 degree angle to create the mid tones.
Then I switched to a White Airbrush Primer and shot it from the top to pick out the highest details!
This technique is often called zenithal highlighting. It basically captures the low, mid and high tones of the model, which in my opinion, makes the final model much more dynamic.

BASECOAT

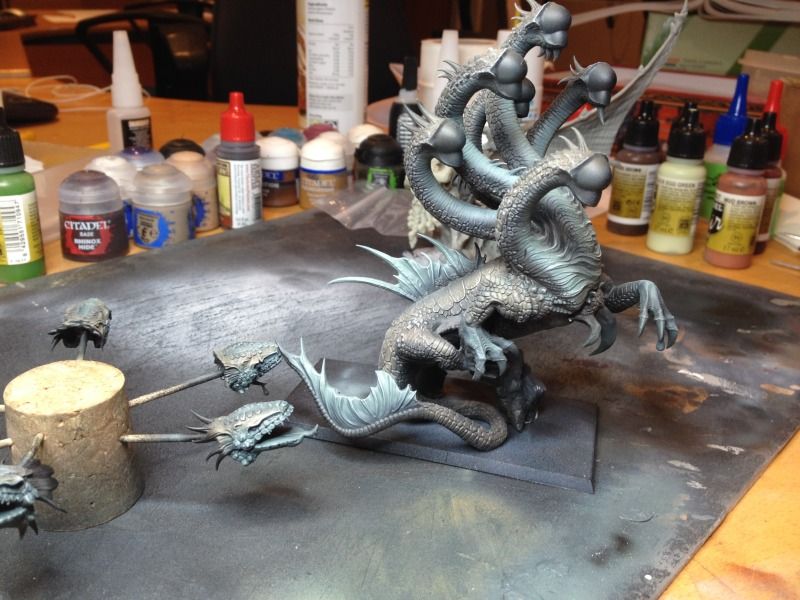
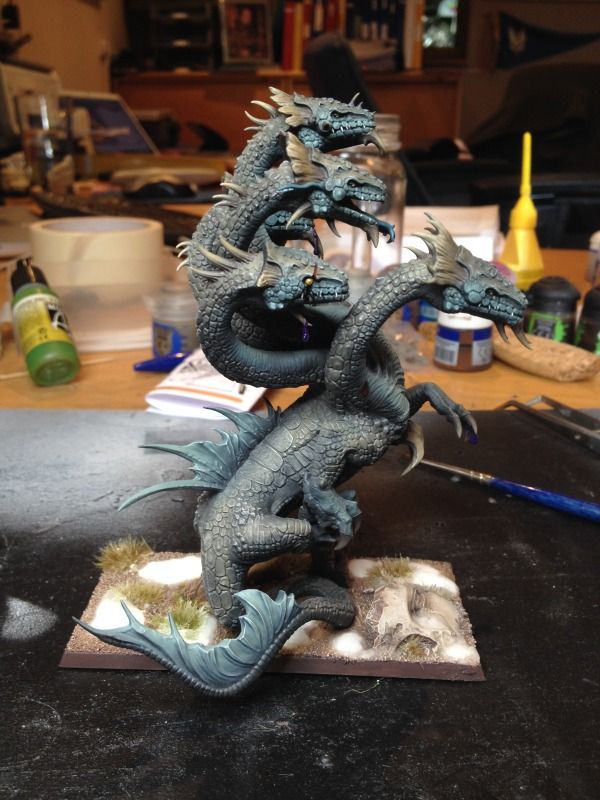
For this model, I decided to make it into a cave dwelling creature who lives mostly in the water. Think the Loch Ness monster and we aren’t too far off!
This being so, I knew I wanted it to have browny scales with a bluey/green belly.
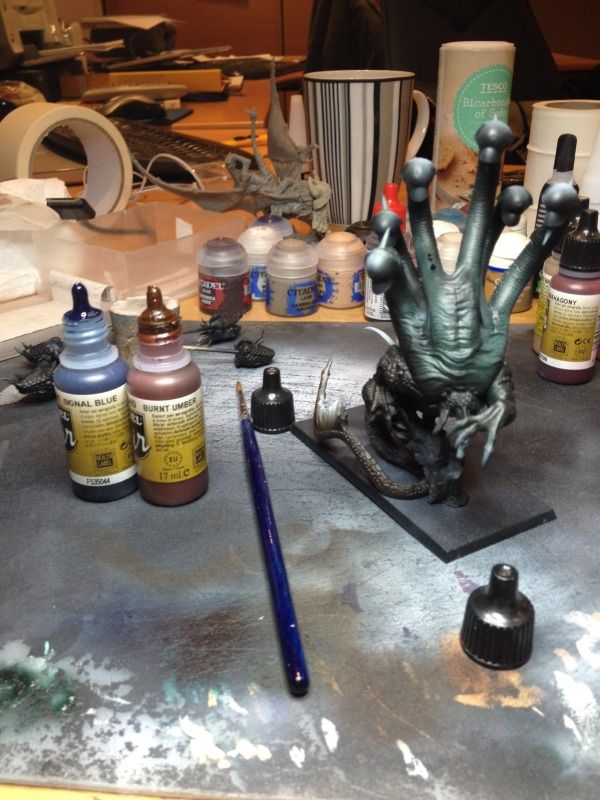
I chose my two main colours : VMA Burnt Umber and VMA Signal Blue.
I loaded my brush with a 50/50 mix of both and gave the model a complete basecoat with it…this meant that the underlying colour was the same.

Image

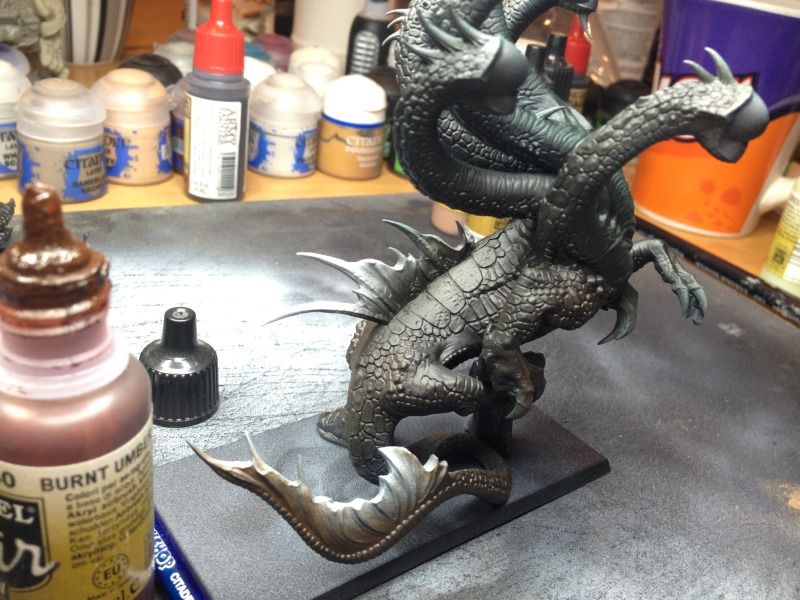
For the scales I added more brown and hit the back of the model and everywhere I thought looked scaly!

Image

The belly was done by starting with the 50/50 basecoat mix and adding more blue. It was a case of winging it, so I apologise that I cannot be more precise!
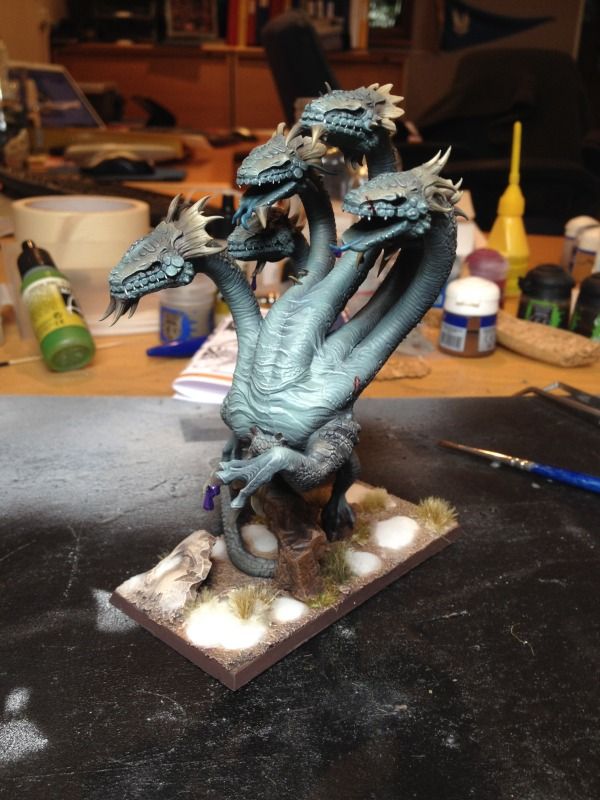

FIRST HIGHLIGHT


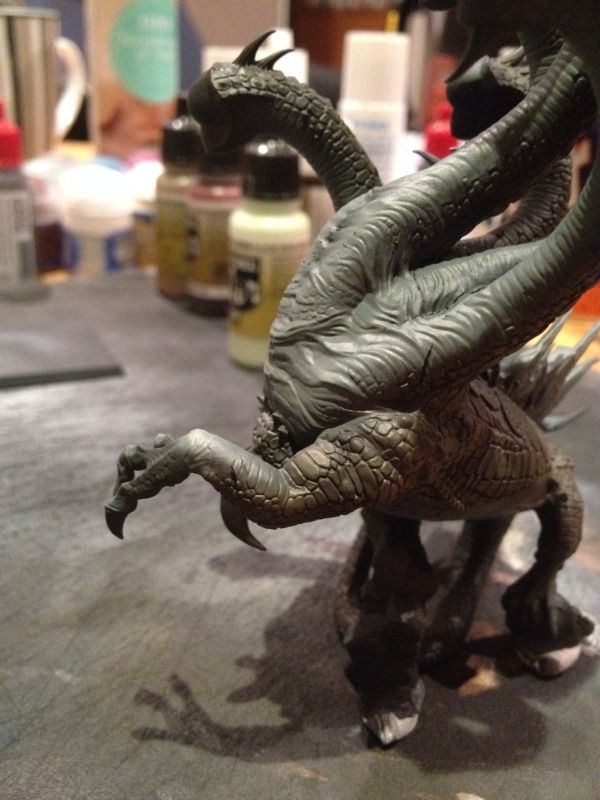
I used VMA Sand to add the lighter highlights. It was as simple as taking each of the original base colours (the 50/50 mix) and adding more sand and brown for the scales. This was used on all of the prominent parts that would be lighter; for example, on the highpoint of the muscle.

Image

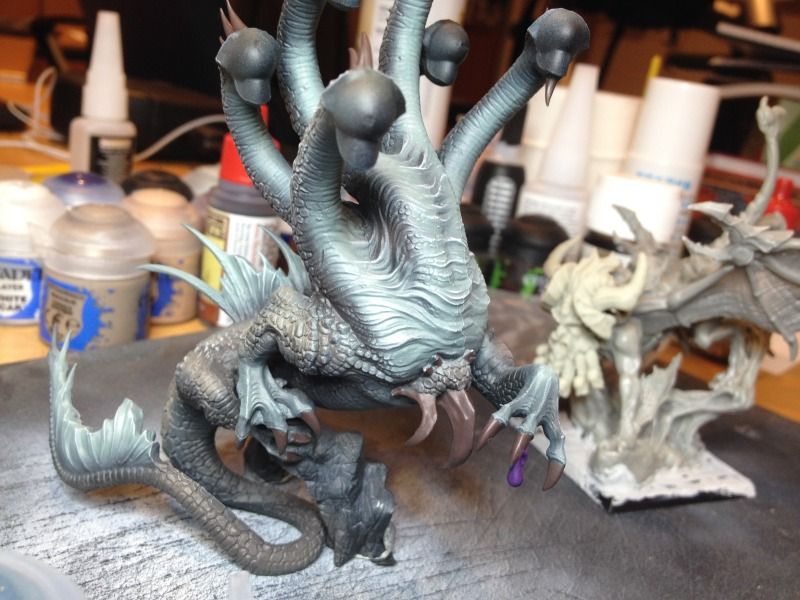
I used the 50/50 mix and added progressively more blue and sand paint and started to build the grey/green colour on the chest and hands/feet. I concentrated this on the raised parts of the neck as I wanted the eye to follow each neck up to the heads!

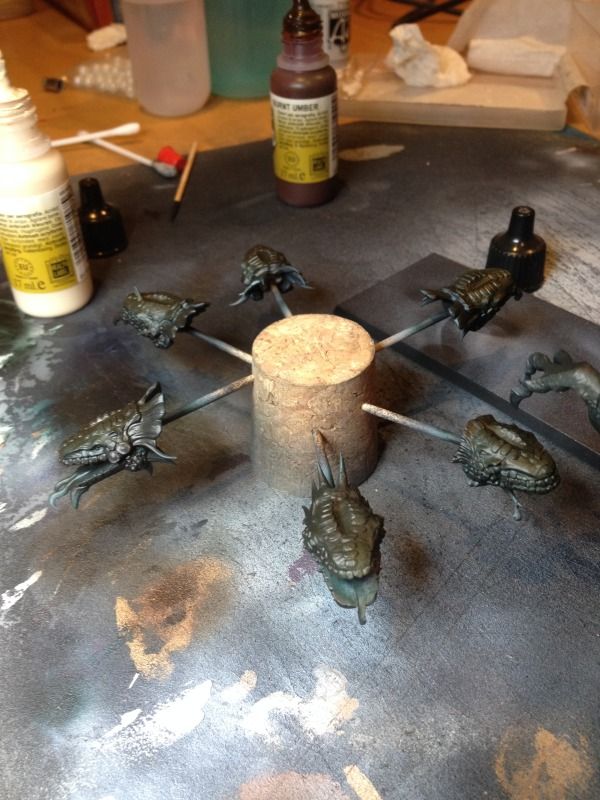
It’s worth noting at this point, that I didn’t glue the heads on as I wanted to paint these separate. Most of them are obscured by the necks so I felt this was an important point!


SECOND HIGHLIGHT

Essentially just add more sand paint to the respective brown or blue mixes. There is no mystery here, just a simple mix of the three paints!
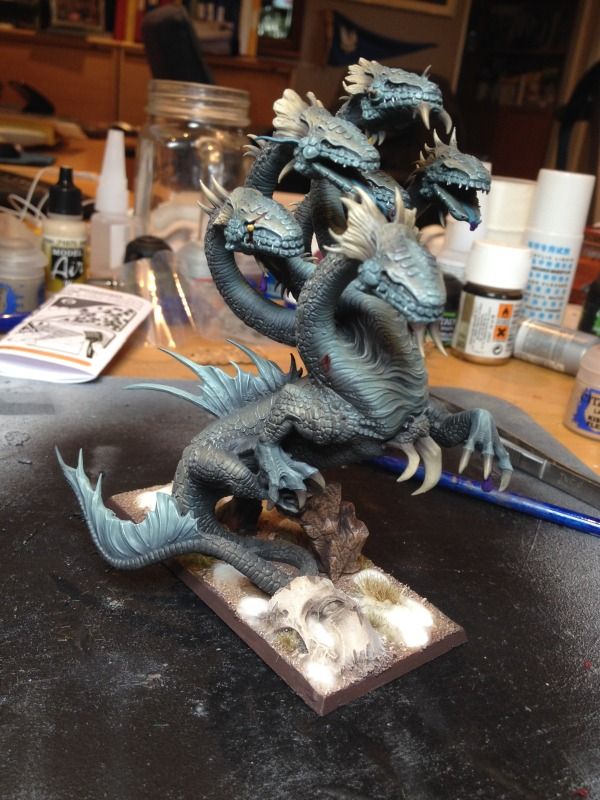
Image

FINAL HIGHLIGHT

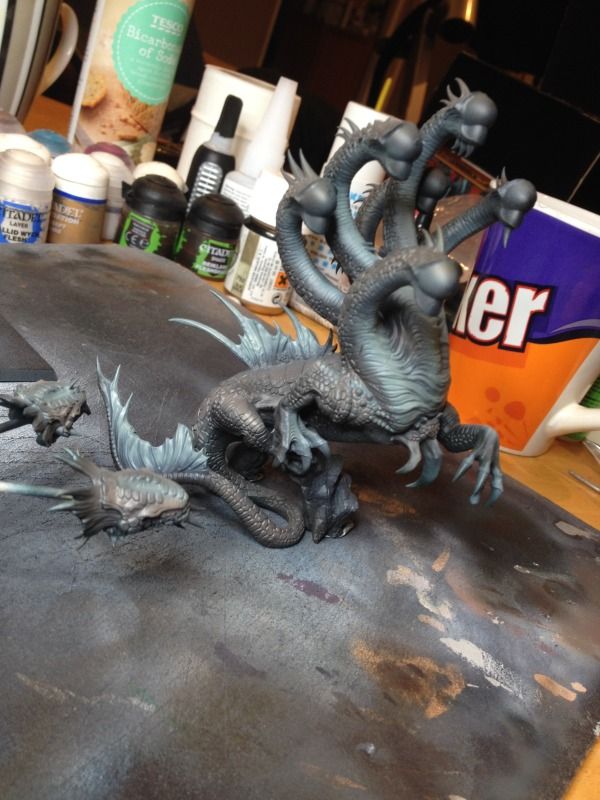
For this, I used a very pale green colour called VMA Duck Egg Green. I very carefully drybrushed this all over the miniature. I used a tiny amount of paint and made sure I did it in several passes. You [i]DO NOT[/i] want to ruin all of that lovely airbrush work!
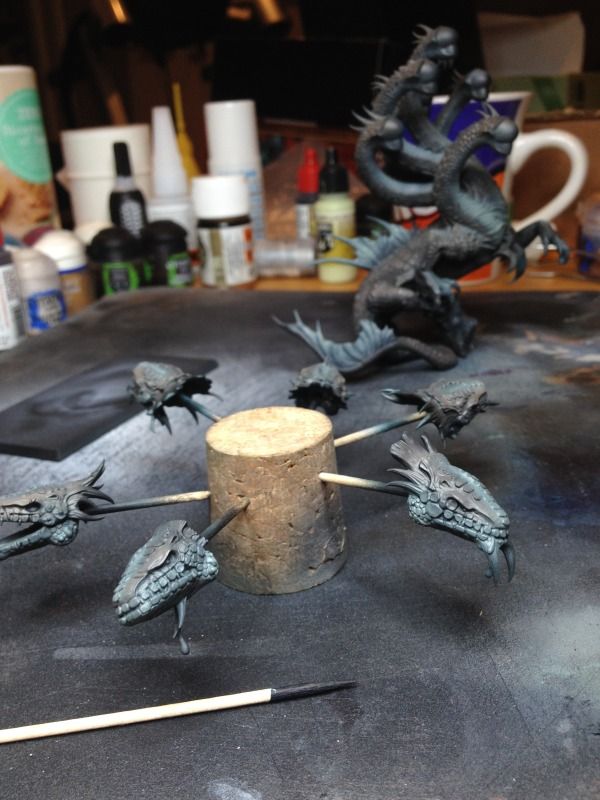
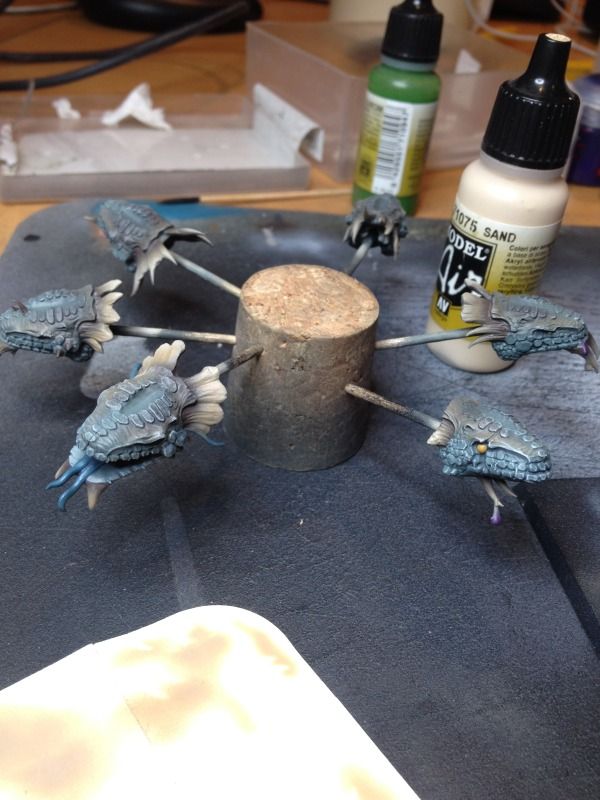
Image

HEADS

I did the same techniqes as the rest of the body really, I just applied it in slightly different parts. I concentrated the brown colour on the top of the heads, and used the green colours for the underparts. I added a green stripe down the heads too, as it was looking a little too brown originally!

Image
Image

Eyes were done in Averland Sunset followed by a lighter yellow.

Image

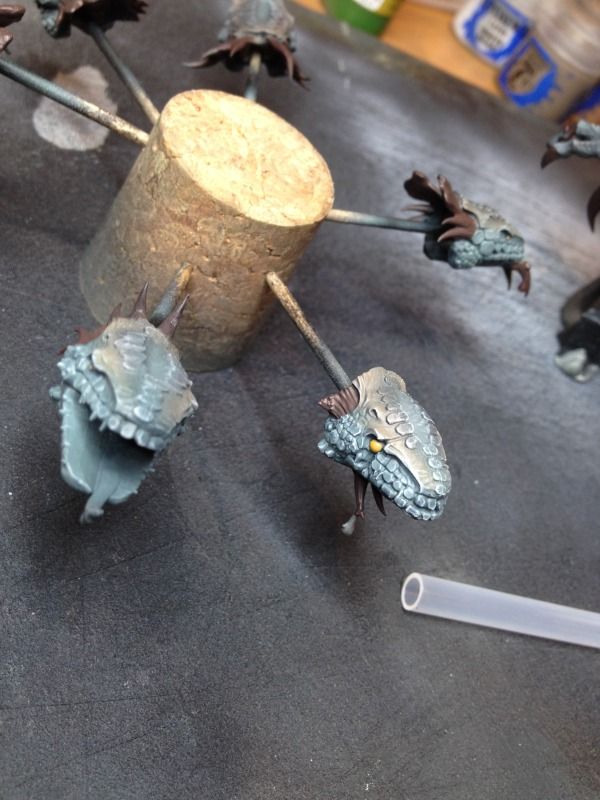
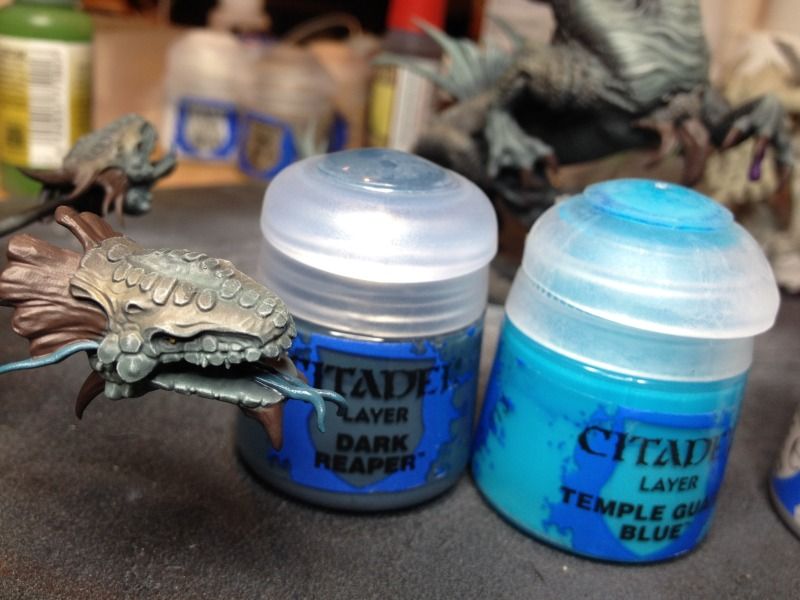
Tongues were done with Dark Reaper mixed and highlighted all the way up to Temple Guard Blue.

Image

Blood/scars were done with Mephiston Red inside the wound. Then I used my classic blood mix which is Tamiya clear red mixed with a little brown and black ink. It’s far too bright on it’s own, but adds a lovely glossy finish.

Venom was done with Naggaroth Night, Xerus Purple and then a little Xerus purple with some sand paint in it. Simples.
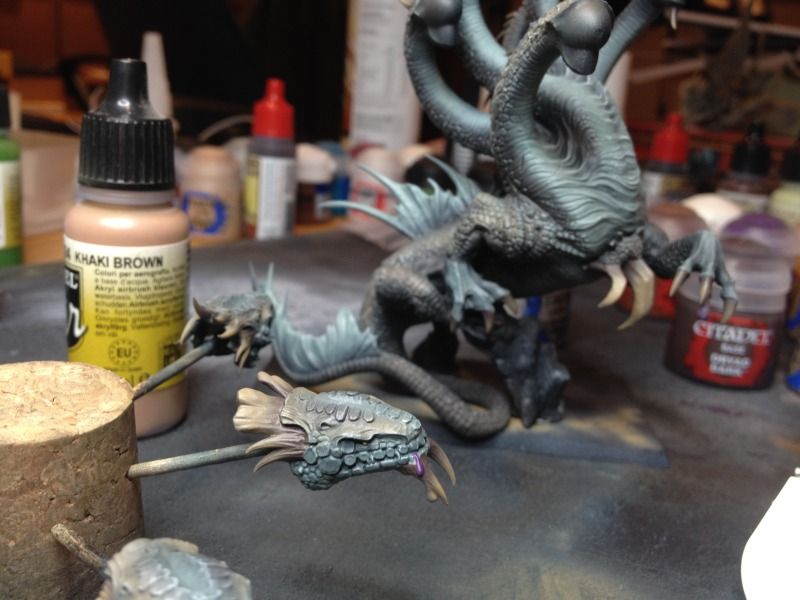
CLAWS/BONE
This was done with the airbrush again. VMA Burnt Umber, followed with VMA Khaki Brown. Once dry, I sprayed VMA sand VERY lightly towards the tip.

Image
Image
Image

Once dry, I washed the bone parts with some brown ink mixed with a glaze medium to reduce the surface tension. I didn’t want it to stain, just blend the colours together even more!

Image
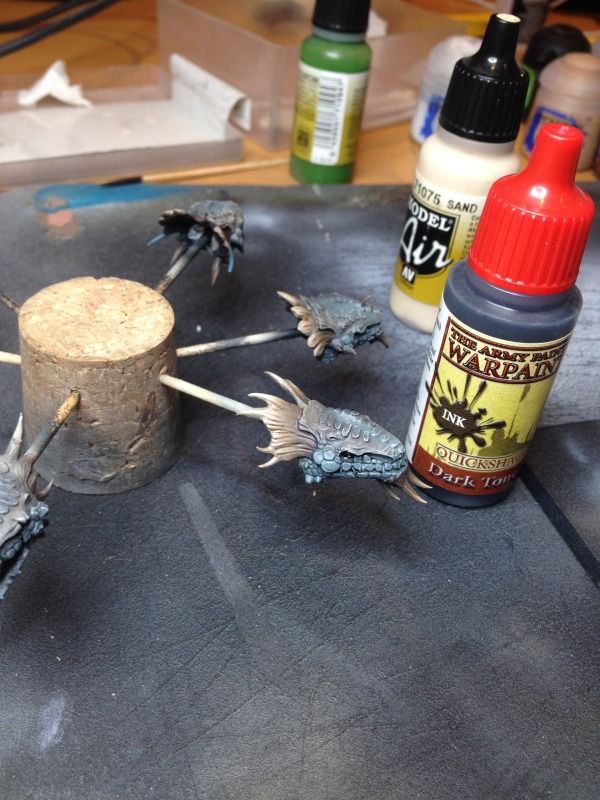
Teeth were picked out with Pallid Wych Flesh
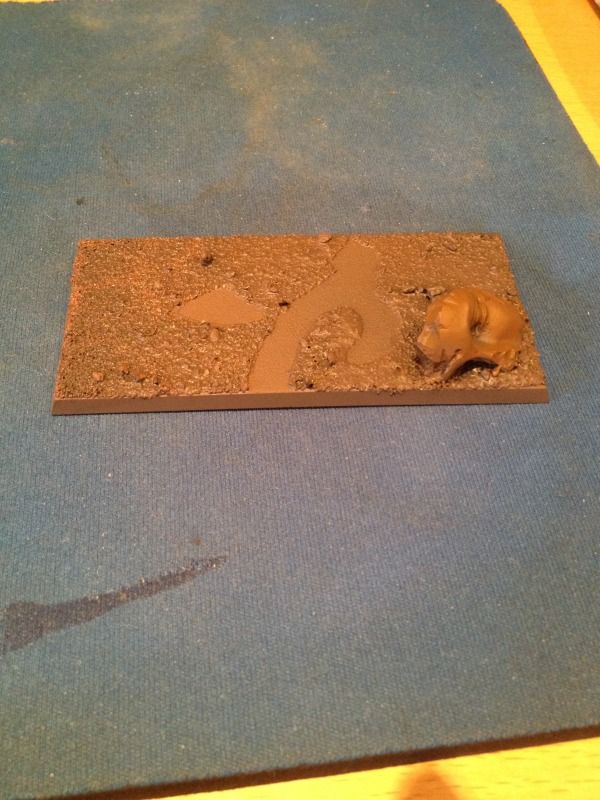
BASE/SNOW

Added sand and extra bits and bobs. Its worth noting that I only sanded the areas where the Hydra won’t be! I wanted a good bond between the hydra and the base (i.e. plastic to plastic).

I sprayed the base a dark brown colour - I used Humbrol Dark Brown Spray but any will do.

Image

I drybrushed the stone head in Calthan brown, followed by bleached bone and white. Nothing terribly exciting!

I drybrushed the base with Tau Ochre Sept, followed by Dheneb Stone.

Image

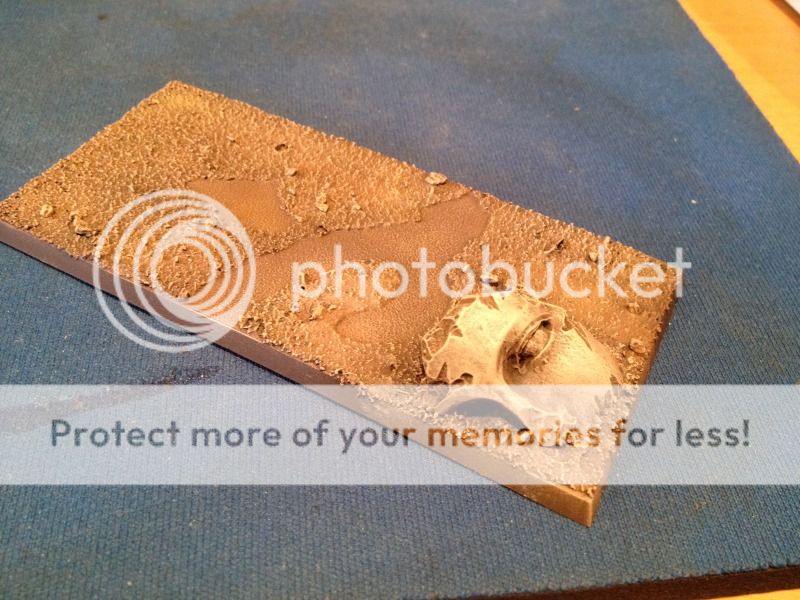
Please excuse the change in colour here - my photography is awful!!!!

Ok, the exciting part! SNOW!

I painted everywhere I wanted snow to be Ceremite white. This is what will give the snow its colour.
Image
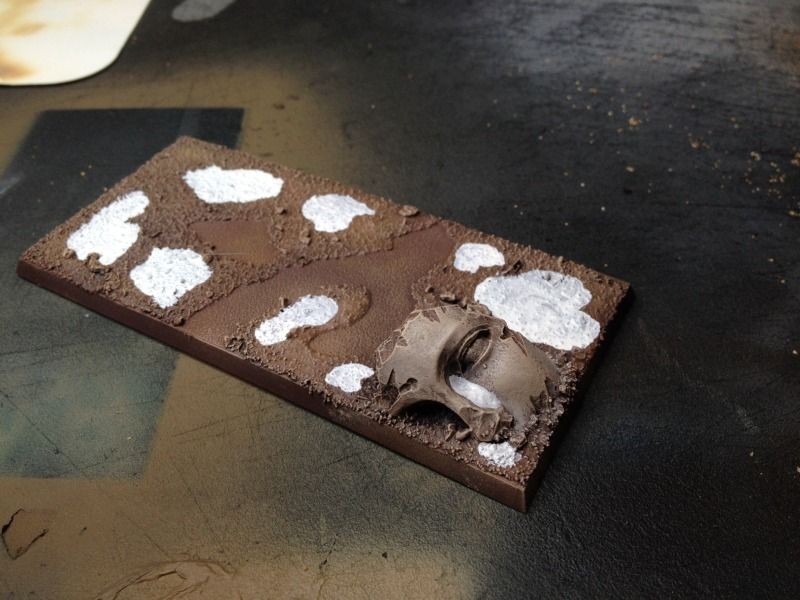
Add whatever clumps/grass to the base at this point if you want them covered in snow. If not, add them last.
Image
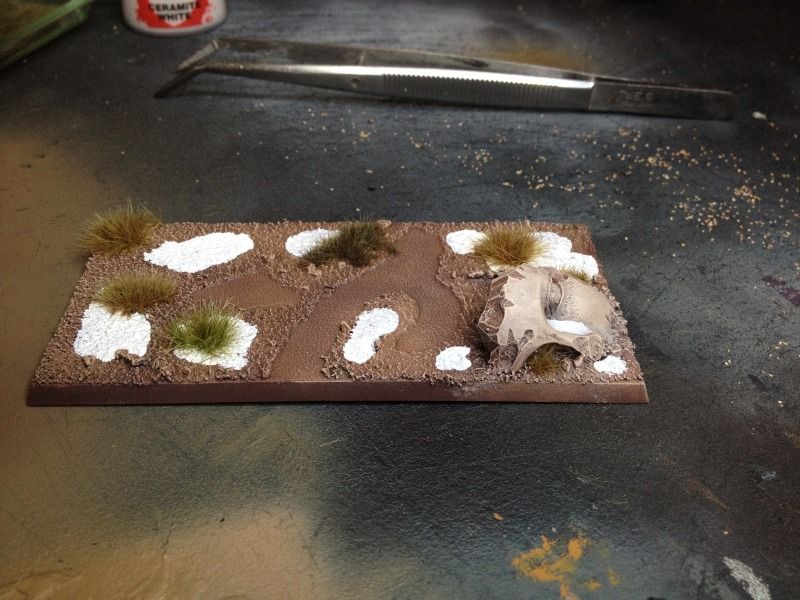
Cover the white parts with thick superglue and put on some Bicarbinate of Soda. You need a good thick covering of this extending to outside of the white area. This is the texture and thickness of the snow.
Image

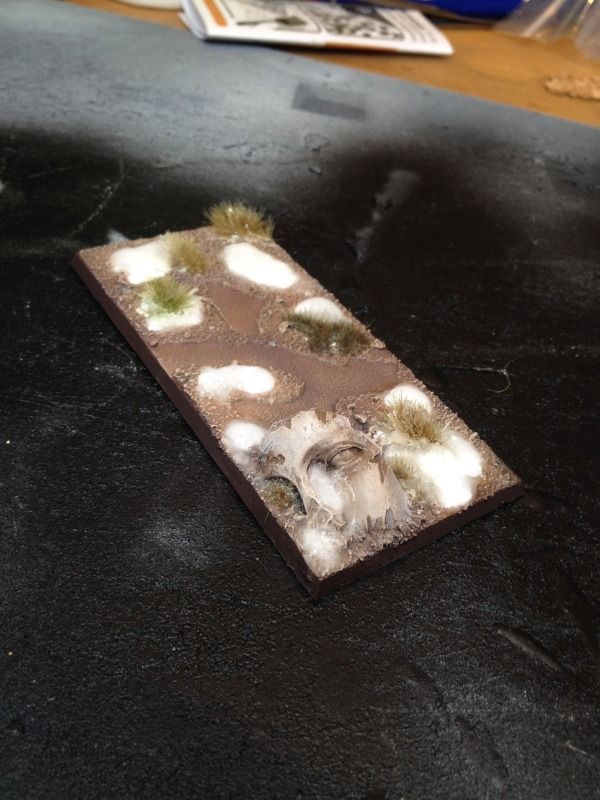
Once covered in Bicarbinate, use a thin superglue to lock in the snow and give it that slushy/wet look.

If the snow isn’t looking quite right, repeat the steps of thick glue, bicarb and then thin glue.

Don’t be afraid to get the bicarb/glue on the grass clumps as this will look quite natural snowfall.

Attach the model to the base and then Voila!
Image
Image
Image

Hopefully you can gleam something from this. Again, apologies for it being mostly airbrushing, but this kind of model screams for it.

Any questions, please ask away and I will do my best to answer!

Regards,
Dreadboi
User avatar
Daeron
Malekith's Best Friend
Posts: 3975
Joined: Fri Oct 03, 2003 7:36 pm
Location: Belgium, Brussels
Contact:

Re: How To Paint A Hydra Dreadboi Style!

Post by Daeron »

Impressive… Better than the AB's work :D
I love me a bowl of numbers to crunch for breakfast. If you need anything theoryhammered, I gladly take requests.

Furnace of Arcana, a warhammer blog with delusional grandeur.

"I move unseen. I hide in light and shadow. I move faster than a bird. No plate of armour ever stopped me. I strike recruits and veterans with equal ease. And all shiver at my coldest of whispers."
- The stiff breeze
User avatar
xFallenx
Malekith's Best Friend
Posts: 1255
Joined: Fri Sep 22, 2006 1:04 am
Location: Calgary, Alberta
Contact:

Re: How To Paint A Hydra Dreadboi Style!

Post by xFallenx »

^ That. I really like the muted tone, very well done!
Oct 2013-Current: 3-2-0
User avatar
Dyvim tvar
Lord of the Dragon Caves
Posts: 8372
Joined: Wed Jan 01, 2003 6:34 pm
Location: The Dragon Caves of the Underway (Indianapolis IN)
Contact:

Re: How To Paint A Hydra Dreadboi Style!

Post by Dyvim tvar »

Great tutorial.

I really need to get an airbrush. If nothing else, it will make big models go a lot faster.
Truly These are the End Times ...
User avatar
Enkiel
Assassin
Posts: 566
Joined: Thu Nov 05, 2009 2:15 pm

Re: How To Paint A Hydra Dreadboi Style!

Post by Enkiel »

the back look a bit unfinished. Some brush work on the scale would make it less "airbrush quick job"...

but the final look is still pretty nice.
Setomidor
Malekith's Best Friend
Posts: 1294
Joined: Wed May 21, 2003 8:12 am
Location: Umeå, Sweden

Re: How To Paint A Hydra Dreadboi Style!

Post by Setomidor »

Wow, thanks a lot for the great guide :)
User avatar
Lord_azoth
Highborn
Posts: 743
Joined: Mon Aug 11, 2008 12:57 pm

Re: How To Paint A Hydra Dreadboi Style!

Post by Lord_azoth »

Enkiel wrote:the back look a bit unfinished. Some brush work on the scale would make it less "airbrush quick job"...

but the final look is still pretty nice.


totally agree..the finish is a bit "unnatural" due to the total airbrush work. Some brush job would add more definition to the miniature. Some scales highlights, some dark outlining, etc.
Death before dishonor
dreadboi
Slave (off the Altar)
Posts: 16
Joined: Thu Oct 03, 2013 7:03 pm

Re: How To Paint A Hydra Dreadboi Style!

Post by dreadboi »

Cheers for the comments guys.

I think i was a little hasty in putting the pictures up for critique! I'll go back and add some more details in.

It looks a little washed out in pictures due to the lighting, so that may not be helping things along.
User avatar
kunimitsu
Corsair
Posts: 90
Joined: Sun Apr 14, 2013 5:27 am

Re: How To Paint A Hydra Dreadboi Style!

Post by kunimitsu »

Once again beautiful work. Any advice on where to find a few good guides on airbrushing? After seeing this I am contemplating buying and giving one a shot...
User avatar
Grogsnotpowwabomba
The Aspect of Murder
Posts: 4646
Joined: Mon Jun 10, 2002 7:07 pm
Location: Los Angeles

Re: How To Paint A Hydra Dreadboi Style!

Post by Grogsnotpowwabomba »

Awesome job. Very nice! I hated the new Hydra when I first saw it, but seeing different paint jobs has made me do a 180 on it.

What is that device you used for the heads? I like it and might try to have something like that for my workstation.
3 bots slain in Khaine's name.
User avatar
Dragon9
Assassin
Posts: 571
Joined: Thu Jun 13, 2002 7:30 pm
Location: Cincinnati, OH
Contact:

Re: How To Paint A Hydra Dreadboi Style!

Post by Dragon9 »

Did you take a pencil and outline the base of the model on the base to know where to put the sand?
"The dark elves have everything cool. They are pirate blood cultist ninjas riding dinosaurs and flinging magic. They're metal. They're the most metal race out there, rivaled only by Warriors of Chaos. They bring a cauldron of boiling blood onto the battlefield. You don't get much more metal than that." -- Mostlyharmless on Warseer

My Blog: A Small World - My Life in Miniatures

Image Image
dreadboi
Slave (off the Altar)
Posts: 16
Joined: Thu Oct 03, 2013 7:03 pm

Re: How To Paint A Hydra Dreadboi Style!

Post by dreadboi »

thanks for the comments!
@: Dragon9 - I did indeed - i use plastic glue to stick it to the base, so i wanted the hydra to bond with the base.
@grogsnotpowwabomba: It's just a cork stopper with toothpicks cut in half. Use some blutack to hold the heads in place. It helps because you don't have to keep touching you nicely fresh paint job!
@kunimitsu: Airbrushing is ALL over youtube...i like buypainted and ichibanpainting....i think schzanuzerface minis too... also, check out www.elementgames.co.uk for loads of tutorials on their...some airbrushing, some not.
They host some of mine too :)
Post Reply