[BLOG] Sarcon's Druchii! Updated May 8: Pic Heavy Army Shot
Moderators: Layne, xFallenx, cultofkhaine
Forum rules
Remember that picture file size should be no larger than 256KB.
For the full Painting and Modelling rules, visit [url]http://www.druchii.net/phpBB3/viewtopic.php?f=9&t=27440[/url]
Remember that picture file size should be no larger than 256KB.
For the full Painting and Modelling rules, visit [url]http://www.druchii.net/phpBB3/viewtopic.php?f=9&t=27440[/url]
-
Sarcon

- Beastmaster
- Posts: 387
- Joined: Mon May 26, 2008 10:07 am
- Location: Rotterdam, The Netherlands
@ Lord Saradain - Yes, they all have red eyes. Maybe it's beauce my camera got a red-eye removal built in (Yes, I'm serious!)? =XI'll make an army so far picture in a minute, sounds like a good idea to me!
My master on steed will be painted in the following two weeks. I need to have him done along the rest of my 500 pts army before november 8th. If I have time left I may do a quick display base (also built easymode!), or help my friend paint 60 goblins in 2 weeks .
.
And I appreciate you like the harpies. Thanks for the reply!
@ Rebmonk - The movement tray is made from sprue edges glued on 1mm thick plastic card. I put some dimension in the tray here and there by making some tiny hills with clay, then I simply sanded it, few pieces of cork here and there, patches of gravel to break up the sandy feel, spraypaint it black, and get drybrushing! I still have to make a tray for my knights, so I could post a WiP of that, if I remember!
Thanks for all C&C so far. You've been great motivators to keep me painting! tomorrow I'm going to make a start on my cold one knights (i.e first layer, wash).
My master on steed will be painted in the following two weeks. I need to have him done along the rest of my 500 pts army before november 8th. If I have time left I may do a quick display base (also built easymode!), or help my friend paint 60 goblins in 2 weeks
And I appreciate you like the harpies. Thanks for the reply!
@ Rebmonk - The movement tray is made from sprue edges glued on 1mm thick plastic card. I put some dimension in the tray here and there by making some tiny hills with clay, then I simply sanded it, few pieces of cork here and there, patches of gravel to break up the sandy feel, spraypaint it black, and get drybrushing! I still have to make a tray for my knights, so I could post a WiP of that, if I remember!
Thanks for all C&C so far. You've been great motivators to keep me painting! tomorrow I'm going to make a start on my cold one knights (i.e first layer, wash).
-
Western elf
- Corsair
- Posts: 84
- Joined: Thu Oct 02, 2008 11:35 am
-
Sarcon
- Beastmaster
- Posts: 387
- Joined: Mon May 26, 2008 10:07 am
- Location: Rotterdam, The Netherlands
@ Western Elf - they're Warmaster High Elf Great Eagles, you can find them under the specialist games section on the GW website.
@ Notts - Yea, I sure do miss the bits service too. It really made things a lot cheaper and handier. Stopping the bit service almost completely killed the conversional options for people on low budgets (i.e students, etc). Now that I want to build a pegasus, I need leathery wings, so now I need to buy the morathi blister just for the pegasus wings...
@ Notts - Yea, I sure do miss the bits service too. It really made things a lot cheaper and handier. Stopping the bit service almost completely killed the conversional options for people on low budgets (i.e students, etc). Now that I want to build a pegasus, I need leathery wings, so now I need to buy the morathi blister just for the pegasus wings...
Be sure to check out my Army blog.
-
Sarcon
- Beastmaster
- Posts: 387
- Joined: Mon May 26, 2008 10:07 am
- Location: Rotterdam, The Netherlands
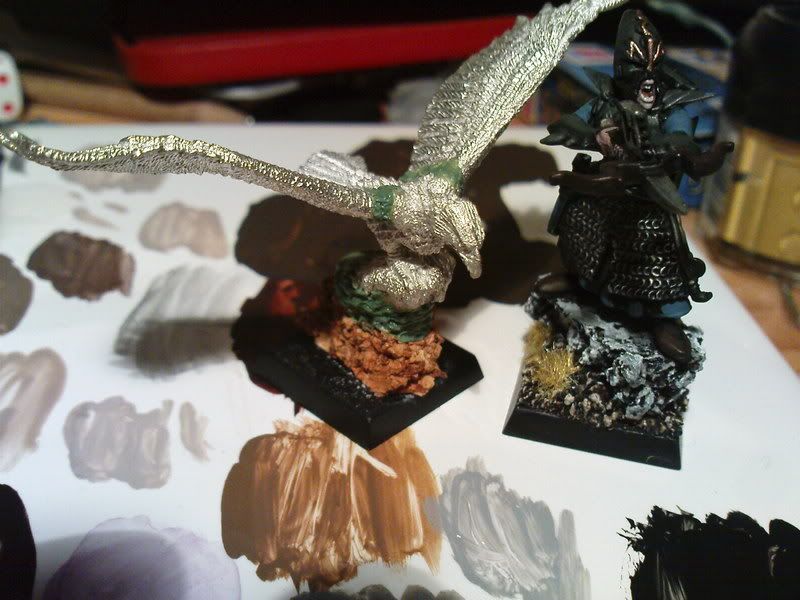
Notts - Yes, that's right, it requires some minor greenstuffing. The model comes stock with pewter pins molded onto them, but I clipped those off and replaced them with pieces of paperclip. That's way more solid. Some playing with the wings angle, then some quick greenstuffing to fill the gabs, and you're done!
EDIT: Here's a WIP shot of the harpy next to a crossbow warrior (for size comparison)
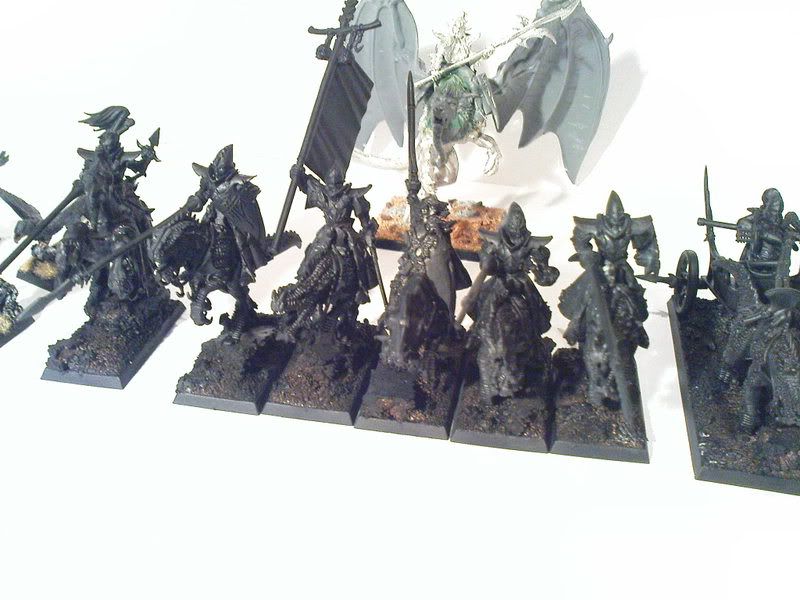
And a small update now aswel! No new models though, I did take some pics of models I built some time ago that have not been seen on this thread yet. So, here's the army so far!
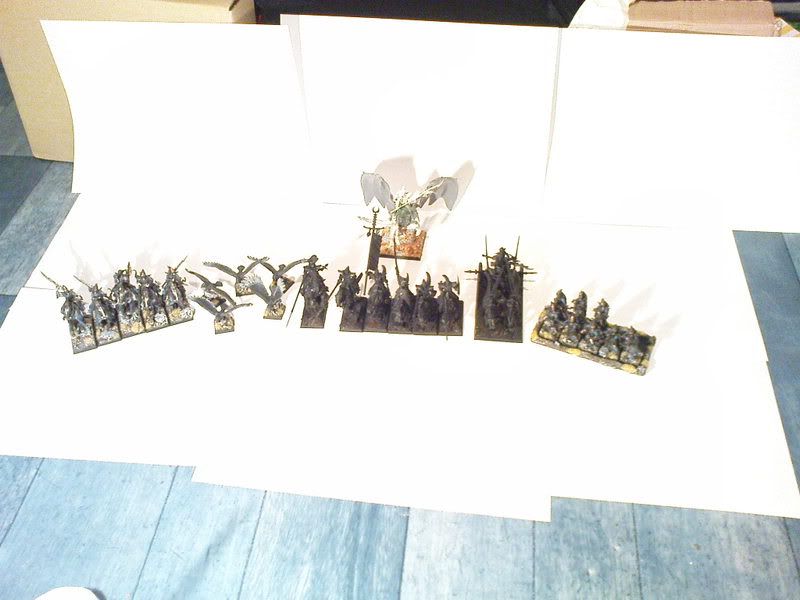
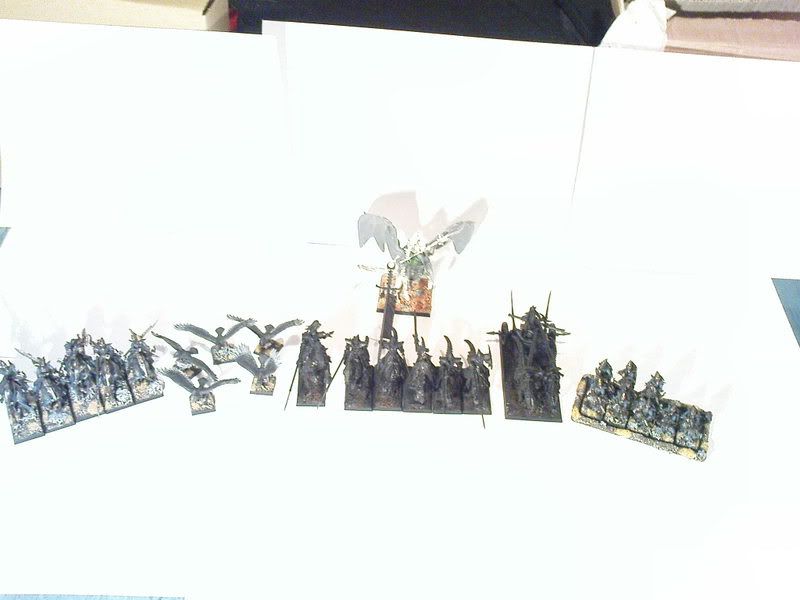
Blurry shots of the army so far
And a few closeups!
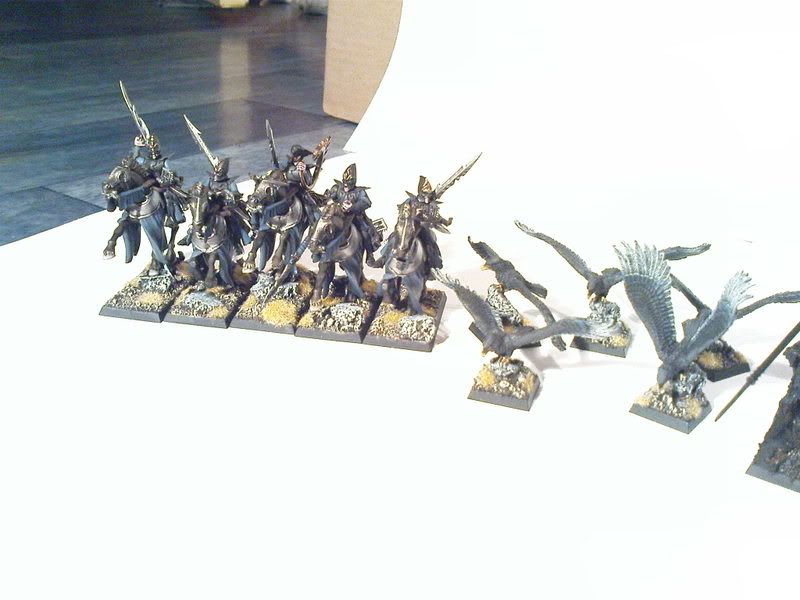
I really like how the dark riders turned out in this picture. It really shows how good fast painting from tabletop distance can look IMO.
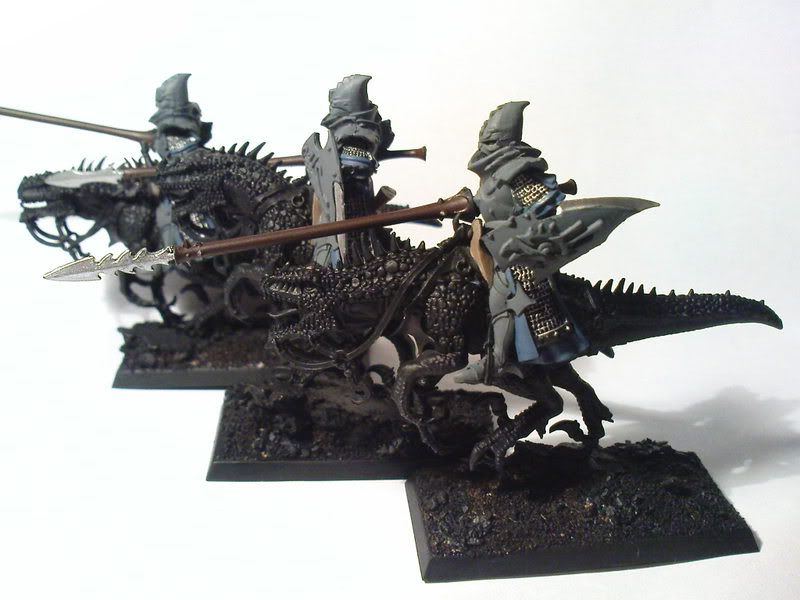
Cold one knights and master on dark steed, with masticore in the background.
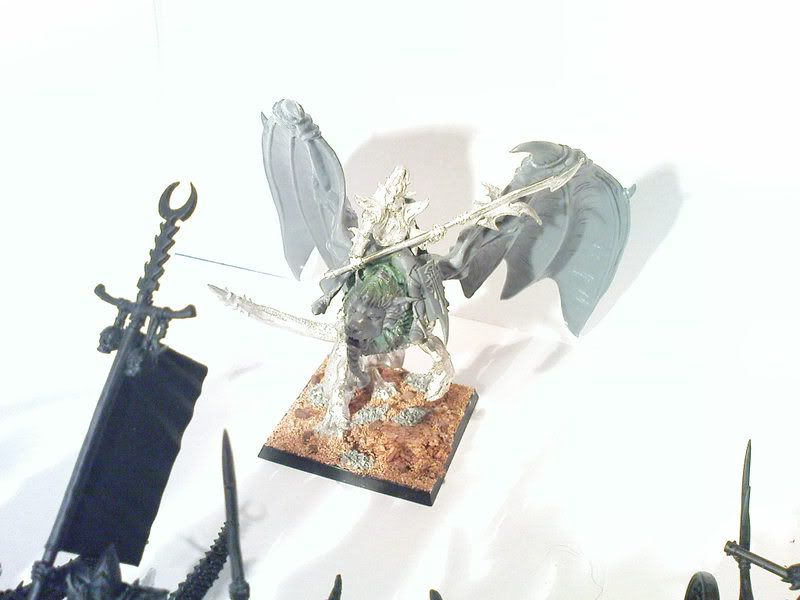
Close up on the Master on Manticore, aka Masticore.
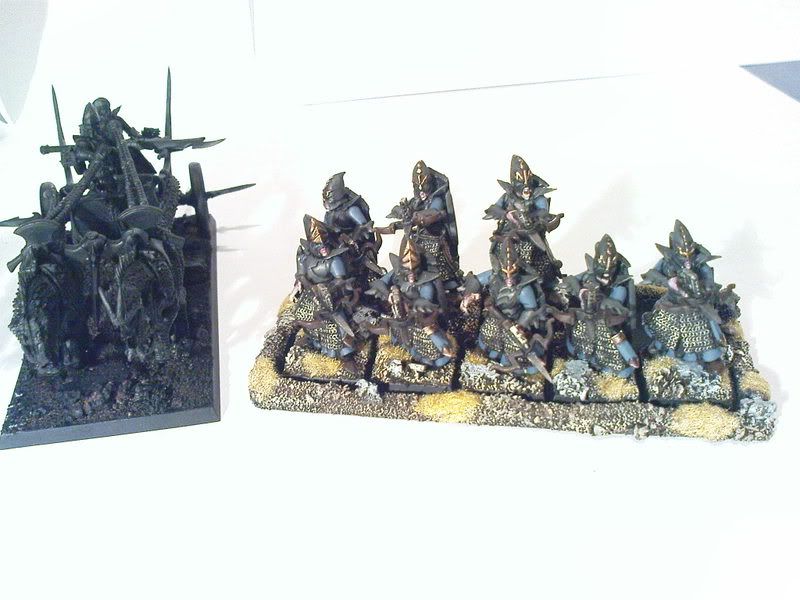
Close up on the crossbow guys + cold one chariot.
And again, C&C is appreciated. I really enjoyed reading all your replies so far. Thanks a lot for that!
EDIT: Here's a WIP shot of the harpy next to a crossbow warrior (for size comparison)
And a small update now aswel! No new models though, I did take some pics of models I built some time ago that have not been seen on this thread yet. So, here's the army so far!
Blurry shots of the army so far
And a few closeups!
I really like how the dark riders turned out in this picture. It really shows how good fast painting from tabletop distance can look IMO.
Cold one knights and master on dark steed, with masticore in the background.
Close up on the Master on Manticore, aka Masticore.
Close up on the crossbow guys + cold one chariot.
And again, C&C is appreciated. I really enjoyed reading all your replies so far. Thanks a lot for that!
-
Angel of algebra

- Assassin
- Posts: 516
- Joined: Mon Feb 21, 2005 7:30 pm
- Location: Liger's trousers
Looking good.  I was going to request a group picture once you had more painted anyway.
I like the use of the chariot lion head on the manticore. And I've always wanted to put that black guard model on a manticore.
As for the heads looking low down on the Knights, I think it works well. Something about having the neck armour come up high looks cool to me.
Keep going.
I like the use of the chariot lion head on the manticore. And I've always wanted to put that black guard model on a manticore.
As for the heads looking low down on the Knights, I think it works well. Something about having the neck armour come up high looks cool to me.
Keep going.
-
Lordsaradain

- Malekith's Best Friend
- Posts: 1479
- Joined: Fri Mar 12, 2004 3:22 pm
- Location: Norsca (Sweden)
The "masticore" and chariot conversions look great. Both the manticore and rider look quite abit cooler than the originals.
Click here to find out how to convert cooler and cheaper models!
(\__/)
(O.o )
(> < ) This is Bunny. Copy Bunny into your signature to help him on his way to world domination!
(\__/)
(O.o )
(> < ) This is Bunny. Copy Bunny into your signature to help him on his way to world domination!

I like the harpy eagles. I was a little skeptical at only seeing one, but the flock has changed my mind. Nice work on the bases, but I's encourage you to add just one highlight to the black armour at the edge. I know you want to do a quick job, but maybe just even a gloss finish to it would work.... It's just your bases are so nice and well I have faith in your painting skills as your work has so far turned out very nice.
The Manticore is lookin sweet too eh!
The Manticore is lookin sweet too eh!
My Photo Bucket:
http://s40.photobucket.com/albums/e236/Seralkith/
http://s40.photobucket.com/albums/e236/Seralkith/
-
Western elf
- Corsair
- Posts: 84
- Joined: Thu Oct 02, 2008 11:35 am
-
Sarcon
- Beastmaster
- Posts: 387
- Joined: Mon May 26, 2008 10:07 am
- Location: Rotterdam, The Netherlands
@ LordSaradain - Cheers, I've posted him a month or two earlier, but with real crappy pics. I'm glad you like them!
@ Seralkith - I know the black armor is a bit flat, but it would take like another 5 to 10 minutes/model or so to highlight it. I really want to keep this army painted without too much fuzz, because I never finished an army, just because I was trying to make every model look really good. I simpled my painting on my khorne CSMs - wasn't enough, so now a wash army (I've been waiting 1.5 years for the new DE book, so I really wanted to do this army). Thanks for the great compliment on the basing and painting, it's much appreciated.
@ Western elf - Yes, they are High Elf Great Eagles, from the Warmaster specialist games range from Games Workshop. Here's a link to the online store:
http://www.games-workshop.com/gws/catal ... GameStyle=
Be sure to check out my Army blog.
-
Sarcon
- Beastmaster
- Posts: 387
- Joined: Mon May 26, 2008 10:07 am
- Location: Rotterdam, The Netherlands
@ Dark Panda - Harpies, harpies, harpies, most discussed part about my army. And that for a mere 55 points, Definetly a keeper
@ Notts, yes I know I have been lacking some updates lately. I will get some more painting done tonight + do a basing turtourial. I've been working 40+ hours/week lately, so I didnt have a lot of time. I did play a few games, but I lack general gaming experience (i.e. forgetting psychology, doing compulsory movement and forgetting to declare charges). I scored a major victory and a draw which wasnt that bad, if I may say so myself. So tonight, Paint time!
@ Arthos - Thanks for the compliment. I'll to post an update ASAP!
Be sure to check out my Army blog.
life can definitely get in the way of painting!
good job on the battles. I am going to make a list of things to do in battles as I ALWAYS forget stuff. I normally dont really take mages, and last battle (as Empire) I did, forgot to cast with him twice.
I'm looking forward to more updates, specially the masticore.
good job on the battles. I am going to make a list of things to do in battles as I ALWAYS forget stuff. I normally dont really take mages, and last battle (as Empire) I did, forgot to cast with him twice.
I'm looking forward to more updates, specially the masticore.
-
Western elf
- Corsair
- Posts: 84
- Joined: Thu Oct 02, 2008 11:35 am
Is it called a 'masticore' after the magic the gathering card?
http://sales.starcitygames.com/cardscan ... ticore.jpg
http://sales.starcitygames.com/cardscan ... ticore.jpg
your western homes are locked forever
-
Dark_and_pointy

- Warrior
- Posts: 61
- Joined: Wed Feb 07, 2007 9:11 am
- Location: brisbane, australia
-
Sarcon
- Beastmaster
- Posts: 387
- Joined: Mon May 26, 2008 10:07 am
- Location: Rotterdam, The Netherlands
@ Western Elf - No, I don't play Magic, but I thought it was a funny combination of words ^^.
@ Dark_and_pointy - Read my post 7 posts up
UPDATE! YES! A few WIP shots!
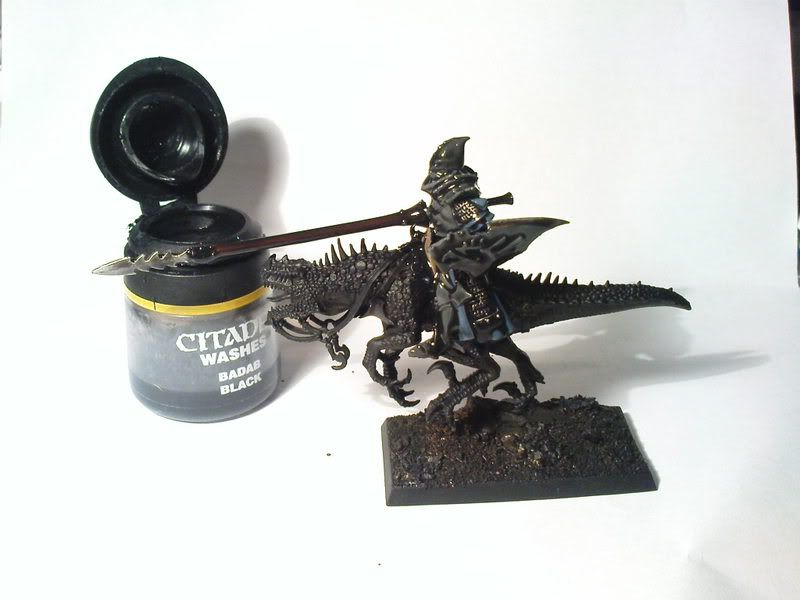
To show you guys how easy it is to use washes, I decided to take a few WIP shots of my CoKs. This is what they look like before the wash:
This is a shot to show how much wash I use (yes, I simply soak them )
)
And this is a shot of what they look like when the wash has dried up (before highlighting a single time)
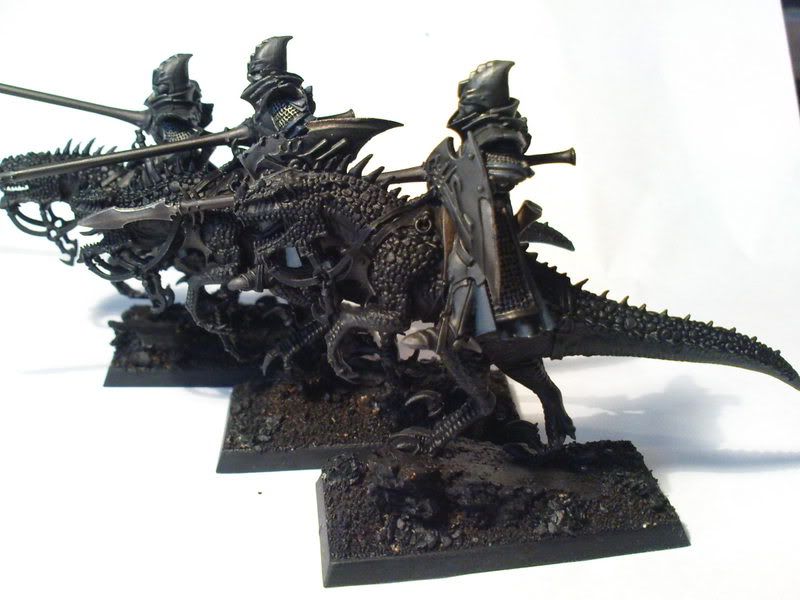
Easy isn't it?
@ Dark_and_pointy - Read my post 7 posts up
UPDATE! YES! A few WIP shots!
To show you guys how easy it is to use washes, I decided to take a few WIP shots of my CoKs. This is what they look like before the wash:
This is a shot to show how much wash I use (yes, I simply soak them
And this is a shot of what they look like when the wash has dried up (before highlighting a single time)
Easy isn't it?
Be sure to check out my Army blog.
-
Sarcon
- Beastmaster
- Posts: 387
- Joined: Mon May 26, 2008 10:07 am
- Location: Rotterdam, The Netherlands
Easy realistic cork bases - A basing turtourial.
In this article I will explain how I make my cork bases. I really like to put more character into my models by putting them on eye-catching bases. With some cork and modelling clay this is easily achieved. This is a list of materials you will need:
Step 1: Grab yourself a base and some cork!
__________
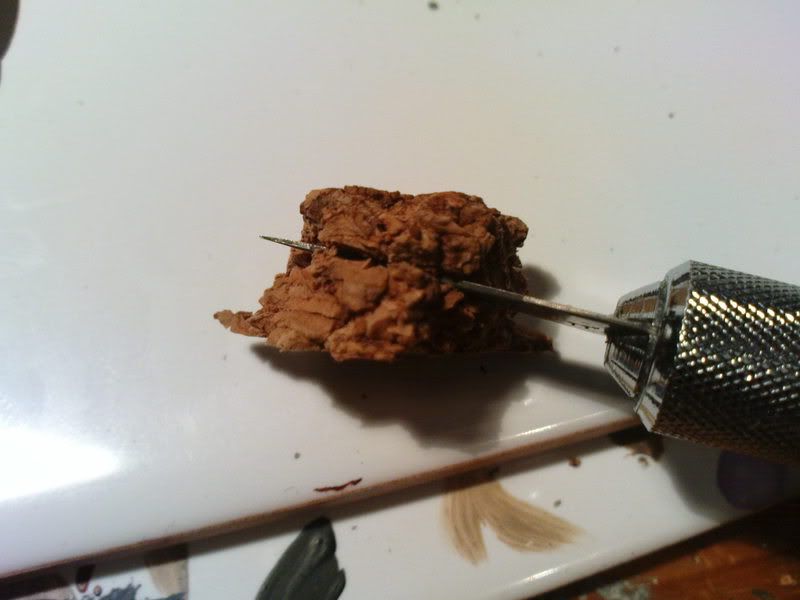
Step 2: Break of a piece of cork, and break it into tiny pieces, you can cut some in half to get an angle in the rocks, or just to have a less high rock. Here's a picture that shows the thickness of the cork I use:
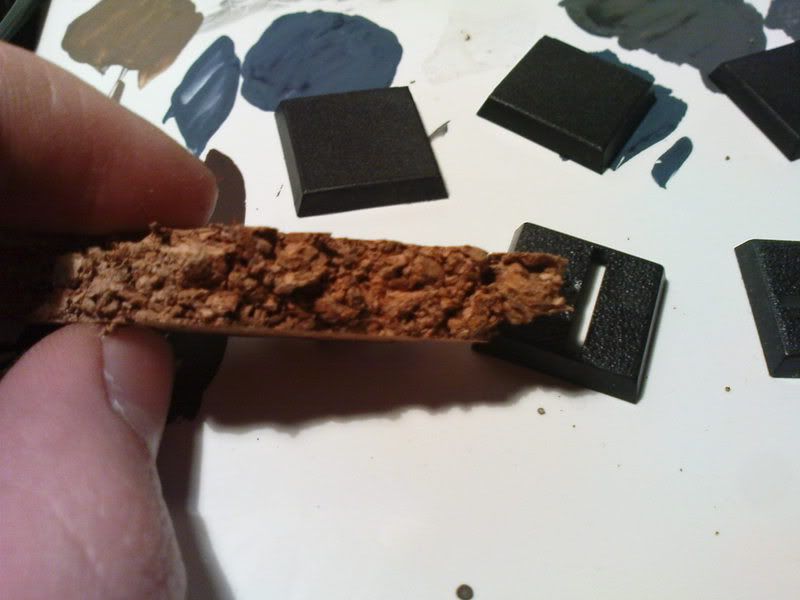
And here's a shot that shows how I cut a piece of cork to an angle to glue it on a base.
__________
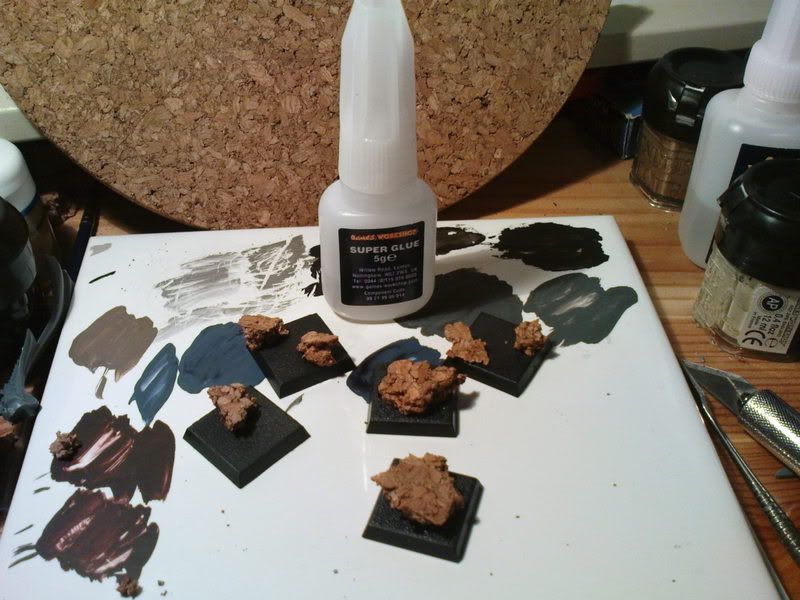
Step 3: After a bit of shufling around with the pieces of cork, I am happy with the result, and decided to glue the pieces on using Super Glue.
__________
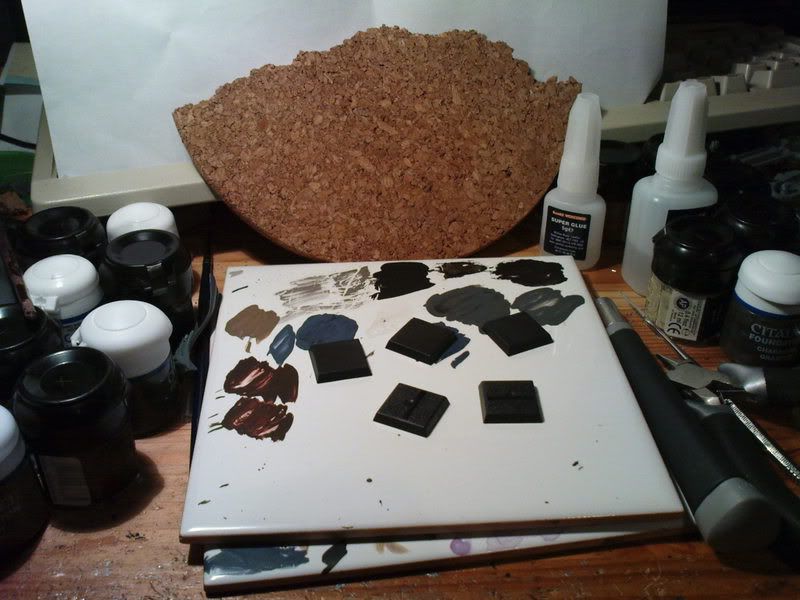
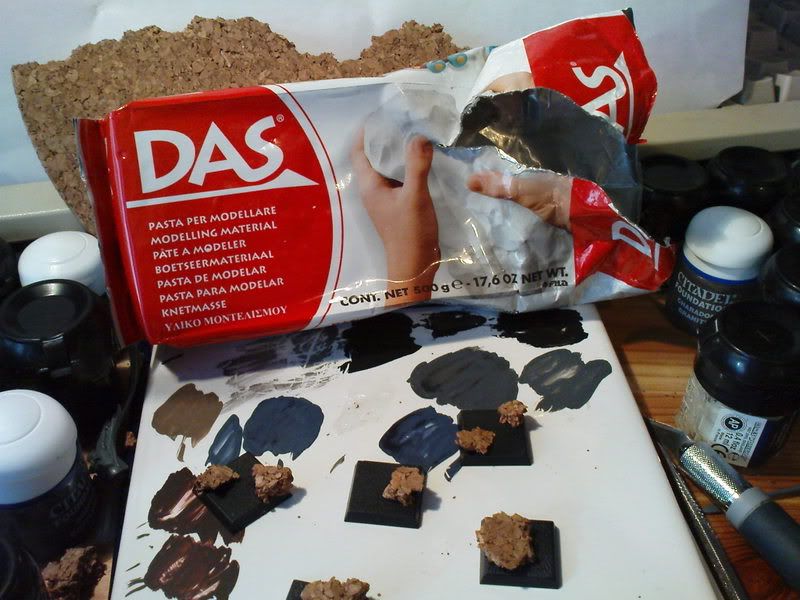
Step 4: Time to bulk the bases up! I use a cheap clay that I bought at a toy store (€1,99 for 500 grams, enough to base atleast 2 armies with!) Here's a picture of the clay that I use:
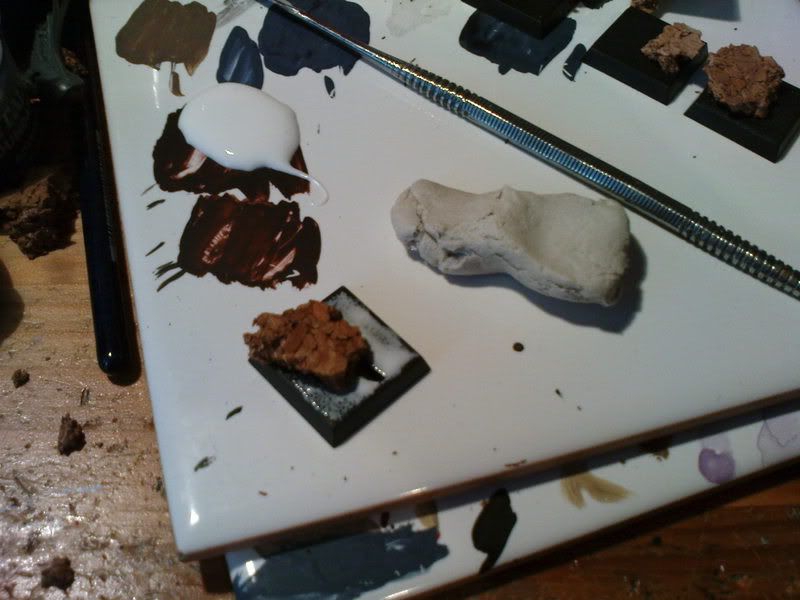
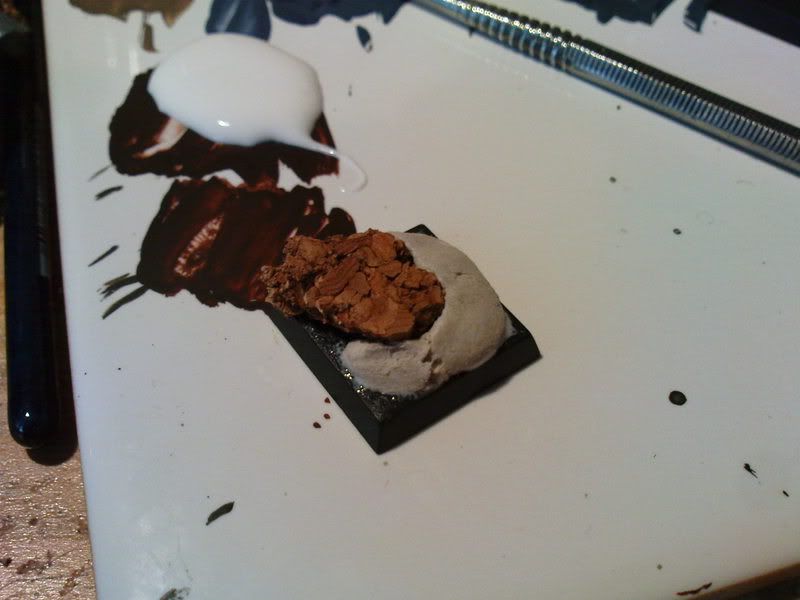
So, to start of with bulking, get a piece of clay, and get some PVA glue on the base. If you do not use clay (I didn't at first either), you have a chance that the clay part of your base may fall of if you drop the model. I never had that problem again since I use PVA for my bases. Here's a shot of a base covered in PVA glue with a piece of clay next to it:
Next, you break of a tiny piece of clay, roll it into a sausage form, and push it into place:
Then, grab your sculpting tool, and even it out nicely. This doesnt have to be very neat.
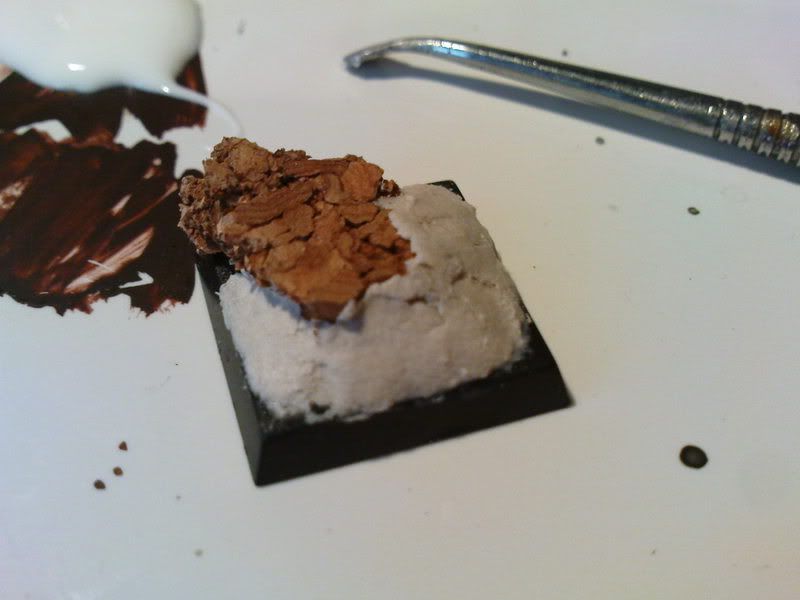
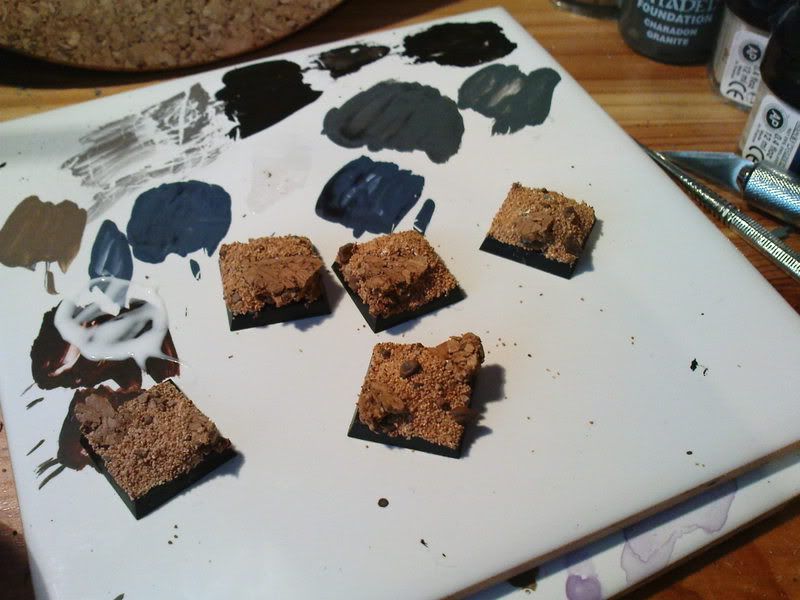
Here's the overview of the 5 bases I did:
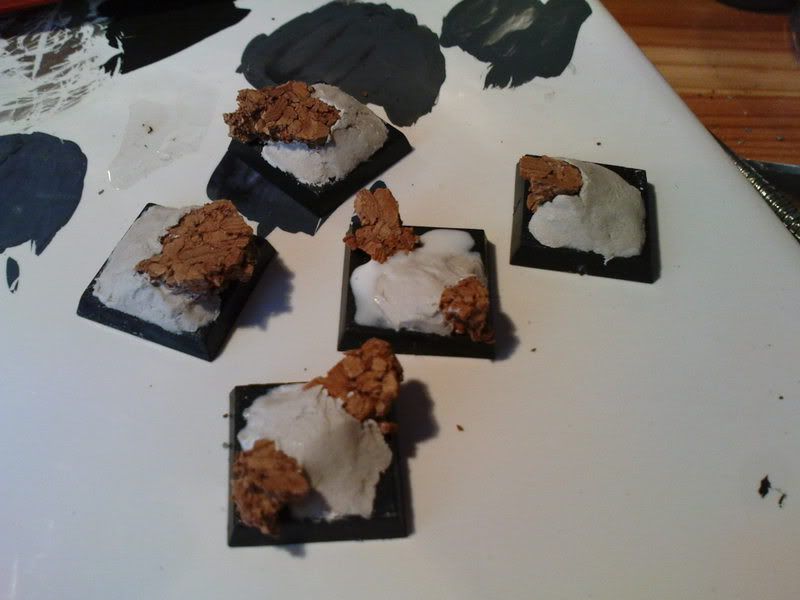
__________
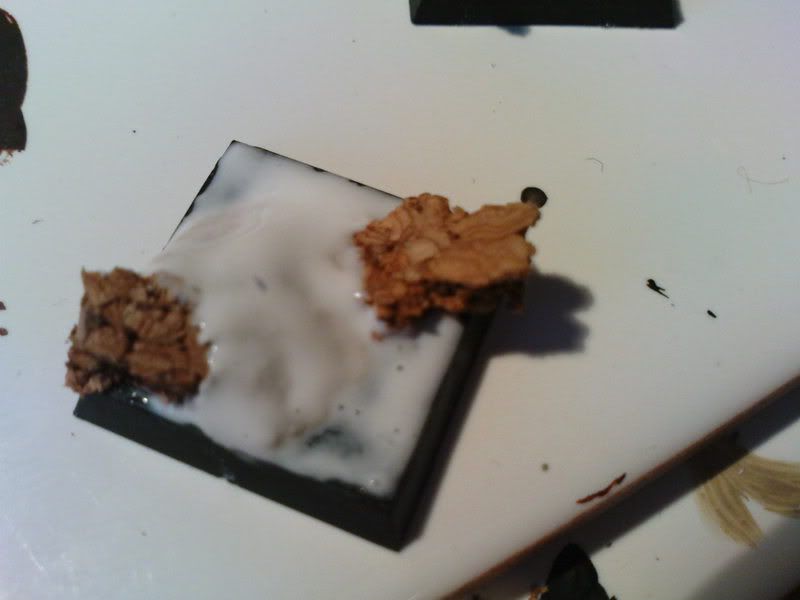
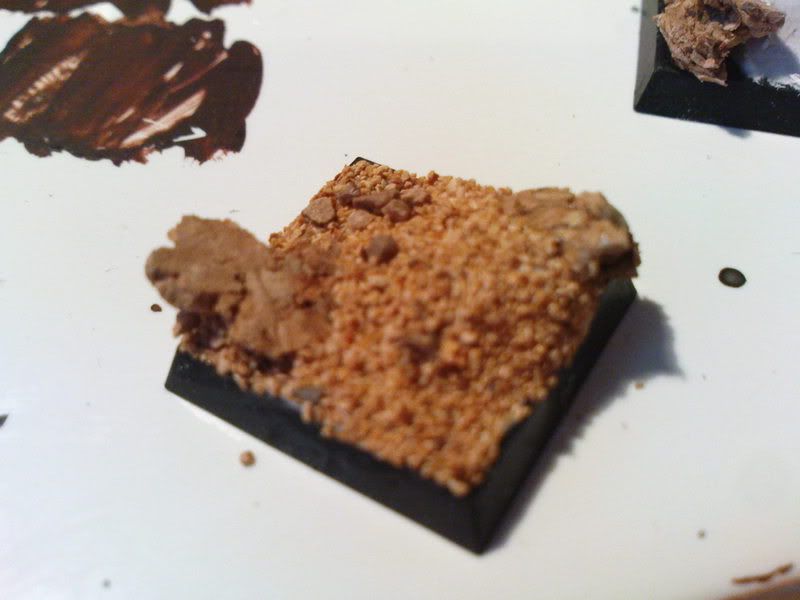
Step 5: Time to glue on the sand! Cover the clay in PVA glue, and glue on some modelling sand. It doesnt matter if some of the PVA hits the cork, it only makes it seem more natural. The only important part is that you keep your base edges clean!
Picture of a base covered in PVA:
Picture of the same base with the sand on:
And a overview of all 5 bases:
This is basicly how I do my bases. You can add some other things, like glue on a patch of fine slate here and there. When the PVA has dried up you can spraypaint them black along with the models.
Whoa, I was done faster than I thought with this article. I hope you guys have some use of this turtourial. Be sure to check out my army blog HERE.
Thanks for reading,
Sarcon
In this article I will explain how I make my cork bases. I really like to put more character into my models by putting them on eye-catching bases. With some cork and modelling clay this is easily achieved. This is a list of materials you will need:
- -A cork plate (mine is about 12mm thick, should be half an inch)
-Modeling clay that dries up hard - colour doesn't really matter.
-A sharp knife
-PVA Glue
-Super Glue
-A pinning device + paperclips (for pinning your model onto the cork)
-Modeling sand/fine slate
-Sculpting tool
-And last, but not least, you need a base!
Step 1: Grab yourself a base and some cork!
__________
Step 2: Break of a piece of cork, and break it into tiny pieces, you can cut some in half to get an angle in the rocks, or just to have a less high rock. Here's a picture that shows the thickness of the cork I use:
And here's a shot that shows how I cut a piece of cork to an angle to glue it on a base.
__________
Step 3: After a bit of shufling around with the pieces of cork, I am happy with the result, and decided to glue the pieces on using Super Glue.
__________
Step 4: Time to bulk the bases up! I use a cheap clay that I bought at a toy store (€1,99 for 500 grams, enough to base atleast 2 armies with!) Here's a picture of the clay that I use:
So, to start of with bulking, get a piece of clay, and get some PVA glue on the base. If you do not use clay (I didn't at first either), you have a chance that the clay part of your base may fall of if you drop the model. I never had that problem again since I use PVA for my bases. Here's a shot of a base covered in PVA glue with a piece of clay next to it:
Next, you break of a tiny piece of clay, roll it into a sausage form, and push it into place:
Then, grab your sculpting tool, and even it out nicely. This doesnt have to be very neat.
Here's the overview of the 5 bases I did:
__________
Step 5: Time to glue on the sand! Cover the clay in PVA glue, and glue on some modelling sand. It doesnt matter if some of the PVA hits the cork, it only makes it seem more natural. The only important part is that you keep your base edges clean!
Picture of a base covered in PVA:
Picture of the same base with the sand on:
And a overview of all 5 bases:
This is basicly how I do my bases. You can add some other things, like glue on a patch of fine slate here and there. When the PVA has dried up you can spraypaint them black along with the models.
Whoa, I was done faster than I thought with this article
Thanks for reading,
Sarcon
-
Lord_azoth

- Highborn
- Posts: 743
- Joined: Mon Aug 11, 2008 12:57 pm
-
Sarcon
- Beastmaster
- Posts: 387
- Joined: Mon May 26, 2008 10:07 am
- Location: Rotterdam, The Netherlands
@ Lord Azoth - I tried to make it as dummy-proof as possible
@ Notts, it could be hard to prevent your models from breaking off, but pinning is not that important if you're going to base plastic infantry. You do need some superglue though.
There are a few ways to base models on cork bases: On the cork, or next to a piece of cork. I would suggest you do the second thing, so you can just glue your plastic model onto the plastic base with polystreen cement, so you're sure it wont come of, then, glue on some patches of cork, bulk it up, and sand it. Easiest thing there is, eh?
Be sure to check out my Army blog.