I have played this game on Sunday against a friend who is very competent with his Asur. I am currently in the process of learning to use a magic-heavy army, so I’ll try to have a battle per week.
We were playing with closed lists. The point value was 2500. The game was a usual pitched battle.
Armies
My army:
L4 on Pegasus with PoK and bound PoD
L2 on steed with ToF and scroll
L2 on foot with dagger and scroll
Death hag: COB, BSB, ASF banner, +d3A
Assassin: ahw, rhb, +d3A, Manbane, Cloak
3 x 5 harpies
2 x 5 DR with Music
10 RxB with shields
10 corsairs with Frenzy Banner
12 BG with Crimson Death champion
5 COK with AP banner and champion
7 shades with GW
His army:
L2 with 2DS and Silver Wand (+1 Spell)
L2 with bound Fury of Khaine
BSB on steed with Battle Banner
Prince on steed with Talisman of Loec, Golden Shield, Sword of Might
2 x 10 spearmen
17 SM with Banner of Sorcery
5 DP with champion
5 DP with Warbanner
19 Phoenix Guard with FC
Tiranoc chariot
Lion chariot
2 RBT
2 Eagles
Table and deployment
We had a table with a hill in either player’s deployment zone, two woods on the flanks and two impassable Monuments of Glory slightly to the center from the woods.
My center was comprised of warriors, corsairs, COK and COB, plus harpies and two L2s
My right flank had BG, RxB (on a hill), a unit of DR and harpies
My left flank had the L4, another Dr unit and another unit of harpies.
Daniel had all his infantry, RBT and tiranoc in the center, with an eagle and a DP unit with a hero on either flank. The right flank (viewing from my side) had the BSB, while the left had his general and a lion chariot.
I deployed my shades in the left wood, and the assassin with the shades.
http://i112.photobucket.com/albums/n169 ... 160011.jpg
Turn 1
Daniel got lucky and got first turn, which was quite beneficial for him. The problem for me was that I deployed badly, and we both had an (almost) infantry center and some cavalry on the flanks. His cavalry was heavy, and mine fast. But as he got turn one, his heavy cavalry made a march forward, thus making it much more difficult for my fast cavalry to block his advance on the flanks.
His infantry center moved forward a bit, and the eagles generally hanged back. The right flank core-filler moved a bit more than the rest of the infantry center.
Of magic, he had rolled Law of Gold, 5+ Ward, Curse of Arrow Attraction, and Courage of Aenarion. He attempted to cast something on three dice, and rolled the miraculous 111. The miscast result allowed me to put the Black Horror on the left-flank DP, which he promptly dispelled. Well, I thought to myself sitting with six dispel dice against his, I guess, two power dice – nothing more to worry about in the magic phase. Daniel casts his drain magic, and rolls 10 I think. I take four dice to dispel and roll double ones. There goes my next turn’s magic phase! Well, at least he didn’t do too much damage with shooting – only three BG fell to it.
http://i112.photobucket.com/albums/n169 ... 160013.jpg
Now, my turn comes. I reveal the assassin in the shades, and charge the dragon princes’ flank (Daniel doesn’t know very well what assassins and/or shades can do, yet, so he didn’t fear to expose the flank to the GW-wielding maniacs). Well, I guess I was too sure about the victory in this combat, and this has cost me the game. I definitely should have bestowed either KB on the unit, or the +1A blessing. The result was that I killed only one DP. I hit with all my attacks, but out of assassin’s attacks only three wounded, and he saved those against my S4. With his attacks, he didn’t kill any shades, and, although all three wounded, he saved two. So I had flank and one kill, while he had outnumber, banner and Warbanner. I rolled eleven for the break test, he restrained pursuit, and I rolled nine for fleeing, just enough to take the unit into the swordmasters on the other side of the wood for crossfire. There go 7 shades, assassin and the security of the left flank.
Well, as I didn’t know the outcome of this combat, the corsairs were standing in a position to control the area around against any eagles or chariots that come this way, and the infantry center just moved a bit forward, with the COK preparing to charge Phoenixes next turn.
My left-flank harpies attacked the lion chariot. Well, it looked like a Tiranoc chariot to me, and I totally forgot that Daniel was using it as a proxy for the lion chariot. He also forgot about this, so two of my harpies actually lived till the end of this combat, and I managed to knock a wound off the “tiranoc” chariot. Oh, and they also didn’t autobreak due to fear, rolling five on my Ld test in the presence of the Sorceress general.
The middle harpies blocked the charge lane against COK for the tiranoc chariot in the center. The right flank saw my harpies blocking the DP, with BG moving for a counter-charge. I moved them too recklessly, totally disregarding the warriors in the flank. My crossbowmen were inefficient, killing one of the aforesaid warriors. Needless to say, magic also didn’t do anything due to the +3 to the difficulty of casting. The only spell I got off was word of pain, which I have put on a wrong target (Phoenixes, totally forgetting that they are not going to charge my COK, whom I didn’t move far enough for this charge to occur). Oh, wait, I also got a chillwind and a small magic missile from death lore on the RBT, scoring one wound against the machine itself and not shutting down its shooting.
http://i112.photobucket.com/albums/n169 ... 160014.jpg
Turn 2
Left flank: DP charge my corsairs and eat them, overrunning into my COB. His eagle charges my L4 and gets spanked – she pursues off the table over the chariot and harpies. These ladies continue fighting, but the sorceress is already off the table, and the harpies can’t use her leadership. They fail the break test and run, but the chariot restrains pursuit. Then we suddenly realize that the chariot was a Lion Chariot, and have a good laugh about it; that’s why wysiwyg is a good thing and proxies aren’t =)
In the center, the blocking harpies are charged by Swordmasters and the chariot simultaneously. Hence, the harpies run not in the direction between the wood and one of the Monuments of Glory, but over my warrior units with two sorceresses. Why we played it as a failed charge for his Tyranoc and not as a charge into the warriors remains a mystery for me. Or maybe he just decided to stop one inch in front… His right eagle blocked my COK (redirect into the other Monument of Glory if a charge). His RBTs kill three of my COK thus making it possible for them to charge the warriors and make and overrun into the RBT on the hill. Well, I have one big problem with rolling Ld tests for anything that contains a cold one. Yeah, you got it right, I failed my panic test and ran far-far away.
On the right flank, his BSB of doom (actually, I think that bretonnian BSB of doom has lost this title after the coming of Battle Banner) charges alone against my harpies, leaving the road clear for the DP. To make this road even more clear, his warriors charge the flank of my BG, which results in a draw (I told I was too reckless when moving them).
http://i112.photobucket.com/albums/n169 ... 160015.jpg
In my turn, I bestow KB on the cauldron (in order to be more efficient fighting the DP). Well, not too much luck in the challenge, which occurs between the Prince and the Hag. I roll my seven attacks only to discover that I can’t reroll to hit, because his lord’s armor requires successful to-hit rolls to be rerolled. I get one auto-wound, and another two hits, which don’t score a killing blow. The lord saves all wounds, and then uses the talisman that allows to re-roll all to-hit and to-wound, killing by hag. This makes the witches lose their ASF (no more banner), leading to their ultimate slaughter in the hands of the scary elven horses.
The horse sorceress, meanwhile, gets out from the spear unit and unsuccessfully tries to cast some nastiness, which all gets dispelled. All sorceresses cast something, and I get one dispel scroll burned (the other one also got burned – in my previous magic phase). The Supreme Sorceress also prepares to charge the RBT on the hill next turn. Left-flank dark riders prepare to play cat and mouse with the lion chariot.
On the right flank, my COK rally and face the BSB of doom. BG lose to spearmen, but hold. Crossbow elves kill one DP. Dark riders move towards the right-flank RBT.
http://i112.photobucket.com/albums/n169 ... 160016.jpg
Turn 3
Center: when we check the line of sight of the Dragon princes with his lord, we find out that they actually do see the warriors (whom I should have moved out of the line of sight of the DP, of course – but I expected the DP to get spanked by three naked ladies). So, he declares a charge against the warriors with his DP and chariot. I flee and get run down (of course; I fled only to avoid giving the +100 VP for the banner). The eagle, at the same time, charges my horse sorceress, who flees.
On the left flank, dark riders flee from the lion chariot. The sorceress’s Pegasus gets shot out from her by bound Fury of Khaine (but later, the RBT just knocks one wound off her). On the right flank, my BG get charged by DP, who kill all but the champion (who stands firmly).
On my turn, I fail two stupidity tests. One was for the cold ones, who might have charged the BSB. The other one was for me. Although the Pegasus died, I though that my Supreme Sorceress is a chick cool enough to kick some Asur crewmen in the nuts. Despite the fact that they had higher ground, and my sorceress only had one attack (so it was not impossible for her to win the combat). Well, I declared that charge, which has cost me the sorceress (who, although with six wounds drained from the nearby spearmen, lost combat by two, rolled 8 for break test, and was caught by the crewmen). OK, just today I was reminded by one friend that warmachine crew can’t pursue, but the mistake I made is still very big - especially considering that had I instead moved into the wood, I could not only save my beautiful general from dying but also drain some life from the nearby expensive unit of swordmasters.
On the left flank, I rallied my sorceress and DR, and the sorceress knocked off another wound from the lion chariot. On the right flank, I countercharged the DP with my crossbow warriors and won the combat by one or two, which wasn’t enough to break them. I also move my dark riders to the right-flank RBT.
Turn 4
http://i112.photobucket.com/albums/n169 ... 160017.jpg
My L2 is charged by the lion chariot and eagle, and is eaten. My crossbows are charged by the tyranoc chariot and are eaten. My COK get charged by the BSB and are outdoomed (I mean, he broke them and caught them). My dark riders near the RBT get shot to bits, with only the musician surviving.
On my turn, I charge the RBT with the musician. No kills to either side, so I win the combat by one (music). The RBT doesn’t break.
In turn five, his BSB charges my remaining dark riders, and his General’s DP charge the remaining DR musician, which ends the battle. I get VP for one eagle and half of a lion chariot. He gets VP for all my army, two banners, four quarters, general and two Monuments of Glory. It’s a Massacre in his favour.
Conclusions
I have already pointed out some of my own tactical mistakes during the report, but that’s not the most important thing: I actually got some insight into the usage of a Magic Heavy army.
As was evident from the course of battle, the magic didn’t do almost anything for me. The main reason is that I haven’t yet got used to the dynamics of a magic heavy army. It’s very important to understand (and I have finally understood it) that the main pain that a magic-heavy army dishes out is in turns 4-6, because before that the opponent usually has some of his magic defenses left. This simple fact means two things:
1. One shouldn’t rush to get into combat too fast. The whole dynamic of the game should be a bit more defensive (which doesn’t necessary mean sitting back; it means more diversion, more asymmetric deployment, more march-blocking and manoeuvres)
2. One should pay a great deal of attention to the protection of own spellcasters during the first turns of the game. If they get to compromising positions, the opponent can kill them, thus reducing the pressure that the magic has.
In the example of the current game, I should have probably deployed the majority of my troops on my right flank (as it was well protected from the hill in Daniel’s deployment area), and put quite some diversion units on the left flank and center.
I’ll try to use these two principles in the next battles I play with my magic-heavy force. And I welcome all comments, especially those that point to some other tactical mistakes I had and how to alleviate those. Learning the ways of magic-heavyness is not easy, but it will hopefully bear fruit over the course of the next few months.
Lakissov's Magic-Heavy BLog: updated Jan 03 (win vs WoC)
Moderator: The Dread Knights
-
Lakissov

- Malekith's Best Friend
- Posts: 1180
- Joined: Tue Jun 06, 2006 12:31 pm
- Location: Tallinn, Estonia
- Contact:
Lakissov's Magic-Heavy BLog: updated Jan 03 (win vs WoC)
Last edited by Lakissov on Fri Jan 02, 2009 10:26 pm, edited 6 times in total.
-
Dyvim tvar

- Lord of the Dragon Caves

- Posts: 8372
- Joined: Wed Jan 01, 2003 6:34 pm
- Location: The Dragon Caves of the Underway (Indianapolis IN)
- Contact:
Re: Learning to use Heavy Magic: massacred by Asur @ 2500 pt
Lakissov wrote:1. One shouldn’t rush to get into combat too fast. The whole dynamic of the game should be a bit more defensive (which doesn’t necessary mean sitting back; it means more diversion, more asymmetric deployment, more march-blocking and manoeuvres)
2. One should pay a great deal of attention to the protection of own spellcasters during the first turns of the game. If they get to compromising positions, the opponent can kill them, thus reducing the pressure that the magic has.
True words of wisdom.
One other thing is that I don't think your army has an optimal build to go magic-heavy.
In order to serve your first goal of delaying engagement, you need to slow the enemy advance. In this regard, I think your list should have more Dark Riders and fewer Harpies. Although Harpies are great for march blocking, Dark Riders excel at bait-and-flee tactics since they can rally and do it again. I would have 3 units of Dark Riders and 2 units of harpies rather than the reverse.
Also, just having more units of troops would help serve both of your goals. More units equals mroe places to hide, and also more threats that the enemy has to be careful of when advancing. I'm a big fan of chariots in a magic-heavy army since they pack a lot of punch for thier price. Their 14" charge range also helps you serve the goal of delaying the enemy advance since the enemy has to be careful of charged instead of just moving forward without concern.
In order to get points for more troops, I would think about dumping the Cauldron. Although I like the Cauldron, In this case I think the points are better spent elsewhere. I think you have anough points tied up in characters already.
Truly These are the End Times ...


Thanks for the report!
The problem of getting magic-heavy is that some armies have strong anti-magic. I know well Dwarves and High Elves who are very good for that (and RoH Druchii!).
In order to overcome their natural magic resistance, you need to litterally submerge them with magic (I call that the magic tsunami).
D.R.A.I.C.H. Best use of Power of Darkness
Then, after casting PoD (assuming it is not dispelled), you should be able to cast easily 21 dice in average each turn. 8 spells to cast (plus your 4 PoD, if not dispelled).
No magic defense can resist that.
The opponent must therefore:
- dispell PoD and suffer the remaining other spells
- hope you miscast (and it will happen - a lot!)
- kill quickly your sorceresses.
In order to counter the opponent's anti-strategy, you must:
- cast as explained in the excellent thread
Game-Winning Magic in 7th Edition Warhammer
- avoid contact (many spells do not work in melee)
- outmaneuvre the enemy so as to avoid letting your sorceress charged/sniped/spelled.
- never move your sorceresses out of their babysitting unit (the opponent always find somehow a way to charge/shoot/spell them)
- get bounded spells (cloak).
So the design of your army turns around
- the 4 sorceresses
...- on a dark steed, they can still join an infantry unit,
...- footed if you want to hide inside a building, which is a very good option
...- or on a pegasus (which is not a large target)
- their babysitting units (spears for the dagger, Mxb or RBT for others),
- plus some flankers to protect from outmaneuvering (chariots, DR),
- some harpies to block LOS, prevent double-marching or sniping and take care of light flyers,
- some shooters (make good babysitting units as well) to kill the fast cav and the flying monsters (RBT are a must)
- and... don't forget some terrain to slow down the enemy (streams and other linear "obstacles" are excellent because they slow down but do not block line of sight for magic; buildings are excellent for infantry-babysitted sorceresses; hills are excellent for RBT- or MxB-babysitted sorceresses).
Conclusion:
In the past, magic was well known not to be able to win games alone.
It becomes less obvious as we can now cast so many more spells than we used to.
But still, magic has to be backed up by some shooting (both are useful at long distance) and a lot of maneuvering, and finally some melee capability to take care of what remains.
The problem of getting magic-heavy is that some armies have strong anti-magic. I know well Dwarves and High Elves who are very good for that (and RoH Druchii!).
In order to overcome their natural magic resistance, you need to litterally submerge them with magic (I call that the magic tsunami).
D.R.A.I.C.H. Best use of Power of Darkness
you were missing a 4th sorceress with the Darkstar Cloak.L4 on Pegasus with PoK and bound PoD
L2 on steed with ToF and scroll
L2 on foot with dagger and scroll
Then, after casting PoD (assuming it is not dispelled), you should be able to cast easily 21 dice in average each turn. 8 spells to cast (plus your 4 PoD, if not dispelled).
No magic defense can resist that.
The opponent must therefore:
- dispell PoD and suffer the remaining other spells
- hope you miscast (and it will happen - a lot!)
- kill quickly your sorceresses.
In order to counter the opponent's anti-strategy, you must:
- cast as explained in the excellent thread
Game-Winning Magic in 7th Edition Warhammer
- avoid contact (many spells do not work in melee)
- outmaneuvre the enemy so as to avoid letting your sorceress charged/sniped/spelled.
- never move your sorceresses out of their babysitting unit (the opponent always find somehow a way to charge/shoot/spell them)
- get bounded spells (cloak).
So the design of your army turns around
- the 4 sorceresses
...- on a dark steed, they can still join an infantry unit,
...- footed if you want to hide inside a building, which is a very good option
...- or on a pegasus (which is not a large target)
- their babysitting units (spears for the dagger, Mxb or RBT for others),
- plus some flankers to protect from outmaneuvering (chariots, DR),
- some harpies to block LOS, prevent double-marching or sniping and take care of light flyers,
- some shooters (make good babysitting units as well) to kill the fast cav and the flying monsters (RBT are a must)
- and... don't forget some terrain to slow down the enemy (streams and other linear "obstacles" are excellent because they slow down but do not block line of sight for magic; buildings are excellent for infantry-babysitted sorceresses; hills are excellent for RBT- or MxB-babysitted sorceresses).
Conclusion:
In the past, magic was well known not to be able to win games alone.
It becomes less obvious as we can now cast so many more spells than we used to.
But still, magic has to be backed up by some shooting (both are useful at long distance) and a lot of maneuvering, and finally some melee capability to take care of what remains.
Winds never stop blowing, Oceans are borderless. Get a ship and a crew, so the World will be ours! Today the World, tomorrow Nagg! {--|oBrotherhood of the Coast!o|--}
-
Lakissov
- Malekith's Best Friend
- Posts: 1180
- Joined: Tue Jun 06, 2006 12:31 pm
- Location: Tallinn, Estonia
- Contact:
The composition of my army is the way it was, because I am currently trying not only to learn to use magic, but at the same time testing a concept that I personally call "Army of Versatility", where the units can provide different results when used together. I suppose that the Cauldron is a source of versatility per se, especially when there are units with either high strength attacks, or many attacks (hence the assassin, the BG, the shades and the COK in the army list). Magic is also part of this same concept, because it can serve as a source of versatility - I should be able to always choose the most efficient lores against a certain army, and depending on the spells I rolled use a tactic that fits this spell selection best.
So, I don't have the intention to go all out on magic - with four sorceresses. In a 2000p list I'll only use two, and in 2500p I'll also have the dagger caddy.
However, I do see now that an additional unit of dark riders (instead of harpies) would be quite useful in this army. Thanks, Dyvim, for pointing this out. In addition to being a unit for slowing the enemy down by fleeing, rallying and repeating, they could be a good host unit for my sorceress on steed against some opponents. I shall think what I could drop to get the points for upgrading a unit of harpies to dark riders.
@Calisson
Thanks, that's an interesting article. I think I should replicate the exercise myself on paper, this should give me a slightly better understanding of the the use of PoD.
-
Drek

- Malekith's Best Friend
- Posts: 1031
- Joined: Mon Jul 21, 2003 4:48 pm
- Location: Naggaroth...where the ice cream never melts
I think maneuverability is a key to magic heavy, and having that COB parked in the middle just makes it a sitting duck. I'd say more DR, more RXB, and make the assasin shooty. Oh- and a hydra, just because they rock.
I tried 4 casters at 2250, and I just found it to be a bit much. I just never found that I got the full utility out of all four, though I will admit that I never gave the 3rd lvl 2 the Darkstar cloak. Other than that, my setup was the same as yours, and I just found that 4 casters was too much.
I tried 4 casters at 2250, and I just found it to be a bit much. I just never found that I got the full utility out of all four, though I will admit that I never gave the 3rd lvl 2 the Darkstar cloak. Other than that, my setup was the same as yours, and I just found that 4 casters was too much.
-
Dyvim tvar
- Lord of the Dragon Caves
- Posts: 8372
- Joined: Wed Jan 01, 2003 6:34 pm
- Location: The Dragon Caves of the Underway (Indianapolis IN)
- Contact:
-
Comrade igor

- Daemon in Disguise
- Posts: 2101
- Joined: Thu Dec 04, 2003 9:13 pm
- Location: London, UK.
- Contact:
What points value do you play usually?
Assuming its 2000pts, I would recommend Lvl 4 /w Pendant, cloak, 2x powerstone, Lvl 2 with dagger, scroll, and an assasin with Rending stars, Manbane and cloak. Add another lvl 2 for higher point games (~2500). Pick an avoidance army with some anvil units (spears, asf BG), and plenty of shooting. Aim to soften up the enemy for late game charges, but be prepared for fast moving armies (use diverting and anvils to deal with them).
Assuming its 2000pts, I would recommend Lvl 4 /w Pendant, cloak, 2x powerstone, Lvl 2 with dagger, scroll, and an assasin with Rending stars, Manbane and cloak. Add another lvl 2 for higher point games (~2500). Pick an avoidance army with some anvil units (spears, asf BG), and plenty of shooting. Aim to soften up the enemy for late game charges, but be prepared for fast moving armies (use diverting and anvils to deal with them).
Best Regards, Comrade Igor.
Where there's a Whip there's a Way
Where there's a Whip there's a Way

-
Lakissov
- Malekith's Best Friend
- Posts: 1180
- Joined: Tue Jun 06, 2006 12:31 pm
- Location: Tallinn, Estonia
- Contact:
Yes, they are usable as an anvil to thwart some of their unit until reinforcement arrives (or until some other, more important unit gets out of the threat range). Besides, the army I am using is not really there to go against Asur, it's more of an all-comers list (e.g. the BG would be absolutely invaluable against VC, as they are almost the only unit that can play the war of attrition game)
-
Lakissov
- Malekith's Best Friend
- Posts: 1180
- Joined: Tue Jun 06, 2006 12:31 pm
- Location: Tallinn, Estonia
- Contact:
Game against Lizardmen: solid defeat
Today I played a game against Lizardmen. The battle was for 2000 points.
Lizards had:
Slann with five spells: Steed of shadows, bear’s anger, d6 S4 MM, 2d6 S4 MM, Metal #1
L2 skink with two scrolls
Nike with 1+ AS
3 x 10 skinks with MR spawning (2x with blowpipes and 1x with javelins)
3 kroxies
5 COK
Block of sauri (around 20, I guess)
3 salamanders
3 terradons
I have changed my list a little bit, following the comments I had received from Dyvim Tvar. Namely, I kicked out the CD champion from the BG and reduced shades by 1 body. With the points, I upgraded one harpy unit to dark riders and gave my assassin the cloak of twilight. So my list was the following:
L4 with bound PoD and PoK on pegasus (rolled chillwind, bladewind, soulstealer, BH)
L2 with tome and scroll on steed (rolled chillwind, WoP, BH)
Death hag BSB with ASF banner and +d3A
Assassin with ahw, rhb, manbane, +d3A and bound Steed of Shadows
3 x 5 DR with musicians
2 x 5 harpies
5 COK with AP banner and champion
12 BG
6 shades
Terrain and Deployment
We had two hills on the right side, a wood in my deployment zone, a wood near Katya’s deployment zone on the left flank, a swamp near her deployment zone in the center, and a rune-covered stone (counts as monument of glory) almost half way between the two woods.
Katya placed her kroxies in the swamp in the center, with salamanders flanking them to the right. Additionally, two units of skinks were on the right flank (one unit was scouts). On the left flank, Katya hid her slann behind a wood, with skinks inside the wood. She also had her block of sauri on the left flank, with COK even more left. The Nike was in the saurus block. Don’t remember where the skink was. Terradons were deployed behind the rest of the army.
I loaded my right flank with two DR units and the L2. Harpies hid behind the wood. Crossbowmen took also the right flank, stretched in a line. My L4 hid behind them. The left flank consisted of BG and COK. Shades hid behind the big stone. My death hag, whom I nominated as the general in this battle, went into the wood in the middle. I also totally forgot that I had another (3rd) unit of dark riders.
Pic 1
Turn 1
Katya got the first turn. She moved all her right-flank skinks closer to me. On the left flank, she started moving the slann closer to the sauri (she herself wondered why in hell she didn’t do it immediately). The rest of the army just moved forward a bit, with the skink priest joining kroxies. Her skinks on the left flank shot one of my shades dead.
Pic 2
In my turn, I reveal the assassin, bestow 5+ ward on shades and move them closer to Katya’s COK. On the left flank, I additionally move COK just a bit forward, and put BG in a flanking position, should she move her own COK forward. The harpies divide – one unit goes to left flank and the other to right flank. My crossbowmen move a bit to have a good shot at the center of the battlefield. I move L4 to a position where she’d be able to cast stuff on salamanders. On the right flank, I botch. Instead of moving both dark rider units into position where they could charge her closest skinks next turn, I move them more forward, leaving a path for the skinks to escape.
My magic is largely stopped, but Katya burns one scroll. In the shooting phase, my manbane assassin kills two COK with his rhb (hitting on 2’s, yeah), and the shades don’t do much damage. The crossbowmen shoot at the kroxies, and, as there are only three of them, some hits randomize to the skink priest, inflicting one wound on him (or maybe it were shades that did it, I don’t quite remember)
Pic 3
Turn 2
On the left flank, Katya moves her slann into the saurus block. She flies the terradons over the shades. I asked her how come she is not afraid of the great-weapon wielding maniacs that shades are, but she just says that with the shooting that shades+assassin can put out, the terradons will soon be dead anyways. Well, her choice.
On the right flank, the skinks move out of the way of dark riders, and unleash some shooting upon them. The unit that didn’t contain the L2 was reduced to only the musician, and failed the panic test, getting into the skinks while fleeing. The unit with the L2 is reduced to just three dark riders.
In the center, salamanders move to spout flames on my crossbowmen (I still wonder why not my Supreme Sorceress), killing six. Kroxies move a bit ahead, and Katya totally forgets to move her COK (initially she was thinking of charging them into my shades, but I told her that my assassin has ASF, and she changed her mind; probably rightly so, as his stand and shoot reaction had a good chance of killing at least an additional COK, and then the CC attacks could kill another 1-2, possibly wiping them out completely). The shooting by terradons and skinks takes the life of another shade.
Pic 4
Nice, I think to myself. There is this flank of the COK before my shades, so I might just charge it, kill all COK, and the overrun into the Slann-container; assassin to kill the Nike, and shades to kill some sauri, probably even breaking the unit. So, with this thought, I bestow KB on my shade unit. And then the bad thing happens. I declare the charge, and make the fear test. Yeah, right, I rolled 10. The shades just stand there looking nice and not being able to shoot.
The BG move to present a target for Katya’s COK and kroxies and cover the flank of my COK, who move a bit further forward to be able to charge kroxies, but all the while refusing these monstrosities the chance of charging them.
Left-flank harpies charge the terradons, cause some wounds and suffer two in return, still winning the combat, breaking the birdies and running them down. In the center, I make a combined charge against salamanders with my harpies and L4; they flee, and I catch them. Right-flank dark riders turn to face the skinks with javelins, ready to charge them.
Comes my magic phase. All spells against the right-flank skinks are stopped. Then L4 casts bladewind on the saurus block (actually, I have checked it now, and this was illegal – I didn’t have the line of sight to this unit; but, well, we did many things that were against the rules during the game, we just didn’t notice them while playing). Anyhow, the bladewind kills around 5 saurus and finishes off the skink priest.
And then I botch. With my assassin, I cast the bound steed of shadows (Katya already has no dispel dice left). I charge the COK. They hold. And I roll badly. I just made the calculations now, and the chance to score 2+ wounds was 81.9% - nevertheless, my assassin scores one wound only, and, due to the musician of the COK, loses by one; he is outnumbered by fear-causers, so has to roll snake eyes to stay put. Well, he doesn’t. In retrospect, even though the chance to kill the COK was high, it would have probably been a better decision to charge the saurus block straight away, trying to kill the Nike: less variables, less risks. Also, I think I should paint my assassin. Probably he will perform better then; it’s the third consecutive time that he just fails miserably, all the while having very good odds.
Pic 5
Turn 3
In her turn, Katya reduces my right-flank dark riders to just the musician and the sorceress, in the process also scoring a wound on my L2. In the center, her magic (which is still very powerful, especially now that the slann is in range of many good targets) kills the COK champion and six BG. Nike leaves the block (I actually recommended it to Katya myself, as this way this maniacal lizard is much more dangerous to my fragile units, with its 18” 360 degree charge range, plus the ability to get steed of shadows cast on him by slann).
The harpies are charged by the COK, and both units run off the board. The shades are reduced to the last survivor. The kroxies back out from my COK charge range.
Pic 6
In my turn, COK fail their stupidity test. BG move towards the sauri. I try to move so that they’d be more than 8 but less than 10 inches away, but judge the distances wrongly, actually. Harpies move away from the Nike, behind the BG.
L4 goes to the right flank, to fry some skinks. Dark riders with L2 on the same flank charge a unit of skinks with javelins and kill them. The magic reduces the blowpipe skinks to 4 models but fails to panic them.
Pic 7
Turn 4
Now, both the sauri and the Nike charge my BG. As told earlier, I misjudged the distances. However, a really funny thing happens. First the Nike rolls to hit. No hits. Then the Sauri roll. Not well enough to break through the armor and ward of my BG. Then BG hit with their 12 attacks, and win the combat by two. Unfortunately, nobody breaks.
Katya’s COK on the left fail their stupidity test. The Slann’s magic kills one crossbowman and reduces harpies to two, panicking them.
My turn comes, and I suddenly remember that I had one more unit of dark riders in my roster. Katya proposes that I still put them on the table then. To be nice, I put them in the line of sight of her COK, like she requested.
I don’t fail the stupidity test with COK, but still bestow the +1 attack blessing on the BG instead of COK. I was just unsure that they see the Nike and thus can charge him. Well, they actually can see him, yes. And so they charge. The dark riders charge the skinks in the wood, who flee, making it a failed charge for me.
Pic 8
My L4 charges the remaining four skinks and runs them down. L2 moves closer to the Slann. During the combat with Nike and Sauri, I score a wound on the Nike with COK (damn, if only I had bestowed the +1A on them, I could have the chance of killing him). I kill some sauri, but three BG die as well. I lose this combat by one but B and COK hold.
Turn 5
Katya’s COK charge my DR, who flee. The Kroxies charge my COK.
Pic 9
In the magic phase, I dispel just the Steed of Shadows, as I don’t want the Nike to escape this combat (I really hope to kill it, directing all possible attacks at him). The Kroxies, of course kill all my COK. Sauri and Nike finish off my BG.
Now Katya has the option of overrunning with her Kroxies. I tell her that if she does so, she will get straight into my Cauldron, and won’t have the option of stopping 1” away (yeah, when you have enemy in the way, you may stop, but when pursuing/overrunning after combat, you must charge anything that you pursue into). I also tell her that this small-looking unit has a lot of poisoned attacks. She still overruns. By the way, in the magic phase the slann scored a wound on my general.
Also, the skinks that fled away from my DR, fail to rally and run off the board.
Pic 10
In my turn, I rally everyone. My DR move out of Katya’s COK charge range, eyeing the rear of the Slann unit. The two remaining harpies act as a screen against a possible Nike charge on the dark riders.
Both of my sorceresses move closer to the Nike. Yes, he is now unengaged, so he is very dangerous to everything I have, and I put all possible magic on him. However, this lizardman army has a very good magic defense, and the few spells that went through can’t hurt the saurus (I was praying for Katya to roll a 1 at least once for the armor save, but that never happened).
In CC phase, I announce that by BSB-general Hag has the ASF banner. I have bestowed the +1A blessing upon this unit, also. So, my hag rolls for the rune of Khaine. Crap, only +1 attack. Well, ok. The Hag and the witches score five wounds on the kroxies, and the two remaining kroxies all target witches, killing one. Kroxies lose but hold.
Turn 6
Slann shows his flank to the DR instead of rear. The Nike charges my L2, and she flees. COK charge the harpies, and they flee.
Pic 11
Katya casts steed of shadows on the Nike on four dice, getting 14. I just don’t dispel, as I only have 4 DD, and I just wouldn’t be able to score 14. So he now charges my L4, who flees. My Death Hag and the remaining witch kill another Kroxigor, scoring two wounds. The remaining krox doesn’t score any wounds.
Pic 12
In my turn, I try to rally my L2 and roll 10. There go my L2 and the DR musician. I do rally the harpies and the L4, though, and I try to hit the Nike with all I have. He just doesn’t care.
My DR charge the Saurus block and kill two guys (they also had +1A from the Cauldron). The Death hag moves into contact with the remaining krox and kills him.
Turn 7
Well, we didn’t notice that it’s turn 7 already, and kept playing. I only now noticed this, actually.
Katya’s COK charged the flank of my DR. The nike charged my L4.
Pic 13
DR break, the L4 survives with one wound suffered.
Pic 14
My harpies charge the Sauri (why not). One dies but the unit holds. L4 miscasts and suffers one wound. The in CC she dies.
Pic 15
The result is a bit more than 750 points in favor of the Lizardmen. Solid defeat to the dark Elves.
Analysis
Well, the first lesson is that I shouldn’t rely on the assassin only to kill the nasty characters (like Nike, who simply means death to any of my units that he chooses to charge). That means, the L2 should have taken metal. If the Nike is not the one with 1+ AS, I have other things that take him out, while metal can still be a useful lore against Lizards (though it’s overall less useful than Dark lore against lizards). What does everyone think about this particular point?
Another conclusion is that I should practice a bit with determining distances. I have misjudged them several times in the game.
-
Lakissov
- Malekith's Best Friend
- Posts: 1180
- Joined: Tue Jun 06, 2006 12:31 pm
- Location: Tallinn, Estonia
- Contact:
This time I faced an army of Daemons of Chaos – my first time ever against daemons. The game was for 2000 points, with the only restriction being that no special characters may be taken.
The army I had was the following:
L4 on Pegasus with bound PoD and PoK – rolled spells number 1, 2, 5 and 6 of Dark Lore
L2 on steed with +1 spell and scroll – rolled 1, 4 and 6 from the Dark Lore
COB Death Hag BSB with ASF banner and +d3A – this time she was nominated as the general
Assassin with AHW, RHB, +d3A, manbane and bound Steed of Shadows
3 x 5 DR with musician
2 x 5 harpies
10 crossbow elves with shields
6 shades
5 COK with AP banner and champion
12 BG
The army I was facing was the following:
BT with 3+ armor, re-roll hits and S7
Tzeench L2 that knows all spells of one lore (fire magic was chosen)
=> goes into 10 horrors with some banner, I guess a non-magical one
Tzeench L2, don’t know the items (spells rolled – the small and big magic missiles)
=> goes into 10 horrors with no upgrades
Nurgle L1 with Noxious Vapors (enemies strike last) and Nurgle Rot on Palanquin
=> goes into 10 plaguabearers
2 x 5 flesh hounds
5 furies
Fiend of Slaanesh
Terrain and Deployment
The battlefield was very open – the whole center was completely uncovered. In my deployment zone, there was a building with two floors in the middle, right on the edge of the deployment zone (ideal for hosting my crossbow warriors). On the very far right flank of my deployment zone was a small wood. On the left flank, almost on the edge of the table again, there was a large wood, in my half of the no-man’s land. In Sergei’s (my opponent’s name) deployment zone, there were two hills – the one on the right (from my point of view) was treated as open ground for the purpose of movement, while the one on my left flank was difficult terrain.
I knew that I’d put my shades in the left wood, so I loaded that flank with only one additional unit of harpies and a unit of DR. As for the right flank, I placed two units of dark riders, a unit of harpies and both sorceresses there (hiding L4 behind the wood to protect her from magic missiles). I also figured that I’d better put my BG slightly to the left of the center, as my left flank was weaker with support troops.
Sergei had a unit of horrors on each flank (the one with fire magic herald on the right flank), and the plaguebearers in the center. Each flank had a unit of flesh hounds, while the left one was also reinforced by the fiend of Slaanesh. Furies were deployed centrally, and the BT behind a hill on the left.
I didn’t know where to put my COK till the very end, but when BT went behind the left hill, I placed them to the left side of the table, near my BG. Probably it was wrong. My logic was that COK are the only thing that can kill the BT. Now, thinking of it, they were not really very likely to get a charge on him anyway, so it would have been better to just get them to deal with the flesh hounds on one of the flanks.
My COB went behind the BG near the house. Looking at all the deployed troops, I decided to put the assassin with the shades – the closest spot to the BT (again, S6 manbane RHB bolts have a chance against the beast).
When I said that this was it, my opponent was quite surprised to see no hydra and no RBT. I guess, the reason why he took fire magic was that he expected to see a hydra, and the reason why he put his BT behind the hill was for the fear of RBT.
http://i112.photobucket.com/albums/n169 ... oyment.jpg
Turn 1
The daemons got the first turn. Sergei simply moved all his forces forward, re-deploying BT to the center (forgetting about the 10 RXB guys in the building). The flesh hounds ended up in positions looking outward, to prevent my fast troops from going around the flanks of the daemon battle line.
In Sergei’s magic phase, I use my 5DD to dispel all his flickering fire against my COK, and so the two magic missiles that were targeted against my DR containing the L2 see three riders fall. The panic test was successful, though.
http://i112.photobucket.com/albums/n169 ... /11DoC.jpg
The first turn is the most important one, and I screw up in it.
Mistake one: I charge the Flesh Hounds with my COK, and don’t reach them, exposing the flank to BT. Looking retrospectively, I see that I should have moved COK to a position where their flank would be covered completely by the BG, and from where they’d be able to move against the left flank flesh hounds in their next turn (all the while screening them with harpies from the incoming charge of the flesh hounds).
Mistake two: I misjudge the distance to which the furies can charge, and put my L2 with Dark Riders not far enough.
Mistake three: too paralyzed by the fear of the Flesh Hounds, I forget about the optimal use of dark riders against such units, and try to get them away from the charge range of the latter. What I should have done is putting them around 9-10 inches away from the hounds, then flee from the charge, if any, rally and move to the flank on the hounds.
Mistake four: I forget that flesh hounds have MR3, and plan to fry them with my magic (again, partly because I was too afraid of them as CC fighters). Due to this, I move my L4 to a position where she can only target the hounds, and regret it as soon as my magic phase comes and I remember about the MR3.
My harpies on both flanks move around the flesh hounds to march block them. My shades with the assassin get to the edge of the wood, with the assassin taking position out of the wood (in order to be able to fly). My dark riders retreat, as I now see that the BT is likely going to charge my COK. I also hide my Hag behind the building, not wanting her to meet the BT (yet).
My magic phase, due to the wrong positioning of L4 bears little fruit (although it’s still OK). I kill four horrors from the unit that had a banner and score a wound on the fire magic herald, and that’s it. The shooting, however, is much better. I kill one flesh hound on the left and score a wound on another one. The RxB in the house, hitting on fours, manage to score a grand total of one wound on the BT – not bad at all, I’d say.
http://i112.photobucket.com/albums/n169 ... 6/12DE.jpg
Turn 2
Sergei declared a charge with his Flesh hounds and Fiend against the shades with the assassin. I was very pleased with this charge declaration. I was intending to kill the Fiend with the Stand-and-Shoot reaction, and have the assassin score around three wounds on the hounds, most likely winning this combat by 1-2 at least. However, there was one small detail – the fear test; the one that I failed, rolling an 11. As the hounds had US8, and I only had 6 shades and the assassin, I had to flee. At least, I managed to get away.
The BT declared a charge against my COK, which fled. The BT then redirected the charge into the BG, who were in his way. He wounded six of them and I removed six models. And then, when the turn had been already done with, I remembered that I had bestowed the ward on the BG. I asked for my opponent’s permission to take these saves, and he agreed. I saved three guys, with one left to strike the BT; which he did, and with a miraculous result – two unsaved wounds on the BT. Saying that this made me happy means not saying anything.
The furies charged my L2 with the DR. They scored one wound on the sorceress, and also killed one DR. Attacking back, I kill one fury, taking away their outnumbering, and thus am not auto-broken (this time luck saved me; but still, moving the unit in a position where they can be charged by the furies was a bad thing – I should train the sense of distances more).
The rest of the daemons just move a bit ahead, with the exception of the right-flank flesh hounds. The daemonic magic kills two of the crossbow elves, and burns my only scroll.
http://i112.photobucket.com/albums/n169 ... /21DoC.jpg
In my turn, I again make a tactical mistake. I charge my right-flank dark riders into the front of the horrors, but again misjudge the distance, and only one dark rider touches the a horror (and I hoped to finish the herald, thus weakening the magic defense). Again, in retrospect, I’d have been better off doing this with magic, and getting the DR around the opponent’s flank to deal with flesh hounds.
This magic phase is actually again weak, and so is the shooting, which kills one horror.
In combat, my L2 and her unit kill the furies. BT kills 7 out of nine remaining BG. My DR kill one horror, but the unit loses no models from combat result.
Shades rally, but the COK don’t (and run away from the table). The COB is not any more afraid of the BT, and moves out to the open. DR make a run forward to the left flank. I totally forget to move my harpies.
http://i112.photobucket.com/albums/n169 ... 6/22DE.jpg
Turn 3
On the right flank, the flesh hounds counter-charge the dark riders and kill them all, choosing not to overrun. The BT finishes the BG (to the disappointment of Sergei, who doesn’t want to leave the BT out in the open with all the crossbows able to shoot at him). On the left flank, the hounds and the fiend face the center of the table. Daemonic magic is rather inefficient.
In my turn, I move the cauldron out of line of sight of the hounds, as I don’t want to get combo-charged by both the hounds and the BT (only the BT wound be OK, as he only had two wounds, and I hoped to take one more wound down with the RXB, which I actually managed to do; the chance was 53% to score 1+ wounds reducing the BT to one wound, and 16.8% to kill the him outright).
I charge the left unit of horrors with my DR and harpies. The harpies fail their fear test.
I charge the right unit of horrors with my L4 and harpies. The harpies fail their fear test.
In both cases, I lose and break. The DR are destroyed by fleeing through the BT, and the L4 flees 15 inches away. Again, this was two mistakes. The correct strategy would have been to move the dark riders to the flank of the horrors, and then flee from the flesh hounds, when they charge. The L4 should have moved to the point between the plaguebearers and the right-flank horrors frying the latter with magic missiles. Actually, L2 did move there, and she died from a miscast.
The shooting of my shades and assassin, who came out of the wood, was inefficient.
http://i112.photobucket.com/albums/n169 ... 6/32DE.jpg
Turn 4
Sergei wants to charge the crossbow warriors in the house with his fiend, and we think for quite some time if the fiend is an infantry unit or a monster. In the end we ask one friend to make a judgment, and he rules that it’s a monster, and thus can’t charge a building. Only now, before righting this report, I read through the daemons FAQ, and found out that the official ruling is that both the fiend and the beast of Nurgle are infantry. I will know this next time (apologies to my opponent).
As the crossbow warriors are left alone, Sergei moves his BT away from their reach, and moves the plaguebearers within charge range of the house.
The fiend turns to face the harpies and countercharge the shades, should they charge the flank of the hounds, which Sergei failed to move away from the charge range of the GW-wielding scouting maniacs.
The left-flank horrors move to cast at the shades, and kill three (panic test passed).
On the right flank, both the flesh hounds and the horrors move full distance to my L4. The hounds hope to charge next turn.
http://i112.photobucket.com/albums/n169 ... /41DoC.jpg
In my turn the shades with assassin, blessed with the +1A from the COB, declare a charge on the flesh hounds. And they fail their fear test, again (rolling 9; I hate the “killer, not a leader” rule).
My left-flank harpies move away from the charge arc of the fiend and march-block the horrors.
The right-flank harpies do the extra-nasty trick of screening my L4, who rallied but couldn’t move anywhere, from the charge of the flesh hounds. I just love skirmishers for being able to do this, especially the flying skirmishers (just in case if someone doesn’t know what I’m talking about: the trick is about putting you flying skirmishers between the unit you want to protect and the unit that wants to charge them; it’s important that the closest visible skirmisher for the charger would be on a line, which goes from the center of the charging unit completely away from the unit you want to protect; then, the charger can’t charge the unit you are protecting, and can charge the screening unit, which flees; due to the rules for skirmishers fleeing, the fleeing unit moves in the same direction as the closest visible skirmisher – meaning away from the protected unit, forcing the pursuers to miss that unit as well). Hence I sacrificed my harpies (who landed in a wood after fleeing), but saved the L4.
L4 reduced the horrors she was facing to one horror and one herald. The COB moved within charge range of the horrors but not the plaguebearers (ASF hags don’t like to strike last).
Turn 5
Right-flank hounds charge the harpies, who buy the life of L4 with their sacrifice. Plaguebearers charge my crossbow warriors and rape them (here we didn’t quite know the rules for buildings, and rules that all crossbow elves are in base contact with the herald; as I checked now, only one model is assumed to be in base contact). BT charges the lone dark rider that I forgot to move in the last turn (the one that was together with the L2 that had blown herself up.
Both the fiend and the flesh hounds on the left flank turn to face my COB.
On the right flank, the herald takes two wounds off my L4’s pegasus.
http://i112.photobucket.com/albums/n169 ... /51DoC.jpg
I move my shades closer to the hounds and do some inefficient shooting. I rally my fleeing crossbow elves. I move my L4 closer to the house with the plaguabearers in it (we forgot actually at that point that plaguebearers couldn’t have occupied the building, but it didn’t matter really, as they couldn’t charge my COB in either case). So my L4 faces the horrors with the fire herald, and kills the herald by a magic missile; she also gets one wound by killing a horror from the second unit with soul stealer (my opponent chose to stop other spells – the other magic missile and the bound steed of shadows of the assassin, iirc).
That horror unit had also been charged by harpies in the flank. The harpies kill one horror, and suffer no wounds themselves. With no rank bonus for the horrors (due to the one horror killed by soul stealer), harpies win by one, but no more horrors die. Again, this was a mistake to make this charge.
The shooting by the assassin and the shades is inefficient.
Turn 6
Right-flank flesh hounds screen the last remaining horror from the unit with the banner. BT moves to a point where my L4 would have to take a terror test, while BT would claim a quarter. Horrors kill one harpy; the harpies break, and horrors fail to catch them.
The flesh hounds on the left flank and the spawn are both looking at the COB now. They think a bit. Then they decide that they don’t want to die, and turn away, facing the shades with assassin (I had bestowed the +1A on the COB last turn, so they’d get 15-17 poisoned hating attacks if they had charged the COB).
Now my turn comes.
The shades are looking at the flank of the horrors. I bestow +1A on them. They declare the charge… and again fail their fear test. Pathetic! The guys didn’t do almost anything useful the whole game, while they were in position where they can break the left flank of the daemons several times.
L4 moves a bit away from the BT, facing the now bigger unit of horrors. She casts the bound PoD, which my opponent now lets through (he only has 5 DD now, and still has to dispel the Steed of shadows yet). I get +4 dice. Then I take two to cast PoD, and get three dice. Now, with 11 dice, I start the casting. I cast doombolt on two dice on the horrors, but the spell fails. Soul stealer is cast successfully, and the dispel attempt fails. I take my four dice to cast Black horror (I intended to cast chillwind last, to have the chance of randomizing against the herald after some horrors die), and miscast. The peggy dies (on the picture, he is standing on the table, but this is because it’s the end of the game, and we don’t care too much to take the models away from the table any more).
http://i112.photobucket.com/albums/n169 ... 6/62DE.jpg
I lost by 500-something for the units killed, and another 400 because Sergei was controlling all four quarters.
Conclusions
The biggest conclusion is that magic can actually be very efficient. I have managed to do quite some damage, even though the opponent had seven DD.
Another very important conclusion is that the consideration of reducing enemy magic defense as soon as possible should still be secondary compared to the consideration of keeping support troops alive; suicide-charging the units with enemy mages is no guarantee of killing them, but it is an almost guaranteed loss of the support unit. This is especially true of armies, where wizards don’t carry scrolls, and killing one means simply one less DD for the opponent.
The third conclusion is that I should convert myself some more shades – nicer ones with wysiwyg great weapons – may be they will screw up less then. In the last two games they failed absolutely all their fear tests.
As always, comments and advise are very much welcome.
Last edited by Lakissov on Tue Dec 30, 2008 9:43 am, edited 1 time in total.

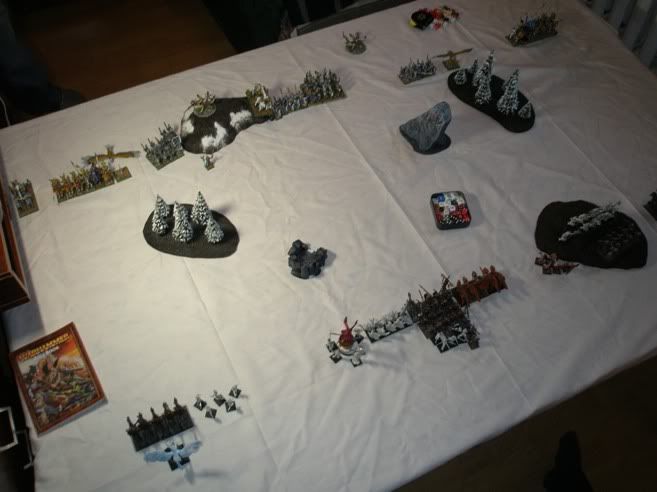
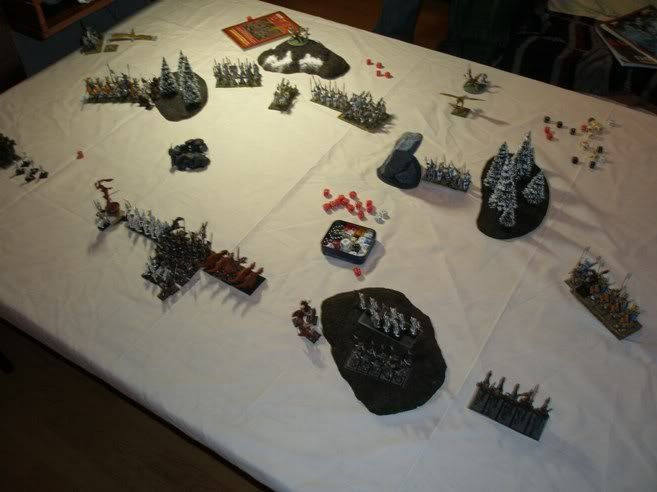
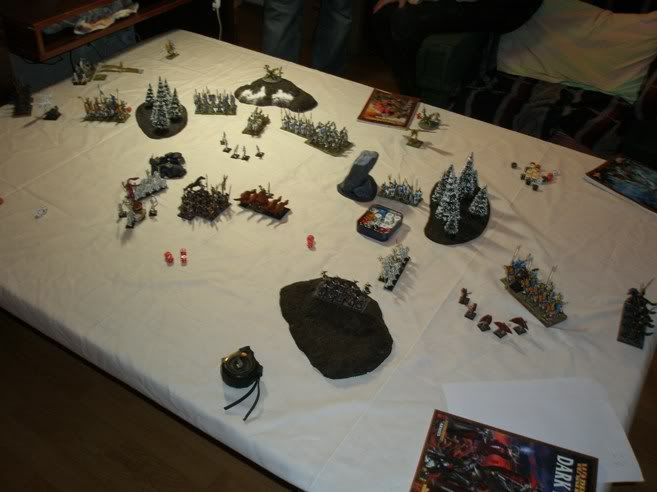
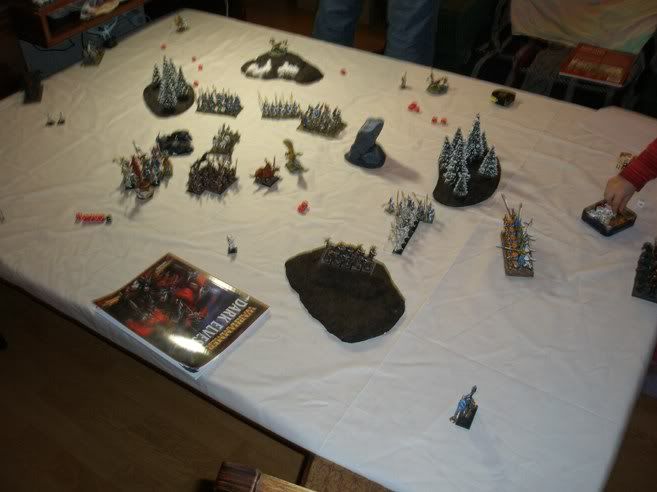
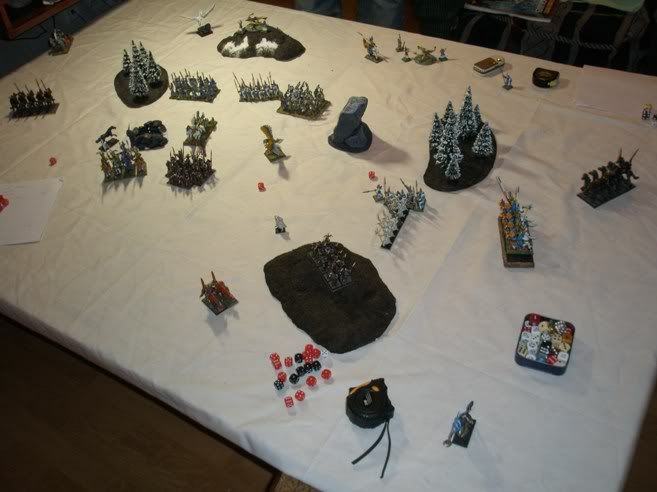
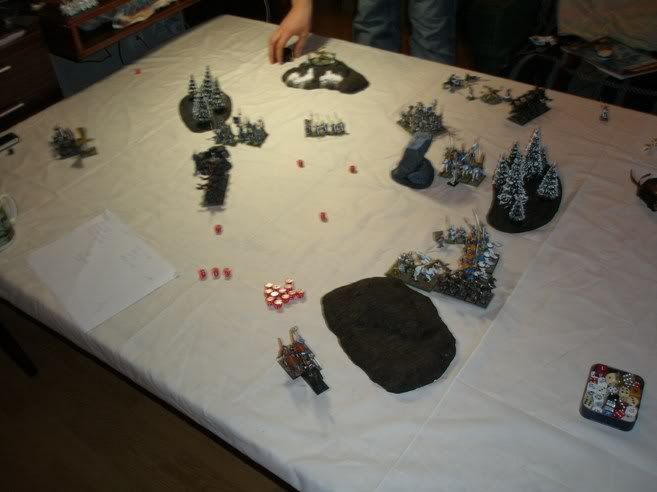
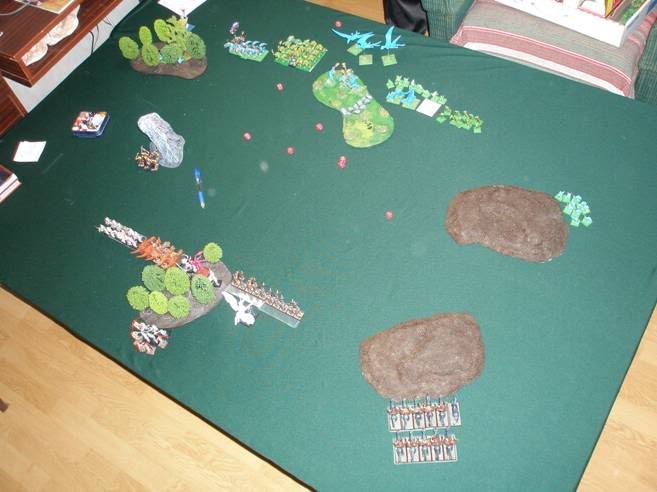
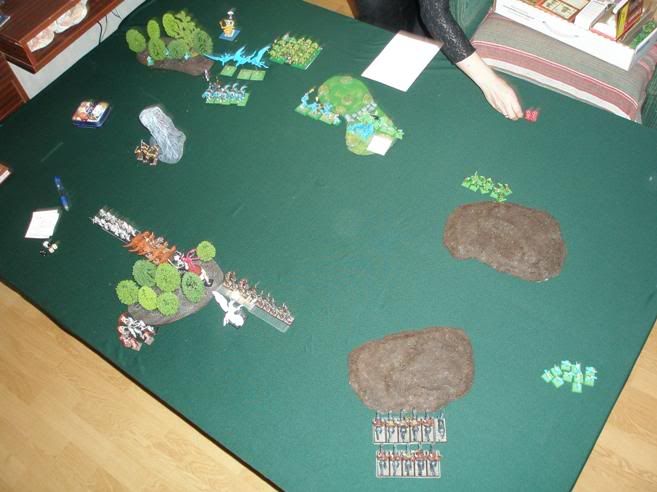
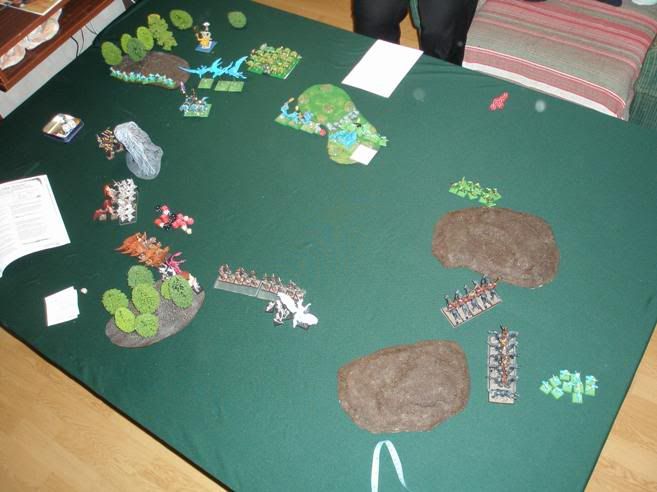
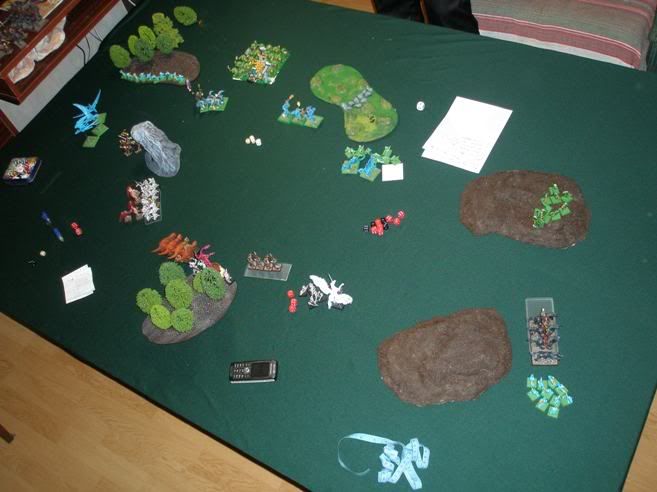
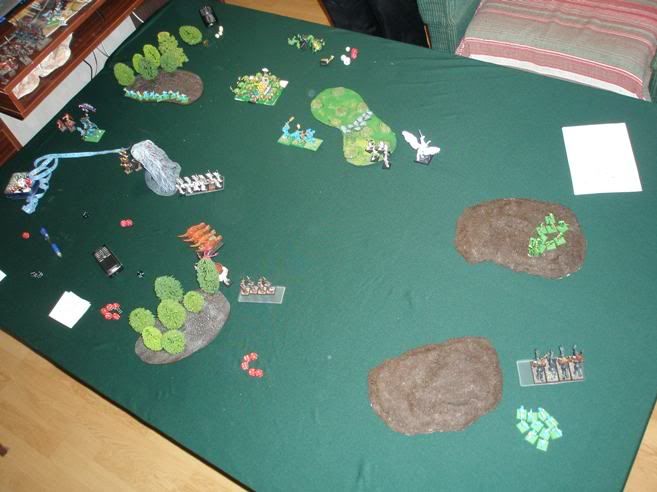
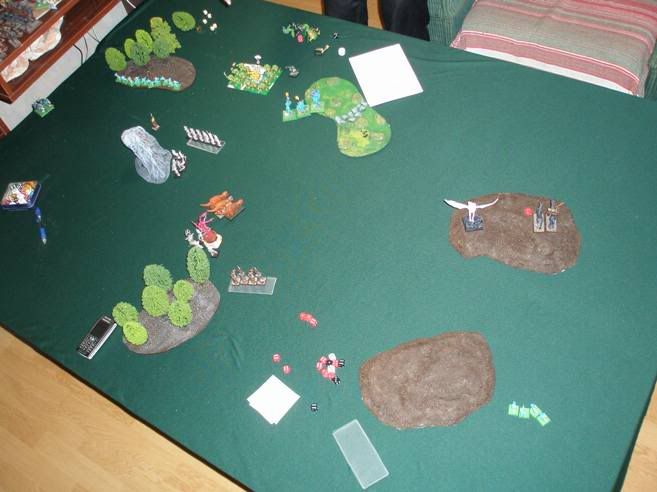
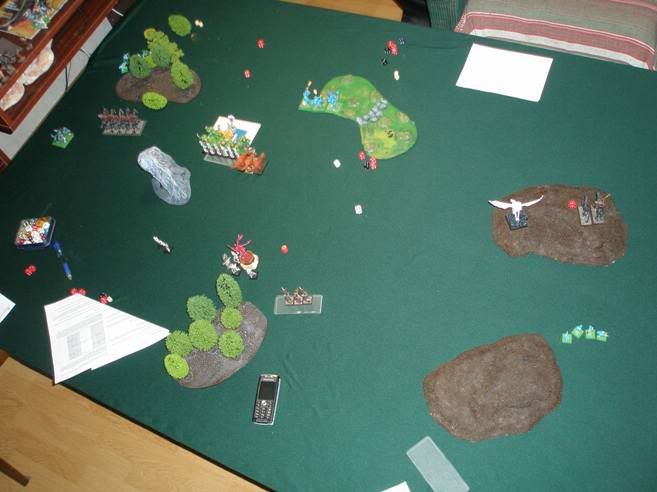
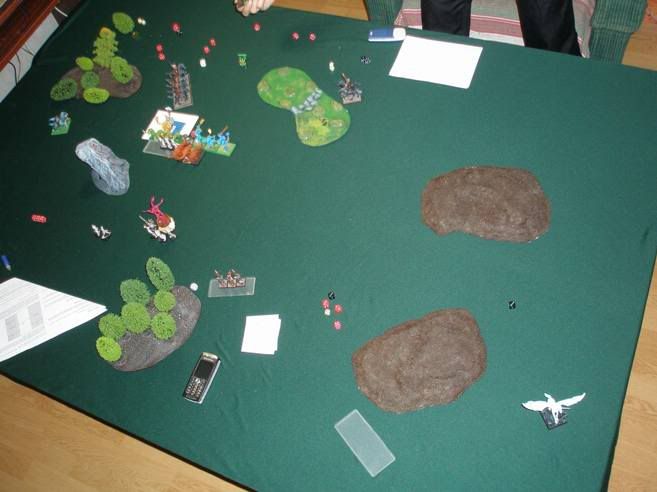
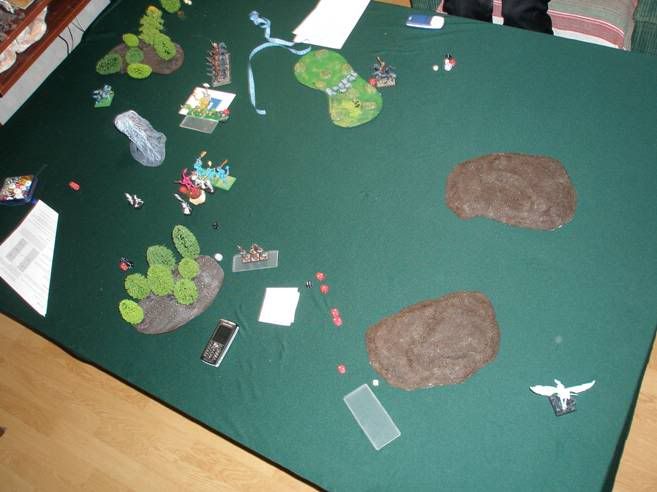
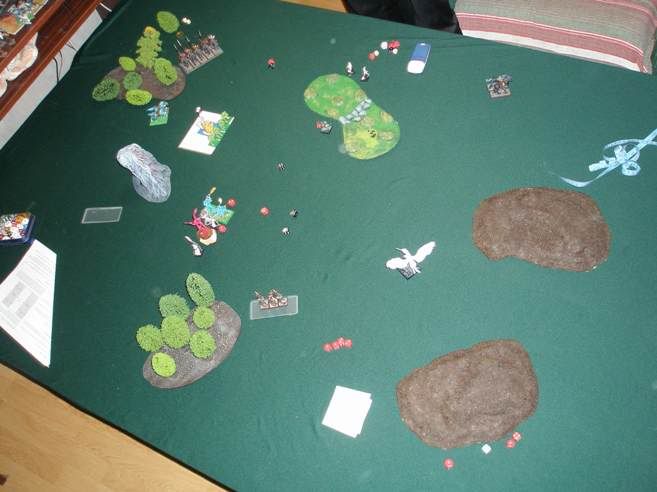
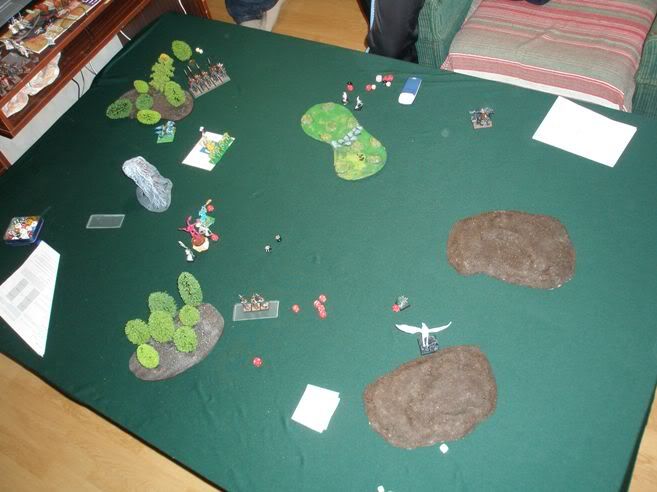
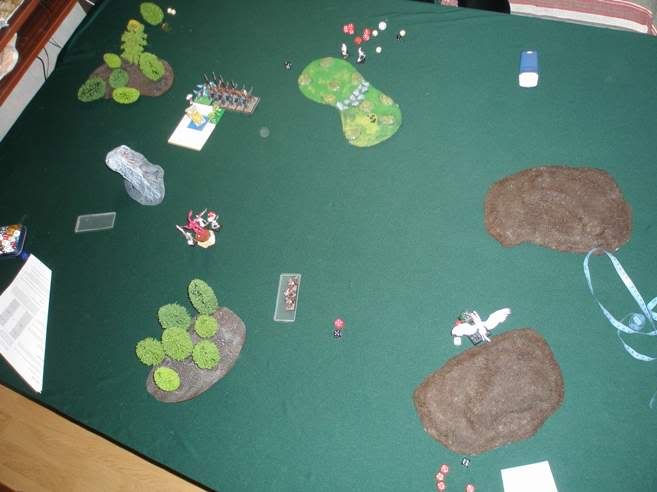
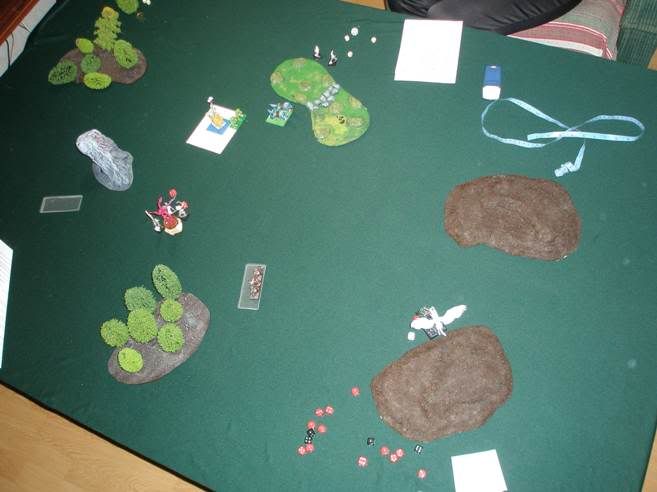
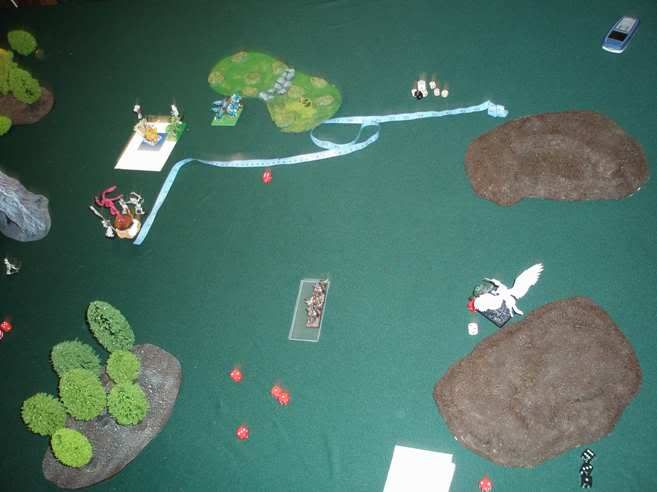
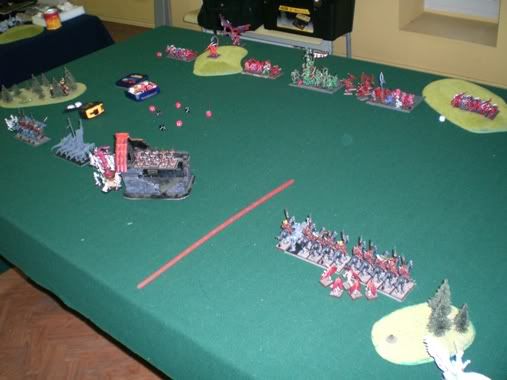
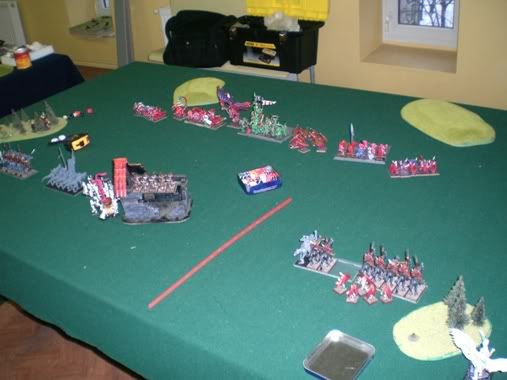
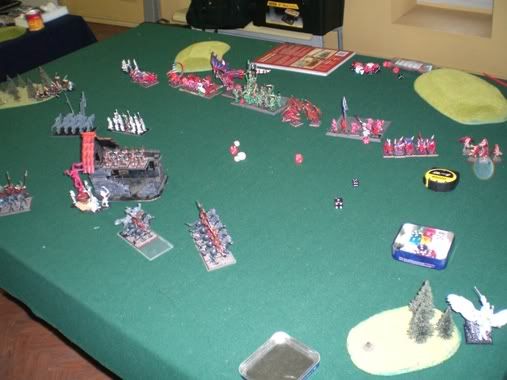
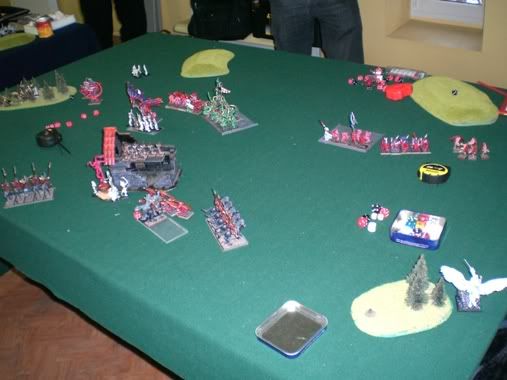
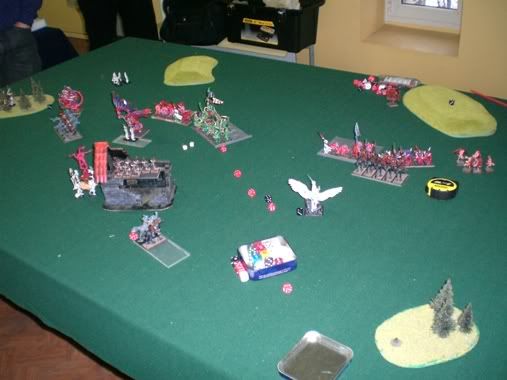
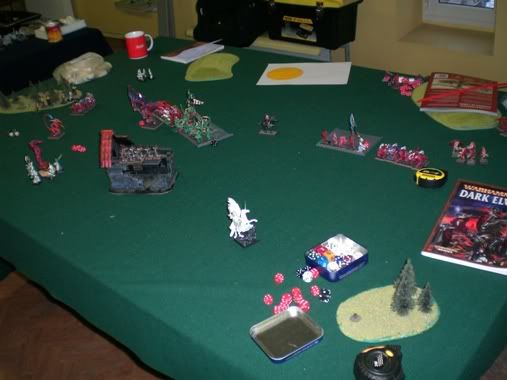
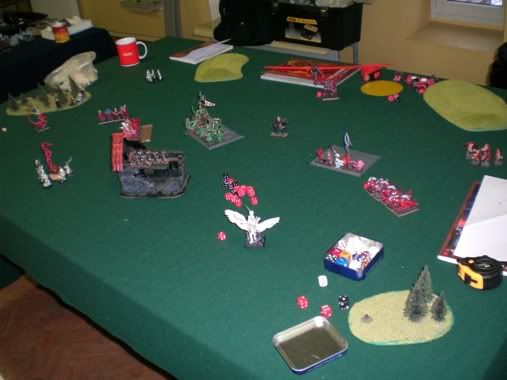
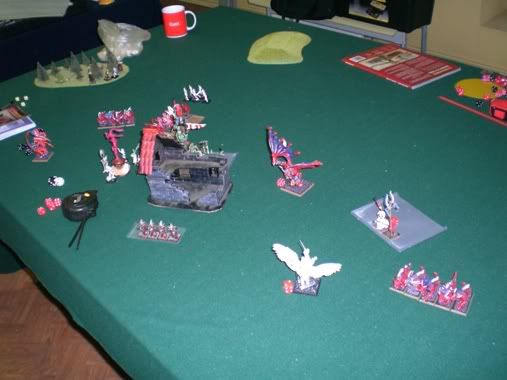
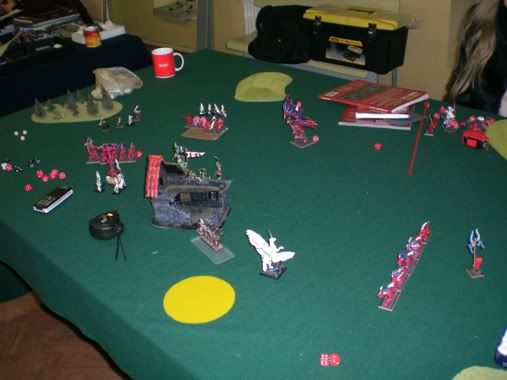
Thanks for the reports!
Don't give up on the magic heavy list, but if you really want to get some punch in the magic phase give your lvl 4 the black staff or even better the sacrificial dagger. The dagger requires a unit to kill though, I use a 15 man shieldless unit...
It seems like you plan the turns well but you're a bit unlucky with your dice... Maybe it's time to get a new set
Fantasy: Dark Elves, Dogs of War and Bretonnians 40k: Dark Eldar and Chaos Renegades, BFG: Dark Eldar, Epic: Dark Eldar, Man O'War: Slaanesh Chaos
My Dark Eldarblog:
http://stefan13.typepad.com/blog
My Dark Eldarblog:
http://stefan13.typepad.com/blog
-
Lakissov
- Malekith's Best Friend
- Posts: 1180
- Joined: Tue Jun 06, 2006 12:31 pm
- Location: Tallinn, Estonia
- Contact:
thanks for support
i definitely don't plan to give up on magic - with each battle I seem to be doing better and better (even if it not always shows in the results)
i already run my L4 with the staff (bound PoD is very helpful, meaning either additional +2-4 PD for me or -2DD for the opponent)
in the last game, though, it was not the luck that was the reason for the loss but several tactical mistakes (which I highlighted in the report). I guess, I made them mainly because daemons are a new army for me to face - I am pretty confident that the next time I battle against them I'll do significantly better
-
Lakissov
- Malekith's Best Friend
- Posts: 1180
- Joined: Tue Jun 06, 2006 12:31 pm
- Location: Tallinn, Estonia
- Contact:
Just yesterday I had a battle against the Asur. My opponent had a themed force, basing it around his Phoenix Guard.
Forces
Druchii:
L4 on Pegasus with bound PoD and PoK (Dark lore spells: 1, 2, 4, 5)
L2 on Steed with additional spell and DS (Dark lore spells: 1, 2, 3)
COB BSB Hag with ASF banner and +d3A
Assassin with +d3A, ahw, rhb, manbane and bound Steed of Shadows
2 x 5 Harpies
3 x 5 DR
10 RxB with shields
5 COK with AP banner and champion
12 BG, naked
6 shades
Asur
Caradryan
Foot BSB with halberd and heavy armor (not sure about magic items)
L2 with three spells and two scrolls
Hero on steed with No Armor Saves weapon, full mundane armor
9 Silver helms with FC
5 naked dragon princes
Around 24 spearmen with some banner
Around 15 phoenix guard with champion and Warbanner
Tiranoc chariot
10 Archers
2 RBT
I was a bit surprised to see no eagles in the army.
Terrain and Deployment
We had an interesting table indeed (even though I had left the majority of my terrain at another friend’s home last week, I managed to find some unpainted hills and some ugly trees at my home, plus an ugly cliff; what was interesting, though, is how the terrain scattered (we deploy it in a random fashion, determining into which sector each terrain piece goes, and then scatter each piece).
http://i112.photobucket.com/albums/n169 ... oyment.jpg
The right flank was loaded with only one hill, in my deployment zone. The left flank, on the other hand, presented an approximately 20” in diameter meadow encircled by a hill, two woods and a cliff – with the hill and the smaller wood dividing the table into two halves.
My opponent won the roll off for table side, but let me choose, as he wanted to place his troops later. I chose the side with two hills and deployed my shooting support on the hill overlooking the whole right flank. I also loaded this flank with my heavy-hitting cold ones and a unit of harpies for support. My L4 also went there, to eliminate the archers. Asur forces on the right flank were consisting of all infantry (Caradryan and caddy in Phoenixes, BSB in spearmen), a tiranoc chariot, DP, Archers and one RBT. The left flank had the Silver Helms with the mounted hero, and another RBT. I placed all my DR there (with my L2), and another unit of harpies. My BG and COB were deployed centrally, but BG were aiming to most likely protect the left flank. The shades too the position behind the ridge of the hill in the center – their main task was to catapult the assassin, if my opponent doesn’t dispel Steed of Shadows, and to just be an annoyance otherwise.
Turn 1
The Asur forces advanced at more or less full speed. The magic phase was inefficient, but the shooting phase took the life of four of my crossbow elves, one COK and three dark riders (off one of the units)
http://i112.photobucket.com/albums/n169 ... /11-HE.jpg
In my turn, I revealed my assassin in shades, and started to move my dark riders around the silver helms, who had gone far enough to allow me to run around their flanks unhindered.
http://i112.photobucket.com/albums/n169 ... /12-DE.jpg
Then I moved my BG to protect the left flank, and also moved my L2 carrying DR to cast at anything I want at the left flank. My shades moved forward, and so did harpies (the left unit being able to charge both RBTs). My COK moved back a bit, as they didn’t want to be combo-charged by the DP and chariot, and my L4 flew towards the archers.
In the magic phase, Martin (my opponent) had only three DD. I killed four of his archers with magic, and he scrolled the Soul Stealer on the DP. Magic by L2 had almost no effect. And then, when already all DD had been spent, I used my bound Steed of Shadows (which my opponent didn’t wish to scroll) to catapult the assassin into the right-flank RBT (which was threatening my L4). The assassin, of course, killed the crew.
Turn 2
http://i112.photobucket.com/albums/n169 ... /21-HE.jpg
The Silver helms charged the DR with L2, which, of course, fled into safety behind the back of the BG. Silver Helms declared an enemy in the way charge into the BG, and stayed there for a long time (killing four on the charge, with the remaining two killing the Silver Helm champion).
The archers scored a wound on the Pegasus, while the RBT killed two shades.
In the magic phase Martin took all his power dice to cast Drain Magic, and did so with irresistible force. And he kept doing this each turn, with irresistible force – with the exception of turn five, in which he simply got a high roll, and I scrolled the spell.
http://i112.photobucket.com/albums/n169 ... /22-DE.jpg
On the left flank, I kill an RBT with my harpies. I also moved my dark riders with L2 around the flank of the Silver Helms that got stuck, and move another DR unit to overlook the hill. My right-flank harpies charge the archers’ flank (killing one and hence winning by two, but not breaking the Asur).
COK now charge the Dragon Princes (they have been blessed with +1A). L2 tries Word of Pain against Silver Helms, but it’s dispelled. L4 scores one wound on the chariot with Doombolt. The Soul Stealer attempt by the L4 is scrolled. The assassin charges the chariot with Steed of Shadows, and kills it, overrunning into the Dragon Princes.
Probably it was a mistake to overrun into DP. The assassin killed none, and was killed himself. However, the COK still killed four DP, and ran the champion down.
Turn 3
http://i112.photobucket.com/albums/n169 ... /32-DE.jpg
The Phoenix guard charge by COB, which had previously moved towards them. The hag challenges, and Caradryan accepts. Of course, the hag kills him, and for that suffers two wounds (both saved by the ward). The two witch elves get killed by phoenixes, who won the roll-off. Still, the hag stands, as she is stubborn.
Harpies finish off the archers. The Silver helms still can’t break the BG, and the BG score one wound on the character in the helms.
In my turn, I charge both flank of the helms – one with my Dark riders plus sorceress, another with my dark riders and my shades (who get the +1A blessing). In the magic phase, Martin failed to dispel the word of pain, and due to this struggled to score any wounds at all. Needless to say, the helms are slaughtered. Unfortunately for me, I have to pursue in the direction of the spearmen, which had just moved to the position on the hill. I have to charge (because one doesn’t have the option of not charging when “pursuing into fresh enemy” – this option exists only in the case of “enemy in the way”)
My Hag again challenges, and the Phoenix champion refuses, so she just kills some phoenixes. The COK turn around, looking at the back of both the phoenixes and the spearmen
Turn 4
http://i112.photobucket.com/albums/n169 ... /41-HE.jpg
In the combat against spearmen, both my Dark Rider units get ultimately pwned, but manage to escape (the spearmen pursue only 3 inches). The shades, being in the way of this pursuit, flee.
Death Hag kills another four phoenixes.
http://i112.photobucket.com/albums/n169 ... /42-DE.jpg
COK fail stupidity, shades fail to rally (but both DR units rally), and the Hag suffers one wound from Phoenixes. My BG move into the front of the spearmen. My L4 manages to score a wound on the BSB with Bladewind.
In turn five, the spearmen charge the BG and win but get stuck, with just two BG surviving but the Asur BSB getting killed. I then charge their flank with my COK, and (this was the turn when the Drain Magic didn’t go off) manage to cast Soul Stealer on them, killing around nine or so (WoP was dispelled). Needless to say, the Spearmen break and are caught.
The hag in the remaining time kills the remaining phoenixes, but the scroll caddy doesn’t break and remains as the only survivor of the Asur.
Forces
Druchii:
L4 on Pegasus with bound PoD and PoK (Dark lore spells: 1, 2, 4, 5)
L2 on Steed with additional spell and DS (Dark lore spells: 1, 2, 3)
COB BSB Hag with ASF banner and +d3A
Assassin with +d3A, ahw, rhb, manbane and bound Steed of Shadows
2 x 5 Harpies
3 x 5 DR
10 RxB with shields
5 COK with AP banner and champion
12 BG, naked
6 shades
Asur
Caradryan
Foot BSB with halberd and heavy armor (not sure about magic items)
L2 with three spells and two scrolls
Hero on steed with No Armor Saves weapon, full mundane armor
9 Silver helms with FC
5 naked dragon princes
Around 24 spearmen with some banner
Around 15 phoenix guard with champion and Warbanner
Tiranoc chariot
10 Archers
2 RBT
I was a bit surprised to see no eagles in the army.
Terrain and Deployment
We had an interesting table indeed (even though I had left the majority of my terrain at another friend’s home last week, I managed to find some unpainted hills and some ugly trees at my home, plus an ugly cliff; what was interesting, though, is how the terrain scattered (we deploy it in a random fashion, determining into which sector each terrain piece goes, and then scatter each piece).
http://i112.photobucket.com/albums/n169 ... oyment.jpg
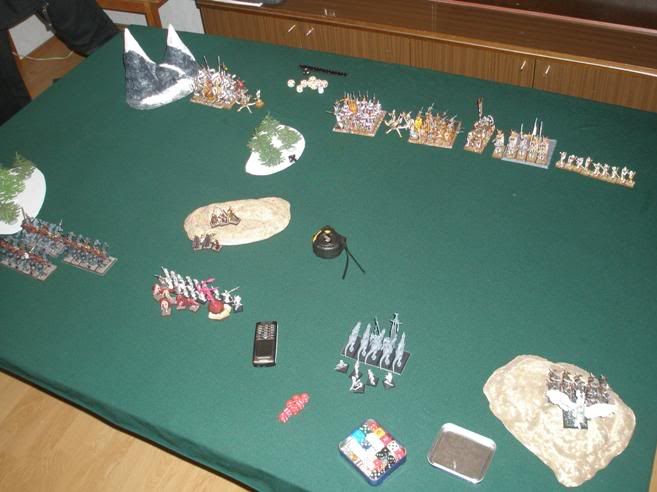
The right flank was loaded with only one hill, in my deployment zone. The left flank, on the other hand, presented an approximately 20” in diameter meadow encircled by a hill, two woods and a cliff – with the hill and the smaller wood dividing the table into two halves.
My opponent won the roll off for table side, but let me choose, as he wanted to place his troops later. I chose the side with two hills and deployed my shooting support on the hill overlooking the whole right flank. I also loaded this flank with my heavy-hitting cold ones and a unit of harpies for support. My L4 also went there, to eliminate the archers. Asur forces on the right flank were consisting of all infantry (Caradryan and caddy in Phoenixes, BSB in spearmen), a tiranoc chariot, DP, Archers and one RBT. The left flank had the Silver Helms with the mounted hero, and another RBT. I placed all my DR there (with my L2), and another unit of harpies. My BG and COB were deployed centrally, but BG were aiming to most likely protect the left flank. The shades too the position behind the ridge of the hill in the center – their main task was to catapult the assassin, if my opponent doesn’t dispel Steed of Shadows, and to just be an annoyance otherwise.
Turn 1
The Asur forces advanced at more or less full speed. The magic phase was inefficient, but the shooting phase took the life of four of my crossbow elves, one COK and three dark riders (off one of the units)
http://i112.photobucket.com/albums/n169 ... /11-HE.jpg
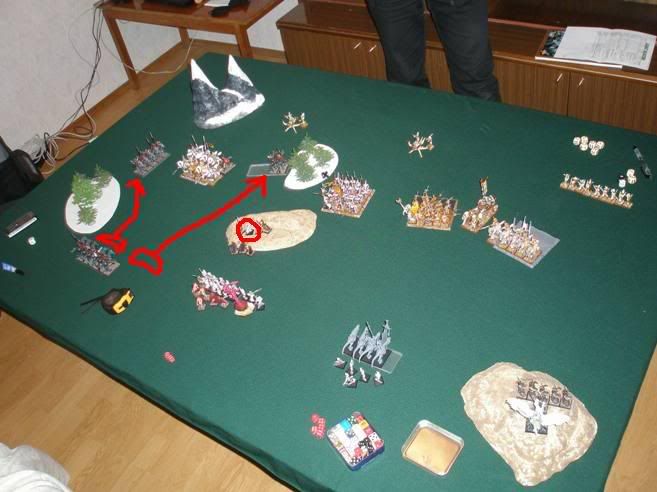
In my turn, I revealed my assassin in shades, and started to move my dark riders around the silver helms, who had gone far enough to allow me to run around their flanks unhindered.
http://i112.photobucket.com/albums/n169 ... /12-DE.jpg
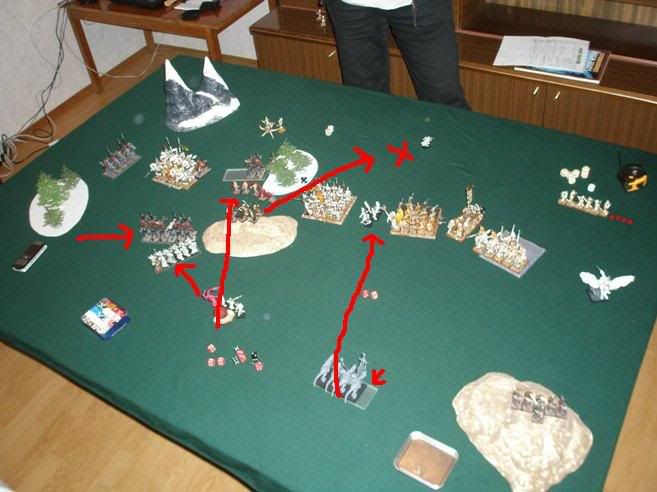
Then I moved my BG to protect the left flank, and also moved my L2 carrying DR to cast at anything I want at the left flank. My shades moved forward, and so did harpies (the left unit being able to charge both RBTs). My COK moved back a bit, as they didn’t want to be combo-charged by the DP and chariot, and my L4 flew towards the archers.
In the magic phase, Martin (my opponent) had only three DD. I killed four of his archers with magic, and he scrolled the Soul Stealer on the DP. Magic by L2 had almost no effect. And then, when already all DD had been spent, I used my bound Steed of Shadows (which my opponent didn’t wish to scroll) to catapult the assassin into the right-flank RBT (which was threatening my L4). The assassin, of course, killed the crew.
Turn 2
http://i112.photobucket.com/albums/n169 ... /21-HE.jpg
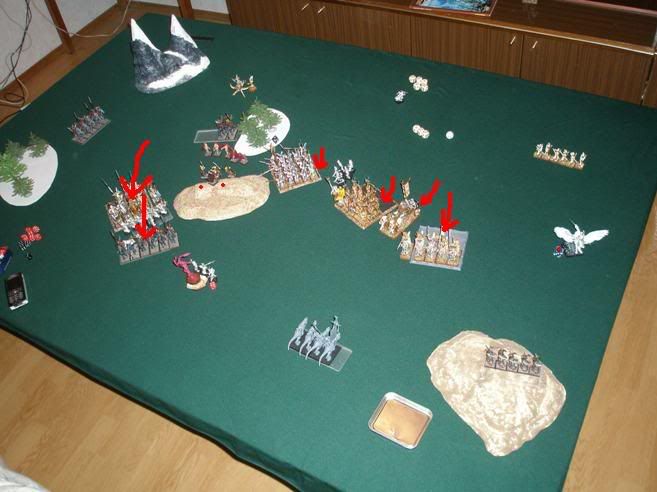
The Silver helms charged the DR with L2, which, of course, fled into safety behind the back of the BG. Silver Helms declared an enemy in the way charge into the BG, and stayed there for a long time (killing four on the charge, with the remaining two killing the Silver Helm champion).
The archers scored a wound on the Pegasus, while the RBT killed two shades.
In the magic phase Martin took all his power dice to cast Drain Magic, and did so with irresistible force. And he kept doing this each turn, with irresistible force – with the exception of turn five, in which he simply got a high roll, and I scrolled the spell.
http://i112.photobucket.com/albums/n169 ... /22-DE.jpg
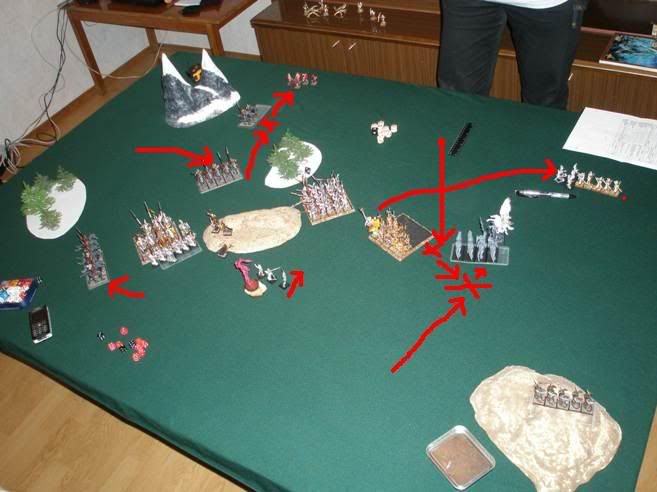
On the left flank, I kill an RBT with my harpies. I also moved my dark riders with L2 around the flank of the Silver Helms that got stuck, and move another DR unit to overlook the hill. My right-flank harpies charge the archers’ flank (killing one and hence winning by two, but not breaking the Asur).
COK now charge the Dragon Princes (they have been blessed with +1A). L2 tries Word of Pain against Silver Helms, but it’s dispelled. L4 scores one wound on the chariot with Doombolt. The Soul Stealer attempt by the L4 is scrolled. The assassin charges the chariot with Steed of Shadows, and kills it, overrunning into the Dragon Princes.
Probably it was a mistake to overrun into DP. The assassin killed none, and was killed himself. However, the COK still killed four DP, and ran the champion down.
Turn 3
http://i112.photobucket.com/albums/n169 ... /32-DE.jpg
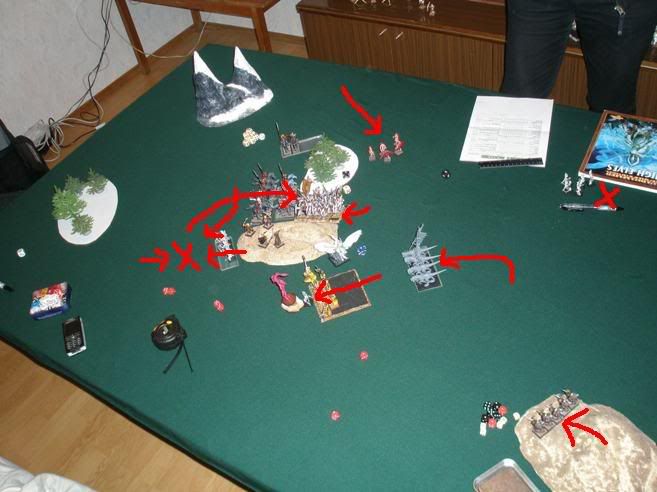
The Phoenix guard charge by COB, which had previously moved towards them. The hag challenges, and Caradryan accepts. Of course, the hag kills him, and for that suffers two wounds (both saved by the ward). The two witch elves get killed by phoenixes, who won the roll-off. Still, the hag stands, as she is stubborn.
Harpies finish off the archers. The Silver helms still can’t break the BG, and the BG score one wound on the character in the helms.
In my turn, I charge both flank of the helms – one with my Dark riders plus sorceress, another with my dark riders and my shades (who get the +1A blessing). In the magic phase, Martin failed to dispel the word of pain, and due to this struggled to score any wounds at all. Needless to say, the helms are slaughtered. Unfortunately for me, I have to pursue in the direction of the spearmen, which had just moved to the position on the hill. I have to charge (because one doesn’t have the option of not charging when “pursuing into fresh enemy” – this option exists only in the case of “enemy in the way”)
My Hag again challenges, and the Phoenix champion refuses, so she just kills some phoenixes. The COK turn around, looking at the back of both the phoenixes and the spearmen
Turn 4
http://i112.photobucket.com/albums/n169 ... /41-HE.jpg
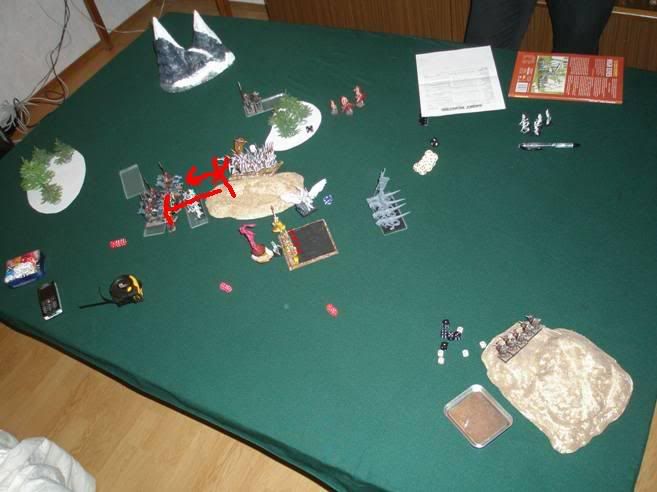
In the combat against spearmen, both my Dark Rider units get ultimately pwned, but manage to escape (the spearmen pursue only 3 inches). The shades, being in the way of this pursuit, flee.
Death Hag kills another four phoenixes.
http://i112.photobucket.com/albums/n169 ... /42-DE.jpg
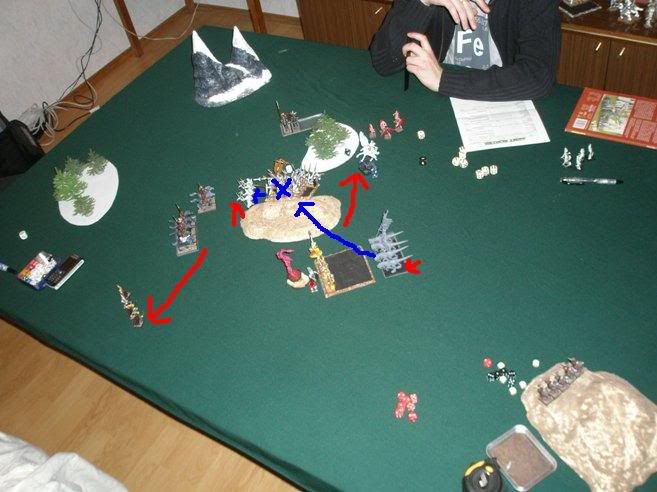
COK fail stupidity, shades fail to rally (but both DR units rally), and the Hag suffers one wound from Phoenixes. My BG move into the front of the spearmen. My L4 manages to score a wound on the BSB with Bladewind.
In turn five, the spearmen charge the BG and win but get stuck, with just two BG surviving but the Asur BSB getting killed. I then charge their flank with my COK, and (this was the turn when the Drain Magic didn’t go off) manage to cast Soul Stealer on them, killing around nine or so (WoP was dispelled). Needless to say, the Spearmen break and are caught.
The hag in the remaining time kills the remaining phoenixes, but the scroll caddy doesn’t break and remains as the only survivor of the Asur.
-
Lakissov
- Malekith's Best Friend
- Posts: 1180
- Joined: Tue Jun 06, 2006 12:31 pm
- Location: Tallinn, Estonia
- Contact:
here is a report of a small 1500-point battle against a friend of mine who is just learning the game yet, but to my mind learns very quickly; he plays Warriors of Chaos
Armies
Druchii:
L2 with dagger and scroll (rolled spells 1 & 2 in Metal Lore)
L2 with tome and power stone, on steed (general) (rolled spells 2(changed for 1), 4 and 6 in Metal Lore)
Assassin with ahw, +d3A, KB and re-roll 1's to wound
3 x 5 DR with music
2 x 5 harpies
20 warriors with FC and warbanner
10 RxB with shields
5 shades
5 COK with champion and AP banner
Chaos Warriors:
Tzeench L2 with +1PD on disc with 3+ ward against missiles (MM#1 and Pandaemonium)
Slaanesh L2 on steed with enchanted shield and scroll (general) (MM#1 and Delusions)
2 x 5 Marauder Horsemen with music, flails, axes and light armor
2 x 5 Dogs
2 Spawns of Slaanesh
3 x 5 Nurgle Knights, no upgrades
Terrain and Deployment
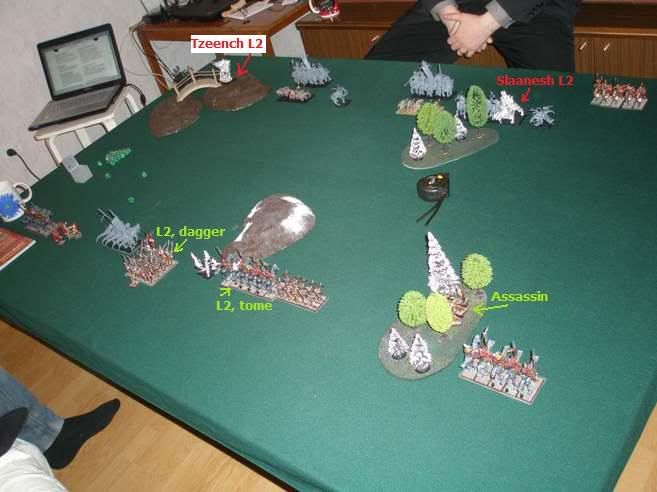
Well, the picture pretty much explains the terrain and deployment. When I was deploying, my biggest concern was about how much forces I may commit to my right flank (the one separate with woods). In the end, when I saw that only one of the spawns is there, I decided that I didn't have to put my sorceresses there, and that the combined forces of one dark rider unit, shades and assassin, and RxB should be enough to hold it.
Also, it's dificult to see on the picture, but behind the big hill in chaos zone, there is a unit of marauder horsemen.
Turn 1
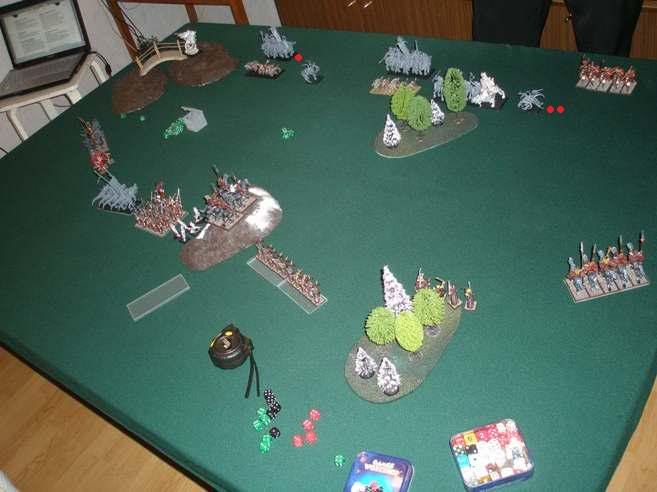
I got turn 1 and generally advanced further a bit. The spell #6 gets dispelled, and then the spell #4, which I cast with the help of a power stone, gets scrolled. I do get the spell #1 of the dagger L2 through, though. In fact, I rolled badly for spells in this game, as the only spell that my dagger L2 can cast is the #1; and she has so many power dice to use...
With shooting, I get lucky and score two wound on the right-flank spawn.
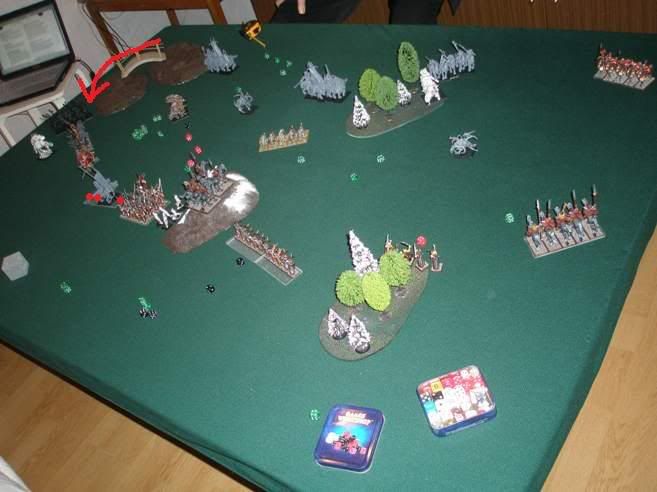
Ed (my opponent's name), in his turn, moves his casters into positions and does a little bit of preventive positioning on the flanks, to prevent me from moving around them. Also, he moves his spawn to central positions of the respective flanks, from where they'd be able to move where they need to.
I am really scared of his magic. I know I have to dispel Pandaemonium and Delusions, so I let his flickering fire on my COK through, hoping for low strength (I do know how risky it is, but stopping Pandaemonium and Delusions is a higher priority). Ed rolls strength 6, and kills three COK. I immediately mark them as sacrificial from now on in my mind.
Turn 2
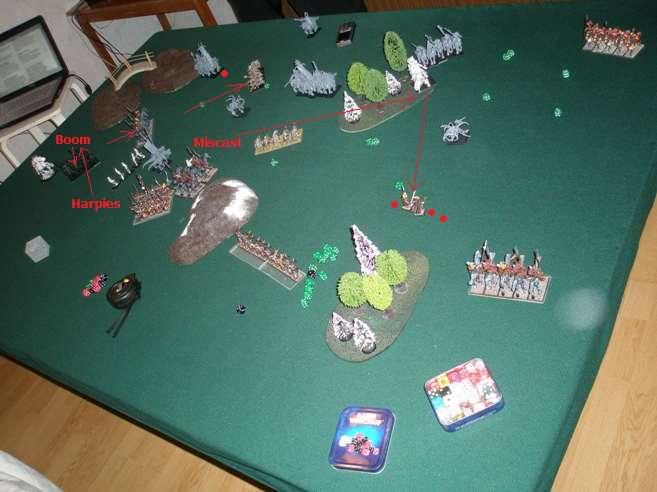
I charge his left-flank light units with mine. Dogs run. Harpies kill one marauder, and subsequently get croaked. In the magic phase, I take one wound off the same Knight unit, and then take four dice to cast #6 at the other unit of knights. I miscast, and Ed casts the Slaaneshi MM at my shades, killing three.
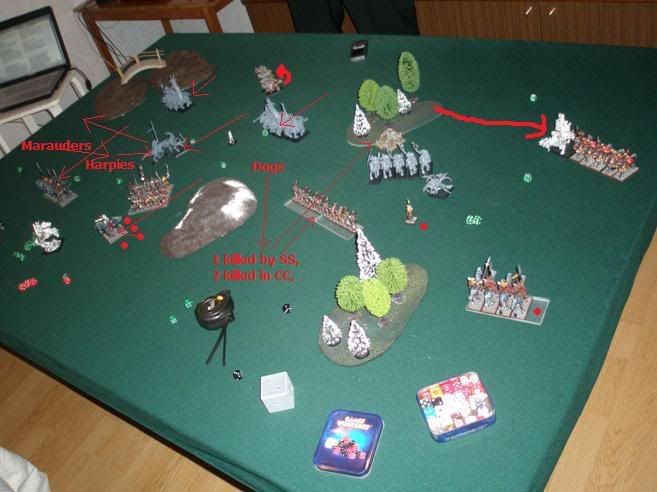
On the left flank, my DR flee from the attack of three knights. My harpies receive the charge of marauders, which, after killing harpies, overrun into COK (who had been also charged by the spawn). The COK champion survives and kills enough marauders to make them run (and they can't stop, as only one remained to live, i.e. below 25%).
My L2 bodyguard runs away from the second knight unit, and then the Tzeench L2 kills 4 out of five DR in that unit.
On the other flank, the Slaaneshi sorcerer kills one DR, as he doesn't see much threat in the shades (I am really happy about it, as I'd like to have my assassin revealed). The Marauders kill one more shade with axes.
The dogs from the center charged my RxB's (in order to free the charge lane for the knights to charge my L2 bodyguard). One dog dies from missiles, and another two from swords, with no RxB elves dead.
Turn 3
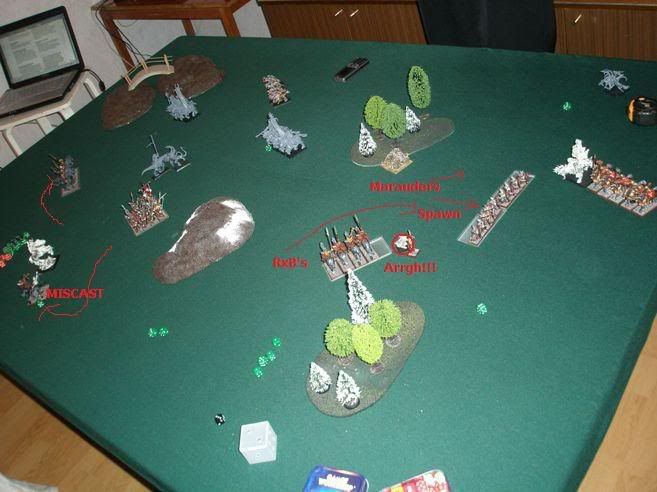
I rally all my fleeing DR's on the left flank, and then, while my L2 on steed tries to cast #4 on the tzeench L2, she miscasts and loses one wound and one level.
On the right flank, I reveal my Assassin. I want to charge the spawn with just the assassin alone. My shades, as one can read from my previous reports, have a tendency to fail their fear tests, so I decide to declare the charge with just the assassin. And I roll 11. Aarrrghhh!
Still, I also declared a charge against the marauders with my RxB's. The marauders flee, but not too far away. I make an enemy-in-the-way-charge into the spawn who has just one wound remaining, and lose one RxB elf, but then kill the spawn and am forced to overrun. I also killed the marauders in the process, while wheeling my unit to align with the spawn's base.
What I also do is reposition my DR from the right flank to the center, to threaten the flank of the central knights.
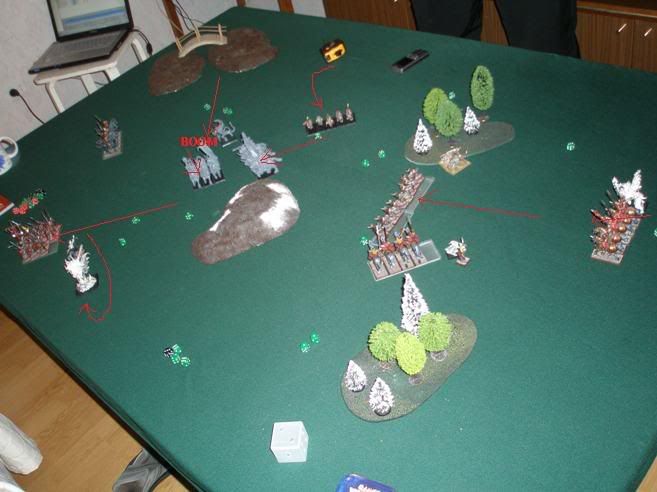
My COK champion gets charged and killed by knights. The other knights charge my dagger L2's bunker, which, of course, flees, leaving the knight's flank exposed to my DR in the center of the field. The knight with the Slaaneshi mage charge my RxB, who also flee, right into the space between my DR and this longed-for flank.
The Tzeench mage also casts the flickering fire on my tome L2's unit, getting S2 this time and killing the musician but failing to kill the sorceress.
Turn 4
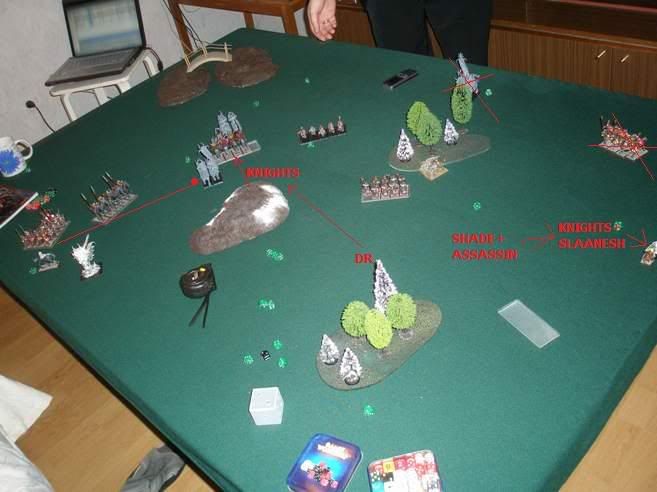
This came to be the decisive turn of the game. I charge the knights containing the Slaaneshi mage with my shade and assassin, and this time I don't fail the fear test. The assassin gets a grand total of FOUR killing blows on the knights (the wizard wasn't available for striking, didn't have enough movement to get to him). The rest of attacks do nothing, but the four KB's mean that the knights lost by three (they didn't even have a banner, remember), and fled off the table.
My Dark riders charge the flank of the other knights, and kill two of them (one killed by a mad elven steed). They break but I fail to catch them, and pursue into the spawn.
My L2 bunker rallied and knocked off another wound off the unit of knights she was targeting from the start. The #6 by the other L2 was stopped.
I stopped making pictures after that (simply forgot about them).
But what happened was basically that my RxB's again got charged by the dogs, killed three more and stayed intact. I evaded combat from there on, and I managed to dispell everyting now, as there was only one wizard left. The dark riders, which had pursued into the spawn, of course got completely eaten over two rounds of CC. The knights that had been defeated by them, rallied and managed to get a charge on my RxB (cause they had to pursue the dogs, and I chose the wrong unit to pursue), but I at least rolled low enough on the break test to stay put (giving up half points of the unit still, as I lost another four men in this combat).
Analysis
Well, the Druchii magic was of course helpful in this combat, but not decisive by far.
The Tzeench magician, though, changed the course of the game, neutralizing my COK from turn 1, which gave Ed a big advantage in the first half of the game; he could have pushed this advantage even further, if he had known that the shades contain an assassin and directed all his further magic missiles at them (he managed to kill three of them by getting one missile off due to my miscast, and there was nothing I could do to prevent him from blasting my shades off with magic and hence getting the points for the assassin).
Also, I got really lucky in CC in this game - in both combats where I attacked knights I killed more than I could have expected (four knights killed by the assassin on the right flank, and two knights killed by DR in the center).
Armies
Druchii:
L2 with dagger and scroll (rolled spells 1 & 2 in Metal Lore)
L2 with tome and power stone, on steed (general) (rolled spells 2(changed for 1), 4 and 6 in Metal Lore)
Assassin with ahw, +d3A, KB and re-roll 1's to wound
3 x 5 DR with music
2 x 5 harpies
20 warriors with FC and warbanner
10 RxB with shields
5 shades
5 COK with champion and AP banner
Chaos Warriors:
Tzeench L2 with +1PD on disc with 3+ ward against missiles (MM#1 and Pandaemonium)
Slaanesh L2 on steed with enchanted shield and scroll (general) (MM#1 and Delusions)
2 x 5 Marauder Horsemen with music, flails, axes and light armor
2 x 5 Dogs
2 Spawns of Slaanesh
3 x 5 Nurgle Knights, no upgrades
Terrain and Deployment
Well, the picture pretty much explains the terrain and deployment. When I was deploying, my biggest concern was about how much forces I may commit to my right flank (the one separate with woods). In the end, when I saw that only one of the spawns is there, I decided that I didn't have to put my sorceresses there, and that the combined forces of one dark rider unit, shades and assassin, and RxB should be enough to hold it.
Also, it's dificult to see on the picture, but behind the big hill in chaos zone, there is a unit of marauder horsemen.
Turn 1
I got turn 1 and generally advanced further a bit. The spell #6 gets dispelled, and then the spell #4, which I cast with the help of a power stone, gets scrolled. I do get the spell #1 of the dagger L2 through, though. In fact, I rolled badly for spells in this game, as the only spell that my dagger L2 can cast is the #1; and she has so many power dice to use...
With shooting, I get lucky and score two wound on the right-flank spawn.
Ed (my opponent's name), in his turn, moves his casters into positions and does a little bit of preventive positioning on the flanks, to prevent me from moving around them. Also, he moves his spawn to central positions of the respective flanks, from where they'd be able to move where they need to.
I am really scared of his magic. I know I have to dispel Pandaemonium and Delusions, so I let his flickering fire on my COK through, hoping for low strength (I do know how risky it is, but stopping Pandaemonium and Delusions is a higher priority). Ed rolls strength 6, and kills three COK. I immediately mark them as sacrificial from now on in my mind.
Turn 2
I charge his left-flank light units with mine. Dogs run. Harpies kill one marauder, and subsequently get croaked. In the magic phase, I take one wound off the same Knight unit, and then take four dice to cast #6 at the other unit of knights. I miscast, and Ed casts the Slaaneshi MM at my shades, killing three.
On the left flank, my DR flee from the attack of three knights. My harpies receive the charge of marauders, which, after killing harpies, overrun into COK (who had been also charged by the spawn). The COK champion survives and kills enough marauders to make them run (and they can't stop, as only one remained to live, i.e. below 25%).
My L2 bodyguard runs away from the second knight unit, and then the Tzeench L2 kills 4 out of five DR in that unit.
On the other flank, the Slaaneshi sorcerer kills one DR, as he doesn't see much threat in the shades (I am really happy about it, as I'd like to have my assassin revealed). The Marauders kill one more shade with axes.
The dogs from the center charged my RxB's (in order to free the charge lane for the knights to charge my L2 bodyguard). One dog dies from missiles, and another two from swords, with no RxB elves dead.
Turn 3
I rally all my fleeing DR's on the left flank, and then, while my L2 on steed tries to cast #4 on the tzeench L2, she miscasts and loses one wound and one level.
On the right flank, I reveal my Assassin. I want to charge the spawn with just the assassin alone. My shades, as one can read from my previous reports, have a tendency to fail their fear tests, so I decide to declare the charge with just the assassin. And I roll 11. Aarrrghhh!
Still, I also declared a charge against the marauders with my RxB's. The marauders flee, but not too far away. I make an enemy-in-the-way-charge into the spawn who has just one wound remaining, and lose one RxB elf, but then kill the spawn and am forced to overrun. I also killed the marauders in the process, while wheeling my unit to align with the spawn's base.
What I also do is reposition my DR from the right flank to the center, to threaten the flank of the central knights.
My COK champion gets charged and killed by knights. The other knights charge my dagger L2's bunker, which, of course, flees, leaving the knight's flank exposed to my DR in the center of the field. The knight with the Slaaneshi mage charge my RxB, who also flee, right into the space between my DR and this longed-for flank.
The Tzeench mage also casts the flickering fire on my tome L2's unit, getting S2 this time and killing the musician but failing to kill the sorceress.
Turn 4
This came to be the decisive turn of the game. I charge the knights containing the Slaaneshi mage with my shade and assassin, and this time I don't fail the fear test. The assassin gets a grand total of FOUR killing blows on the knights (the wizard wasn't available for striking, didn't have enough movement to get to him). The rest of attacks do nothing, but the four KB's mean that the knights lost by three (they didn't even have a banner, remember), and fled off the table.
My Dark riders charge the flank of the other knights, and kill two of them (one killed by a mad elven steed). They break but I fail to catch them, and pursue into the spawn.
My L2 bunker rallied and knocked off another wound off the unit of knights she was targeting from the start. The #6 by the other L2 was stopped.
I stopped making pictures after that (simply forgot about them).
But what happened was basically that my RxB's again got charged by the dogs, killed three more and stayed intact. I evaded combat from there on, and I managed to dispell everyting now, as there was only one wizard left. The dark riders, which had pursued into the spawn, of course got completely eaten over two rounds of CC. The knights that had been defeated by them, rallied and managed to get a charge on my RxB (cause they had to pursue the dogs, and I chose the wrong unit to pursue), but I at least rolled low enough on the break test to stay put (giving up half points of the unit still, as I lost another four men in this combat).
Analysis
Well, the Druchii magic was of course helpful in this combat, but not decisive by far.
The Tzeench magician, though, changed the course of the game, neutralizing my COK from turn 1, which gave Ed a big advantage in the first half of the game; he could have pushed this advantage even further, if he had known that the shades contain an assassin and directed all his further magic missiles at them (he managed to kill three of them by getting one missile off due to my miscast, and there was nothing I could do to prevent him from blasting my shades off with magic and hence getting the points for the assassin).
Also, I got really lucky in CC in this game - in both combats where I attacked knights I killed more than I could have expected (four knights killed by the assassin on the right flank, and two knights killed by DR in the center).
-
Fatontoast

- Black Guard
- Posts: 251
- Joined: Sun Aug 11, 2002 9:08 am
- Location: Sydney, Australia
- Contact: